Making Pão de Queijo
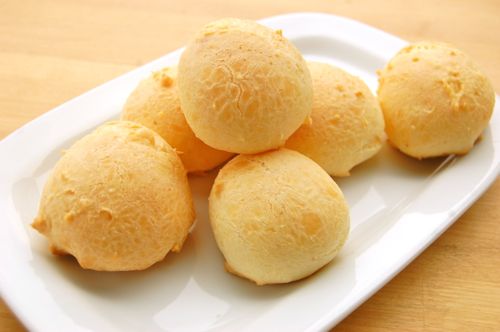
Pão de queijo (pãos de queijo?) are a lot like gougères, but with a little less fat and zero gluten. Why’s that? Because they’re made from tapioca starch, a derivative of the cassava root, not wheat flour. This gives them a somewhat different texture, like a soft wheat bun when cool, like a hot air ballon made of molten cheese when warm. They’re really quite a delicious experience either way, no wonder they’re one of the national foods of Brazil.
Be advised that there’s a lot of conflicting information out there about pão de queijo. Believe me. I’ve suffered from it all week long. Just get yourself some tapioca starch (a powdery white flour available at most health food stores or your local Whole Foods), follow the below instructions and you’ll do just fine. These things really are incredibly easy when you know how.
Traditionally they’re made using a semi-firm cheese from Brazil called Minas. That cheese is nigh impossible to get here in the States. Parmesan is commonly used as a substitute, but Mexican Cojita is far closer in flavor and can be found at most Mexican markets. But really any semi-firm cheese will work. Below I used Manchego and the results were fantastic. Anyway, begin by preheating your oven to 375 degrees Fahrenheit. Combine the water, milk and oil in a small saucepan.
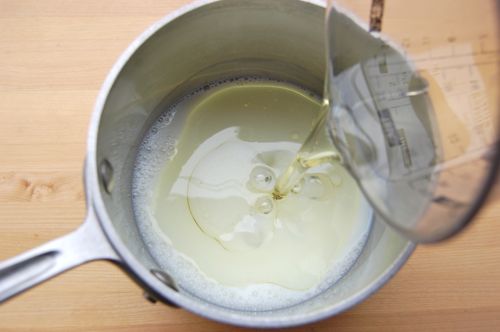
Don’t forget the salt!
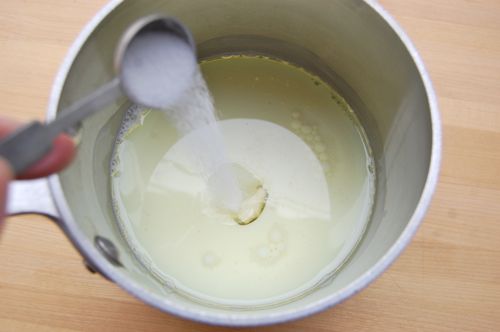
Bring the mixture to the boil…
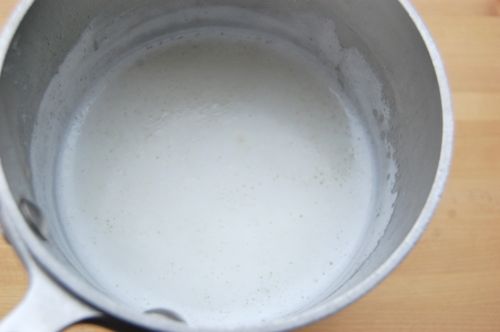
…and pour it over the tapioca flour.
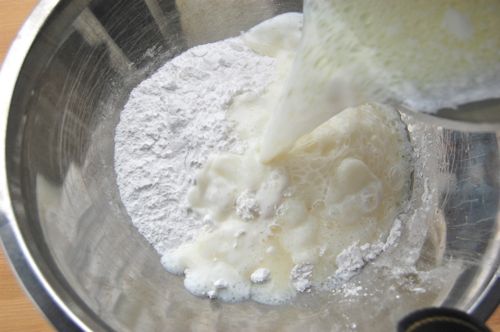
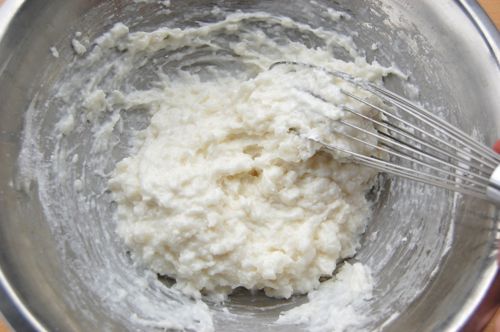
Stir or whisk that mess together until the starch is gluey and gelatinized. It will be quite thick. A wooden spoon would have been a better choice here. Allow this mixture to cool completely.
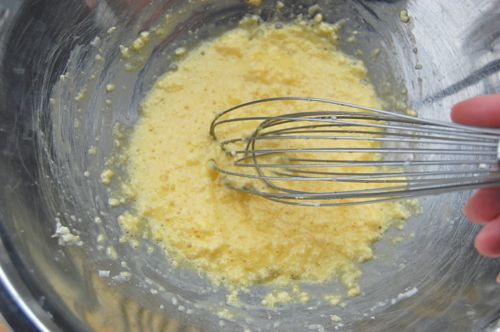
Meanwhile, whisk together the eggs and cheese.
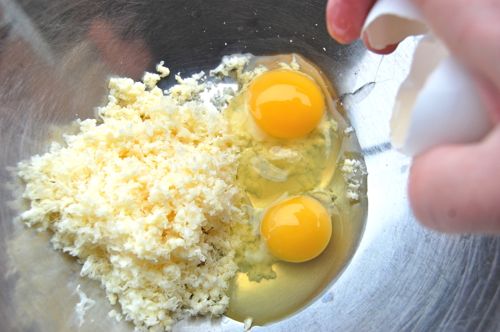
Until it’s about like this.
When the tapioca mixture is cool, combine that and the cheese mixture in the bowl of a stand mixer fitted with a paddle (you can do the mixing by hand if you want, but a mixer will do it faster and more consistently…it will also incorporate more air).
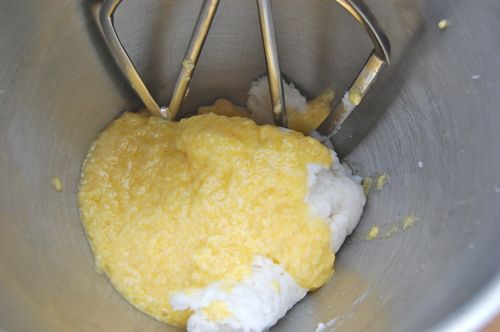
Beat for about 90 seconds or so until the batter is uniform and fluffy.
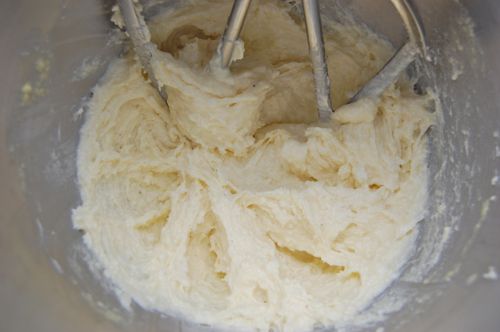
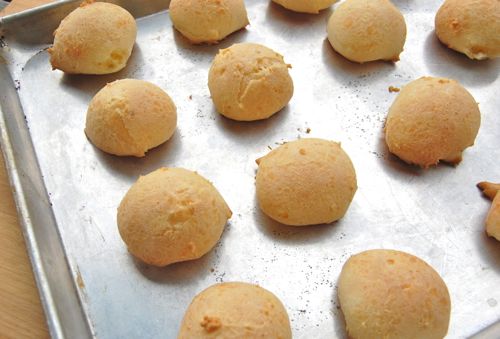
Spoon the mixture onto an un-greased sheet pan, about two tablespoons per dollop.

Bake them for about 30 – 40 minutes until golden.
Quite light and fluffy on the inside, see? Warm, they’re meltingly delicious.
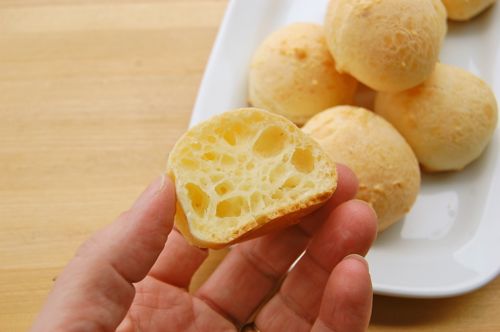
This recipe makes about 20. Leftover baked puffs can be frozen, through there won’t be any. The best of all possibly freezing strategies is to freeze the batter/dough dollops themselves and put them in bags. They can go straight from the freezer to the oven.
Special thanks to reader Bronwyn for her help and insights! Also many thanks to reader Monika, a professional Brazilian pão de queijo maker, who weighed in with some truly excellent ideas.
oh wow! Thanks Joe! A choux like pastry but without all the instructions being screamed in my inner year by my instructor from school! Snack for the weekend sorted…I can almost taste them dipped in Sriracha sauce (my universal condiment of choice!)
NOW you’re talkin! Let me know how they turn out!
– Joe
Definitely better-looking than my prior attempt! Thanks, Joe – I’ll give these a try.
Alright Joe…so now that you’ve figured it out–what am I going to do with this bag of Manioc Flour ?
Can I get back to you on that? I’ve in the same boat…with two different brands of the stuff!
– Joe
Joe, I have to say these look wonderful and I look forward to trying them out. I have previously made gourgeres and they have turned out only ok, a little to heavy for my liking so I am keen to try out your recipe. I must also thank you for the review of the folding bread proofer. I have looked for one of these for so long and was excited to see a domestic one is now available, I have ordered one and look forward to it winging its way to me in NZ ….I hope you are on commission from the company!! 🙂
It was a pretty sweet deal they gave me, but not that sweet! 😉
I get to keep the proofer. That exceeded my expectations. I while back someone asked me to review $1,500 ice cream maker. I declined because I was sure that Mrs. Pastry wouldn’t be able to live without it after the review process was over. There was no way they were going to let me keep it no matter how good a job I did!
But this is far and away the best piece of swag I’ve yet gotten as a blogger. I genuinely love the thing!
Hi,
I’ve made them in a blender before from another recipe with shredded cheddar and parmesan and a healthy dose of garlic powder and herbs and they turned out great, like puffy. crispier yorkshire puddings,
There was a teaspoon oil at the bottom of each muffin well in the pan, and the temperature was turned to high.
I’ve seen that technique, but had a hard time reproducing it. Still, whatever works for you! I also really like those twists on the theme.
– Joe
http://simplyrecipes.com/recipes/easy_brazilian_cheese_bread/
Have you tried this one? Works well,,, I use PDQ in place of yorkshire puddings at the roast beef dinner.
Excellent idea, Karen. They are actually quite similar in texture…but then of course Yorkshire pudding isn’t gooey when it’s warm. Mmmmm.
The added dimension of cheese would be very nice, especially with a well-grilled steak! Thanks!
– Joe
Great instructions. Just so you know, the plural of pão is pães. 🙂
Ah yes, thank you, Derek!
– Joe
I just made them. Thank you. They’re delicious! I just ate about 5 of them. I hope they’re not high in calories.
How high in calories can they be? They’re mostly air! 😉
– Joe
Forgot to say that this type of bread exists in Colombia and in my native Ecuador. It’s made a little bit differently, but as I could taste today, they’re about the same thing. We use butter.
http://laylita.com/recipes/2008/01/14/pan-de-yuca-pan-queso/
Fascinating, Doris! Thanks!
– Joe
Wow, I managed to mess this one up completely. They came out more like pancakes than bread (totally flat). I think I didn’t wait for hot dough to cool enough before adding the cheese and eggs. I tried to recover by cooling the whole mixture. No joy. They were really good tasting, just flat, so word to the wise don’t rush the cooling.
Hey Wendy! So sorry to hear that, but I feel your pain for sure. Give it another try! Make sure the flour mixture is good and goopy and yes, cool it all the way. Let me know that happens next time!
– Joe
Uma ótima receita!
We lived in Brazil for a few wonderful years and these turned out almost exactly as I remembered them, crispy on the outside and gooey on the inside . The only small change I made was the cheese – here in our small town, parmesan was my best (maybe only) choice.
They were very easy to make, impossible to resist hot out of the oven and carried us back to Brazil for a moment.
Muito obrigada!
You made my day, Natalie! I suffered for these…but it was worth it to get this sort of comment!
Many, many thanks,
– Joe
ooooh, i’ve had to resort to using a box mix to get pao de queijo here in the states, which is not as good as the real thing. when i tried to make them from scratch in the past, i also got pancakes. i am pinning this recipe and am definitely going to be trying it soon! out of curiousity, what happens if you use manioc starch instead of tapioca starch in this recipe?
Oh, don’t get me started on that. This was a hard-won recipe. Go back to the blog from around that date and you’ll witness the pain. To answer your question, I got dense little rubbery balls.
– Joe
Hmmm….so I went back and read your other posts about the painful road to this recipe and I have one lingering question, does it matter what kind of tapioca starch you use? I have a bag of tapioca starch that I bought from an Asian grocery store, but am worried it might not work right in this recipe. I can go and buy the Brazilian sweet and/or sour tapioca starch, but that will require an extra trip out and I was hoping to make these soon.
Ok, never mind my previous question, I couldn’t wait anymore, and went for it. The recipe worked just fine with tapioca starch from an Asian grocery store. The only thing was, my pao de queijo didn’t come out round like yours did, they were more random oblong puff shapes. I did use a cookie scooper to dole out the dough, but going onto the pan, the dough looked circular in shape, so I’m not sure why it didn’t rise up to become a sphere. Any tips based on all your different attempts in making pao de queijo on how to get them to be spheres?
And THANK YOU so much for figuring out and sharing this recipe, all your efforts were not in vain. It is ten million times better than the box mix. My family polished off the whole batch in one morning. And as my husband ate his last one, he said, “We definitely need to make this again real soon, it is so good.” So kudos to you Joe!
Sorry about the wait, Deb, but glad they turned out! Using the sweet and sour starches adds more depth of flavor, but as long as you’re getting the very powdery starch you should do just fine. Glad it worked out!
– Joe
I tried a recipe from scratch and they didn’t turn out. I’ve since stumbled across this post, but I don’t see the recipe you used. I’m not sure how everyone has tried your, or how I might try it without the actual measurements.
Hey Jenn!
These things were tough on me, too. It took many, many attempts to get them right. The reason you can’t find the proportions is because I list the recipes and the tutorials separately. Go under “Bread” in the left-hand navigation and you’ll find everything you need under “Pao de Queijo.” You’ll find the recipe at the bottom.
– Jim
Thank you SO much. I have been making these little guys for a while from a box mix – I didn’t even know they were a Brazilian thing until recently. It was very coincidental. Any any rate, I was playing with various cheeses and what not. After I discovered their origin, I thought I would try it from scratch (and the fact that I could get a few pounds of tapioca starch for 1 box of gluten free cheese bread mix that consisted of…tapioca starch). But that’s when I failed. I’m so glad I stumbled across your site. Thank you SO much for doing all the work :-p I have made them tonight with pepper-jack and a little super sharp cheddar. My two favorites are one with Swiss and one with a mix of rosemary Asiago and Havarti. Not the least bit traditional, but my Brazilian in-laws are proud nonetheless 🙂
Thanks so much. I shall now enjoy my little balls of love.
Jenn
Great news, Jenn! Yes, those were a source of great frustration and embarrassment. But that’s why I’m here, to take hits for the team. 😉
So glad your worked out so well!
– Joe
Hi Joe, just posting in here to let you know, and anyone else that reads through the back pages, that I made these for the Argentinian workers on the farm. The comments ranged from Magnificient, to This is Argentine bread!.
Now I have a cooking class to organise for the Argentinians, which will help use the 3kg of tapioca starch I have 🙂 But it was only $8 for 3kg, so not a great expense.
Thanks for the recipe.
Woohoo! Thanks for the great story Warren. This is a popular recipe on the site, so you’ve just added a bunch to my street cred!
Thanks very much!
– Joe
Hi Joe,
Your instructions look inviting. Just recently we discovered that my son has to eliminate all gluten from his diet for the next year, as well as sugar! I’ve been researching for a recipe to follow to make this bread for him. I look forward to giving it a try. I don’t have a stand up mixer, have you ever made the dough in a food processor?
Thanks! Kat
Hey there!
I have not made it in a food processor but I’d think that would be a perfectly good way to go. Let me know how they turn out!
– Joe
Tapioca starch and manioc (or cassava or yuca) starch are the same thing that Brazilians call polvilho doce, and that American vendors call tapioca flour.
If you see something called manioc or cassava flour, be sure that it’s pure white and the texture and consistency of flour or cornstarch. There is another product called manioc flour (or farinha de mandioca in Portuguese) that is kind of beige and has a coarser consistency like fine corn meal in the U.S. DON’T buy that product to make pão de queijo. It won’t work. In Brazil it’s used for different cooking purposes.
Minas cheese, which is what is used in Brazil, isn’t easy to find in the U.S. But virtually every Latin American country has a similar fresh cheese that can be substituted. Mexican Queso Fresco or Cotija or Panela (which are fresh, crumbly cheeses) all will work well. Feta is similar, but for this recipe look for the French-made feta and not the authentic Greek cheese because the French version is less salty and more like the Minas cheese which is also not very salty.
Great information, Rob!
Thanks very much for posting it, it’ll be very useful for future pão makers!
Cheers,
– Joe
These look fantastic! The gluten-free community would be all over these. They sound perfect served alongside winter soup. I’ll bet staled and quartered, they’d be great in a breakfast egg casserole.
Let me know how yours turn out, Beth!
Cheers,
– Joe