Perfect Pie Dough
I can already see the list of emails in my in box complaining about the complexity of this technique. Pie dough, at least for most people, should be a simple operation. All I can say is, first, that it’s really not all that complicated, and second, that this is the method that gives me the best results. It’s Rose Levy Berenbaum’s pie crust technique, and to my way of thinking, it is the best method yet devised for producing a crust that blends both flakiness and tenderness in a single buttery melody. Why would I not want to share the best with you, my beloved readership?
Happily, I’m not giving anything away by posting the recipe. RLB has it up on her own website, albeit the truncated food processor method, which I’ll discuss at the very end of this post. For now here are the proportions for a double (top and bottom)-crust fruit pie:
6 ounces (12 tablespoons) frozen unsalted butter, cut into 1/2 inch cubes (for best results, use a 50-50 blend of six tablespoons [3 ounces] butter and six tablespoons [3 ounces] rendered leaf lard)
10 ounces (2 cups + 3 tablespoons) bleached all-purpose flour
1/4 teaspoon salt
1/4 teaspoon baking powder
4.5 ounces cream cheese
2 tablespoons ice water
1 tablespoon cider vinegar
For a single-crust 9-inch pie, the proportions are:
3 ounces (6 tablespoons) frozen unsalted butter, cut into 1/2 inch cubes (for best results, use a 50-50 blend of 3 tablespoons [1 1/2 ounces] butter and 3 tablespoons [1 1/2 ounces] rendered leaf lard)
5 ounces (1 cup + 1 tablespoon) bleached all-purpose flour
1/8 teaspoon salt
1/8 teaspoon baking powder
2.25 ounces cream cheese
1 tablespoon ice water
1 1/2 teaspoons cider vinegar
Start by cutting up your butter and putting it in the freezer on a plate.
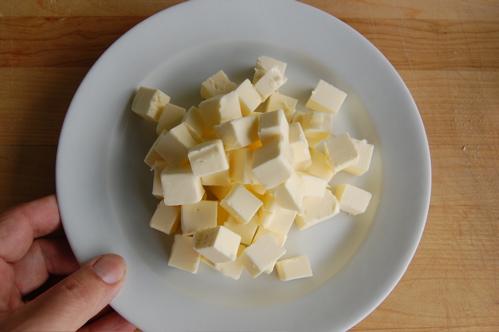
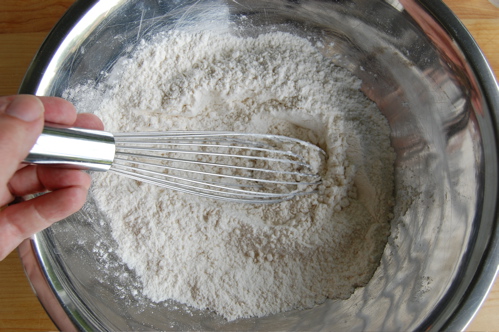
It need not be 100% frozen, but very, very firm. Next, combine your flour, salt and baking powder in a bowl and whisk to combine them:
Add in the cream cheese…
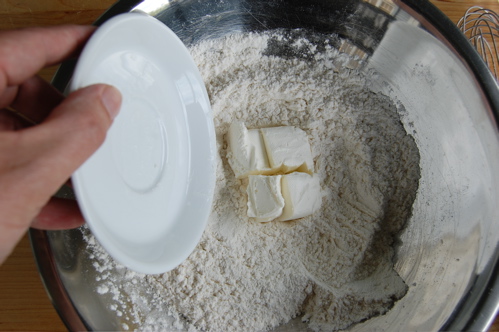
…and incorporate with your fingers until you get that “course meal” consistency everybody always talks about.
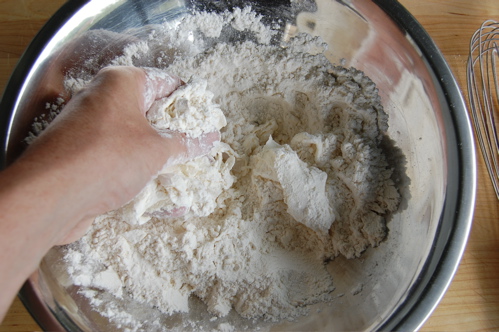
Like so:
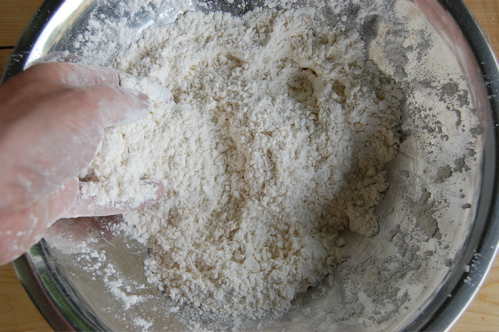
If you’re still waiting on your butter at this point, you can toss the bowl with the flour mixture into the freezer if you feel like it, since cold is much desired in this process. Once the butter is frozen, pour the dry ingredients into your plastic bag…
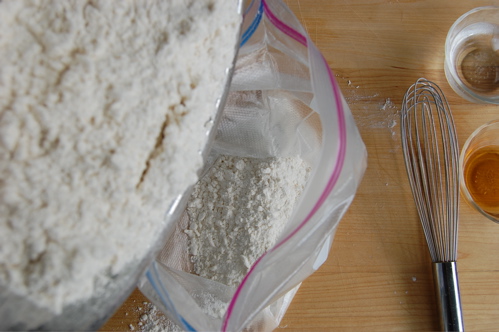
…followed by the butter.
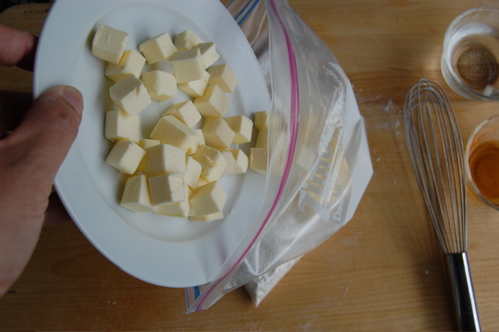
Squeeze any air out like so:
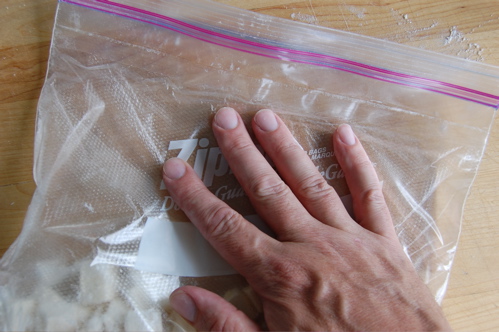
Give it a shake:
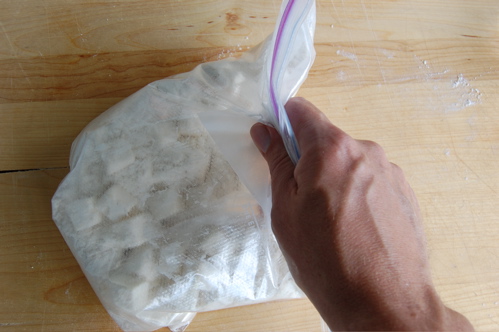
And apply the pin, rolling the mixture as flat as you can. What you’re after here are thin, thin flakes of butter that will eventually incorporate into your dough as super-thin layers or veins. This will create an effect not unlike a laminated dough, imparting flakiness to your finished crust.
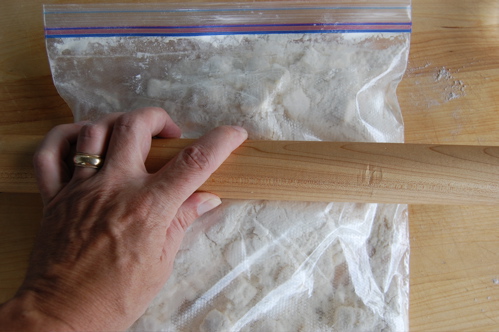
When you’re done your bag should look something like this:
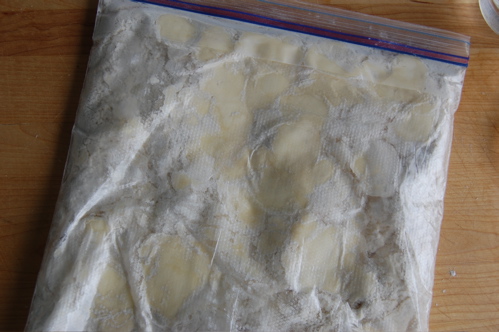
And its contents something like this:
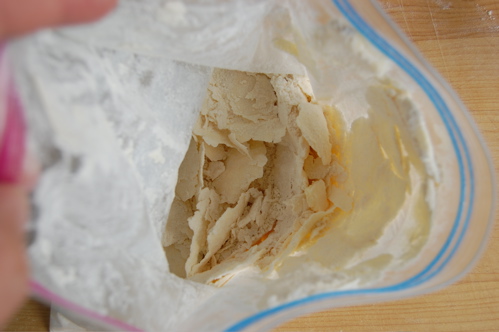
Now then, pour the mixture out into a bowl (chilled would be very nice, since you don’t want to lose those nice flakes of butter). Then sprinkle your water and vinegar over it thusly:
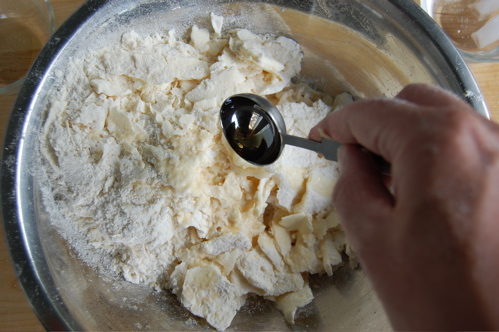
Give the whole mess a stir…
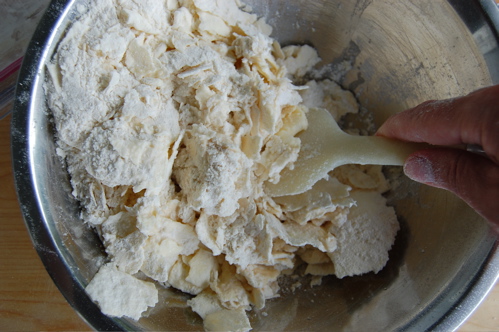
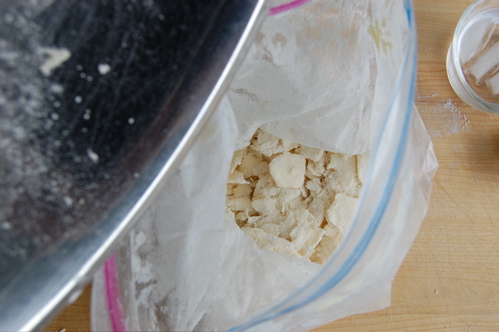
…and pour it back in the bag for kneading. Why back in the bag? Because you want to keep all those dough pieces contained, and also expose them to as little heat as you can.
Knead by pressing your fists into the bag until the dough comes together and is even a little elastic.
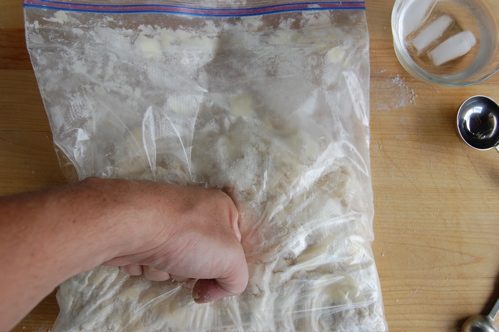
Shape the dough into a ball, pat it into a disk, and put it in the fridge for a minimum of an hour, overnight preferably.
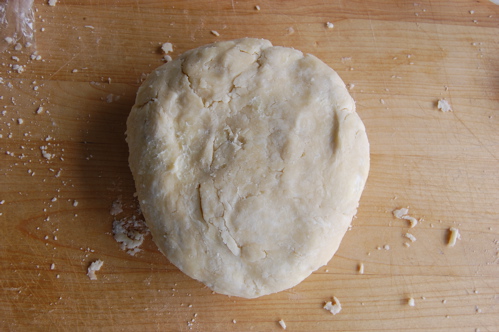
I know, I know, it ain’t grandma’s crust-making technique, but I’ll tell you, this is the best way I know to create both tenderness and flakiness in a crust without resorting to shortening, which I hate to do…not because I’m afraid of trans fats or anything so ludicrous, but because I simply don’t like the greasy mouthfeel of shortening. This way you get the flakiness of shortening with the mouthfeel and flavor of an all-butter crust. And what’s not to love about that? To me it’s worth the effort.
For a more expedient method, prepare the dough in a food processor, pulsing the motor to incorporate the cream cheese and the butter, then knead it in the plastic bag as directed. The crust won’t be as flaky, but it will still be very good.
Good heavens, just when I thought I’d read every single bit of pie crust literature on the internet and concluded that I was completely hopeless at it, I happen upon your site and see this wildly different approach. This is fascinating and I can’t wait to give it a try. Thank you so much for such detailed instructions! Your whole site is a complete joy and I can tell it is going to become my go-to reference for any question regarding baking ingredients or techniques. Your hard work does not go unappreciated!
Erica, you made my day! Thanks so much for the very kind compliments and please let me know how it goes. I trust this method will turn you into an avid pie baker! – Joe
I must admit that baking stresses me out a bit because its not as forgiving as cooking is. I have tried other pie dough recipes but I hated the greasy texture from the shortening. Maybe its because I an a total beginner at making pies, but this method seems so much easier than others I have found. I will have to give it a try at Thanksgiving! Thanks for the great website!
PS: I LOVE your knish recipe! It has become a staple in my house full of picky eaters!
You made my day, Becky! I love to hear that you’re making them so regularly. More people need to be raised knowing the glory of a knish!
Best of luck with the pie dough. Please check back in and let me know how it goes!
– Joe
I’m not much of a baker, so whenever I try something I find it to be nerve wracking. Decades ago I tried making pie dough from scratch, and it didn’t turn out very well. It was edible — because I was a student and always hungry — but the memory has haunted me and for years I avoided making pies “from scratch”.
I have used this recipe for pies twice since you first posted it, and although it is a bit time-consuming, it has turned out perfectly. And frankly, the time-consuming part is really just that I need to plan ahead if I’m going to make this. And the planning ahead is really because as a batchelorette, my cupboard almost always is missing one or more ingredients.
It is a real tribute to your recipes, your pictures, and your powers of description that an uncertain and infrequent baker such as myself is able to create a perfect pie from scratch! THANKS!!
Brigitta, you made my day! I’m so deeply flattered. Please keep up the baking and tell me about the progress! I’m pretty much always here!
Cheers and thanks again!
– Joe
I didn’t think it was possible to improve upon pecan pie, but I used this pie crust recipe this year and proved that theory wrong 🙂 Rolling it in the bag took quite some effort and time for me, but the results were well worth it. And I love having made two crusts (plus my ball of dough in the freezer) with that time and effort. I also greatly appreciate your tips on the other page about letting the dough warm up a little before rolling it out. Thanks for all your guidance and advice!
My pleasure, Heidi! Very glad the recipes worked for you. Thanks so much for the note.
– Joe
hi, pardon my english language….as its not my native language…..i am new to this country and style of cooking. i love to cook but baking was always my weakness. i tried to make simple things and believe me they always turned out nerve wrecking. i have been searching for few recepies for a while but didnt like thm much….when i saw your site and details….and the way you used to make your readers understand…i must say its the best one…..and from now onwards your site is my dictionary and cooking bible………..i willl use it when ever i have to learn something regarding baking…..i highly appreciate your efforts……..keep up the good work so that the layman like me can also learn baking
thank you very much…
You made my day, Sadaf! You are very kind, and I am very pleased that the site has been so helpful to you. Please write to me if I can answer any questions or be of any help as you continue your baking career. And welcome to America! We are very glad to have you.
Your friend,
– Joe
Hi Joe,
I love your website and you are so generous, thank you for sharing your recipes here. I have a question, I want to bake fruit tratlets this weekend, is this recipe match well for kind of fruit tartlets? Or is it better if I use your tart crust recipe. I want to get a nice result. I’m confuse what is the difference between tart and pie. In my country we don’t bake pies or tarts that much, so it’s a little bit confusing for me. It’s the first time for me baking my own pie. Btw, I’ve tried your Danish pastry recipe, it’s soooo great! Love it!^^
Thank you,
Midia
Hello MIdia!
That’s a good question since the terms can be confusing. If you are baking small, round, open-topped tarts (“tartlets” is the correct term), then you want the tart dough. It will be easier to prepare and to work with than pie dough. It’s right here:
http://joepastry.com/category/pastry-components/tart-crust/sweet-tart-crust/
Good luck and have fun!
Cheers,
– Joe
Hi Joe!
Thank you so much for the reply, really appreciate that!
Have a nice weekend!:D
Cheers,
Midia
My pleasure…and you too!
– Joe
I like knowing how things work, so I’m like the toddler who just keeps asking why – so here I go. Why is cream cheese rubbed into the flour in the beginning and not just more butter? And why is there baking powder in this recipe (I’ve never seen a pie crust recipe that used a leavener of any sort before)? And what does the vinegar do?
Hi Deb!
This pie crust is an attempt to strike an even balance between flaky and tender, two very opposite textures, but which people nevertheless expect in a great pie crust. The butter flakes create the “flaky” and the cream cheese creates the “tender”. Vinegar works as the liquid binder instead of water. Its acidity helps undermine the development of gluten, which makes a crust tough, and/or causes it to shrink up in the oven. A little baking powder keeps the crust from becoming too dense.
it’s a lot of balancing and re-balancing for something as simple as a pie crust, but it does work. RLB did a good job with this.!
– Joe
Thank goodness for Joe Pastry!!
I made this pie dough for my husband’s birthday yesterday and it really was PERFECT. He loves pumpkin pie and dubbed them his most favorite pumpkin pie he’s ever had. I owe a lot of that to this crust! Which I also couldn’t get enough of. Flaky and buttery and just delicous! I wasn’t sure how the dough would turn out when made into mini desserts but they worked great! I didn’t have any cider vinegar on hand so i just substituted with a little bit more water and it still turned out really well!
Thanks Joe!
Woohoo!
Thanks for writing in to tell me the good news, Val! And I shall remember that for mini desserts. Very good to know!
– Joe
Thanks so much for this site – I love to experiment with baking so, as an amateur, understanding how the individual components work is a huge boon to my overall success rate. To that end, I was wondering if the type of top crust can be affected by the dough – would this type of dough be useful for lattice or other decorative cutout top, for instance? Also, is there a general rule for which type of top crust is best for different kinds of fillings, or is it just a matter of personal preference?
I’ve tended to avoid pies due to past disasters, but I made some ground cherry pie with this crust over the weekend, and it came out beautifully. So thanks again, and keep up the fantastic work!
Hey Romy!
Thanks very much and I’l delighted by your successes. To answer your question, you can use this crust for a lattice top just as easily. There really are no rules for that. Of course you’ll want to make sure you rest, rest, rest the dough, but other than that it should turn out very nicely. Cheers,
– Joe
Love this 🙂 I tried the other, simpler method of yours first (which was the first successful pie crust I ever made), and I have to say that I actually think this is easier! Less messy, and I think all the freezing (the butter/lard, the bowl, etc) made a difference too. It took me less time to do it this way, even with the extra ingredients and the back-and-forth between bowl and bag. The bag kept everything contained enough to stick together without the heat of my hands. Totally genius. The dough is in the fridge resting right now but I can already tell the texture will be SO much better. Yay! 🙂 Thanks!
Michelle!
I’m so pleased that the site was such a help to you in your evolution as a pie master. Keep up the great work and send me pictures! 😉
Cheers,
– Joe
I’m one of the Rose’s Alpha Bakers (bloggers baking our way through her new book, The Baking Bible). We made this recipe a couple weeks ago. I much prefer the food processor technique, but I really wish I had seen you post before I gave the bag method a try. Your process photos are really, really great. Don’t know how I’ve managed to make it all this time without knowing about your blog, but I’m sure glad I found it (and glad I have a snow day to peruse!).
Happy Baking,
Patricia @ ButterYum
Rose is the real deal! Nice to meet you, Patricia! Please come back often and check in with a comment when you can!
Cheers,
– Joe
I am in start terror of anything involving tolling out crusts or making dough, for bread particularly. I am ecstatic to find your site, recommended by one of Alpha Bakers of Rose Levy Beranbaum’s Baking Bible.
There is a question, among others I am sure when I actually begin this crust for the Black and Blueberry Pie.
What on earth is leaf lard and where on earth would one find such a thing? Thanks! Joan
Hey Joan!
Great question. The answer is right here! http://joepastry.com/category/baking-ingredients/fats/lard/
Cheers,
– Joe
Hi Joe!
I found this recipe and knew I had to try it! So I weighed out the ingredients as you have listed (but I didn’t have leaf lard so I used Crisco) and followed the directions. Yet my crust came out extremely greasy– flaky and yummy tasting, but super greasy. Like if you squeezed it between your fingers you’d be able to see the grease coming out :/ What do you think I did wrong? Maybe the brand of butter I used? The fact I used Crisco? I’m at a loss lol, so thank you in advance!
Hey Jenny!
That’s very odd. Using Crisco the cooled crust should have actually been firmer. From there my suspicions would also turn to the butter. Sometimes less expensive butter (or simply a bad batch) will have a melting point that’s lower than normal, and that causes greasiness. What sort of butter did you use if you don’t mind my asking?
– Joe