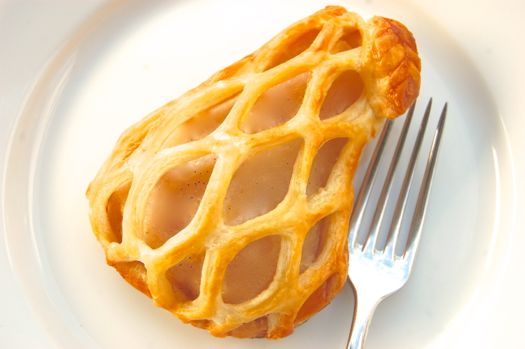
Making Caged Pears (Poires en Cage)
Pears are too dangerous to be allowed to roam freely, hence this ingenious preparation which safely confines them behind bars of buttery pastry. For goodness’ sake don’t go sticking your fingers in there. What goes in that cage may not come out. Still if you’re the kind of baker who craves adventure and doesn’t mind working around savage fruit, then these might be for you.
The only unusual piece of equipment you’re going to need for this is a lattice cutter. They’re cheap and easily obtainable online. Once you learn to use one you’ll find plenty of excuses to use it on other things like pies and tarts. Start by assembling your ingredients. I highly recommend using homemade puff pastry, especially imperfect homemade puff pastry since we’re not looking for a dramatic rise here. We want a cage that’s light, crispy and buttery but not extremely puffy. If the pastry is too airy the cage won’t have any strength and that’s just the opportunity a feral pear is looking for. You don’t want one of them breaking free during an elegant dinner party, trust me.
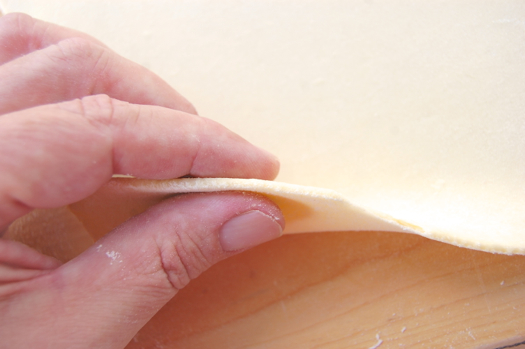
So if you’re new to laminating and have produced what you believe to be imperfect pastry, think caged pears. Like Alsatian onion tart and cheese straws they demand very little in the way of puffing and can even be made with scraps of puff pastry dough if you happen to have a bunch in the freezer. I recommend you have at least a pound of dough on-hand so you’ve got extra in the event of mistakes, and there’ll be some, especially if you’ve never used a lattice cutter before. Extra components have a nice way of taking the pressure off. Anyway, roll your cold dough out quite thin, using plenty of flour, about 1/8 of an inch. You don’t have to roll a sheet out to any specify size since you’ll be cutting out medium-sized pieces, that’s another nice feature of this recipe. In generally you want to use plenty of flour and refrigerate the dough whenever you feel it getting unworkable. A little cold quickly re-firms the butter and helps it behave.
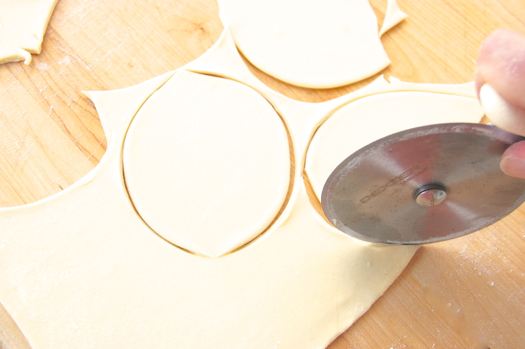
Using a pizza cutter, cut out roughly pear-shaped pieces of dough. Once you have six of them, put them in the refrigerator to firm.
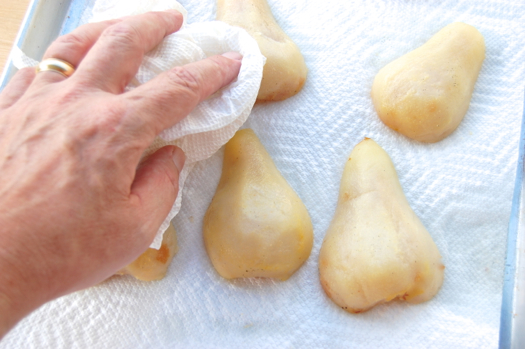
While they’re firming, take the poached pears out of the fridge. They should be fairly docile at this point. Gently lay them out on some paper towels and dab them dry.
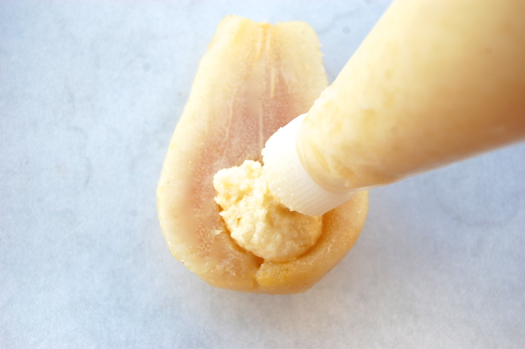
After the dough has chilled about ten minutes, grasp a pear in your open hand (mine is snapping pictures just now, and fill the depression in the back (which you made when you removed the seed structures with a melon baller back in the poaching step) with almond cream. Not too much now, just a bit. It’s like a little hidden surprise.
Reach into the fridge, pull out a piece of pastry and plop it on top.
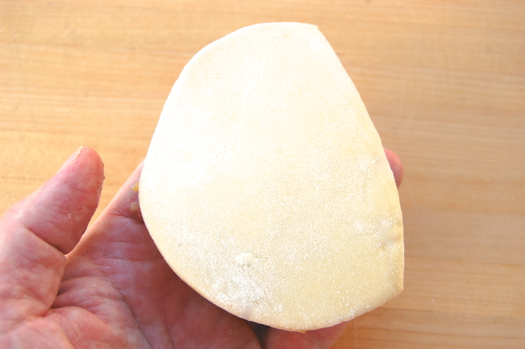
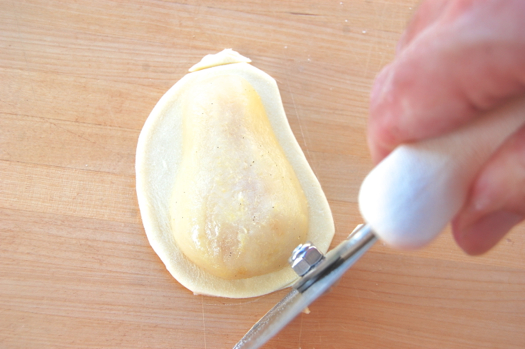
Flip the device over onto a lightly floured board and trim it, leaving half an inch around the pear. Don’t get too close to the pear as it may bite, but do your best to follow those elegant, womanly curves.
Very good. Once they’re all done and back in the fridge, turn your attention to the lattice. Now this part can be a little frustrating since lattice cutters aren’t necessarily high-performance instruments. Which is to say they don’t always cut all the way through on a single pass, and if you’re not careful the dough will get stuck in them and roll around the cylinder.
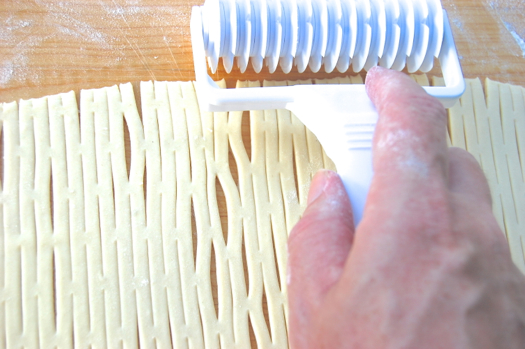
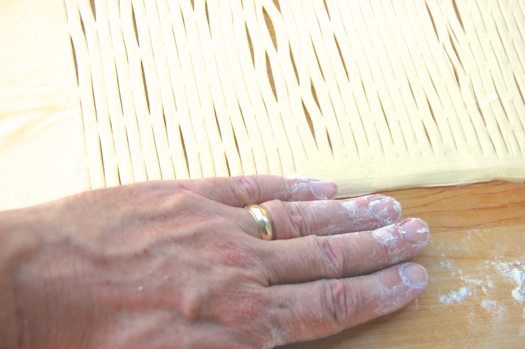
So, always be sure to hold down the edge of your pastry piece with a floured hand to prevent it lifting off the pastry board. Here I’m applying the cutter to a sheet I rolled out, but you can apply it to smaller pieces if you like. I find that little pieces tend to get caught in my cutter, but whatever works for you. Flour helps prevent sticking.
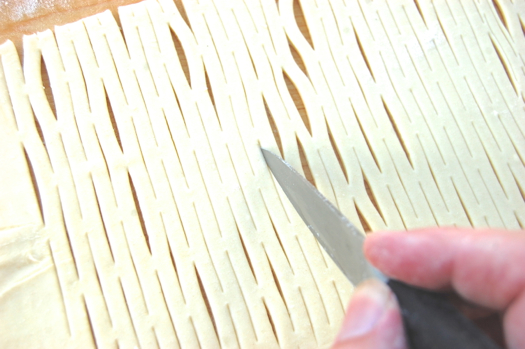
If you’re like me, all your cuts won’t open at first, so you may need to go through and do some re-cutting. Hold your pairing knife as you would a pencil and just scribble them open, being careful not to cut through the little bits that aren’t supposed to be cut (you’ll figure it out).
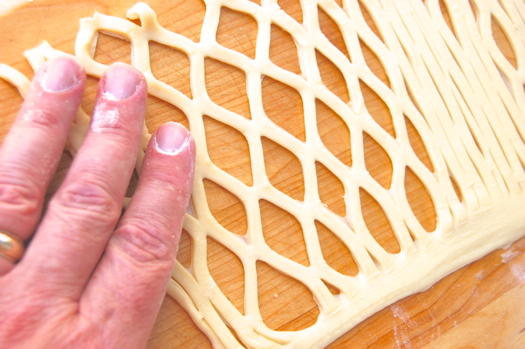
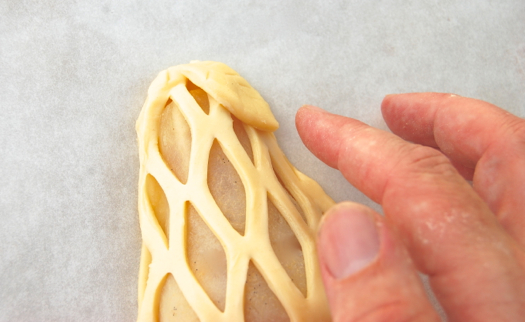
When you’re reasonably sure you have a well-cut sheet, gently tug the latticed pastry apart.
Apply egg wash to the edges of your pastry base…
…and lay your “cage” over to enclose the pear. Bang! Got you, you scurvy devil. You may now remove your pear-resistant protective clothing. I should add, if the cut pastry seems too soft and limp to work with, give it a shot of cold refrigerator air for 2-3 minutes to firm it up to the point you feel confident again. Focus on laying it over the pear rather then tucking it around the pear, since a bunched cage isn’t nearly as attractive (and may in fact be dangerous).
The just trim the extra off. Gently tap the lattice down onto the egg wash-covered base.

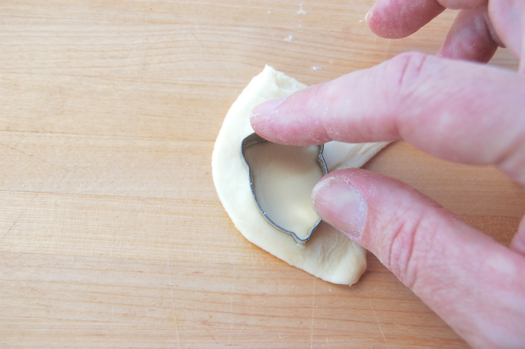
A leaf garnish looks extra nice on these. I don’t have a pear leaf-shaped cutter so I just used this little acorn-shaped one…
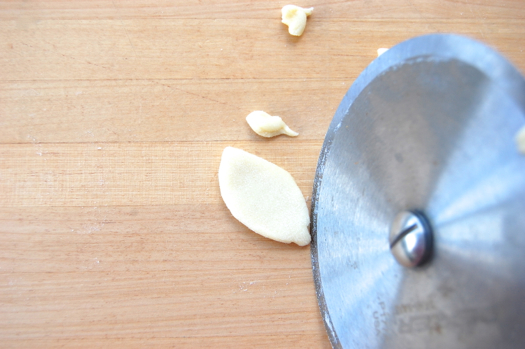
…trimmed off the extra bits…
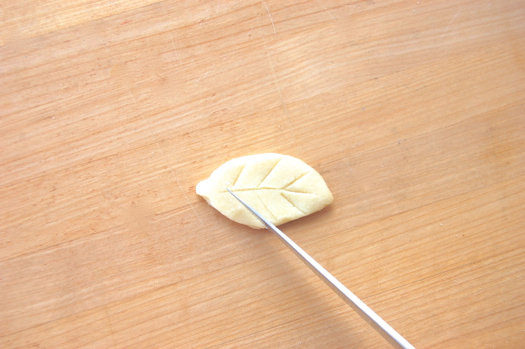
…and pressed in some veins with a sharp knife. Remember the healing power of cold if this process becomes difficult.
Apply a little egg wash to the back of your leaf and gently stick it on. At this point you can refrigerate your caged pears, lightly covered in plastic wrap, for up to a full day or freeze them for up to three weeks.
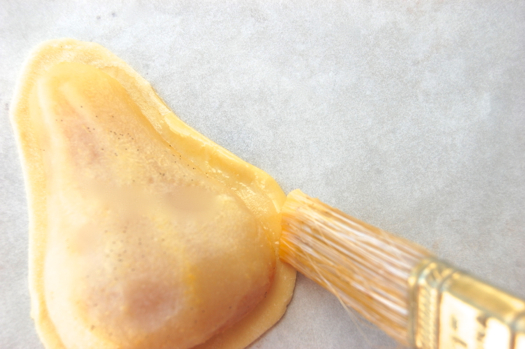
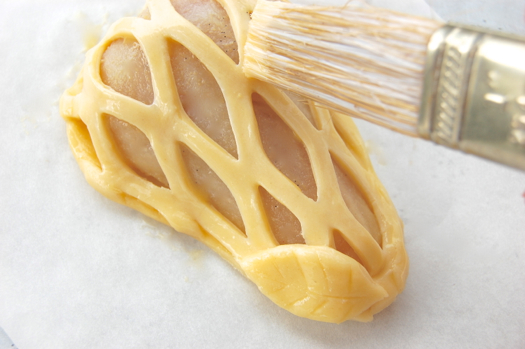
When you’re ready to bake preheat your oven to 375 degrees Fahrenheit. Remove them from the fridge and carefully paint the pastry with egg wash. Don’t worry if you get egg wash on the cut sides of the pastry. That’s normally a no-no (or non-non as they say on the Continent) with puff pastry as it glues the layers together and inhibits puff, but again a big puff-out isn’t what we’re looking for here. Try not to get any on the pear if you can avoid it since it’ll create a crust and that only makes pears angry.
Bake them for about half an hour, rotating them one or twice for even color starting at the 15 minute mark. Serve them hot with a quenelle of vanilla ice cream on the side.
Yup, you’re gonna like these, I can tell already.
Yup, I’m liking it! Oh my goodness…. I’m liking it enough to lick my computer screen. But may I please have a squidge of rasberry coulis and a dab of whipped cream with mine… if that’s not asking too much?
Why not indeed, Brian! Knock yourself out. And send pictures.
– Joe
Never saw these before, what a clever, classy looking, idea. Thanks!
They’re one of those staples that have been around so long you never hear about them anymore. But you’re right, they have a very nice look to them. Individualized pastries really make an impression. They’re a bit fussy to do, but the response is usually worth it! 😉
Cheers,
– Joe
Love the back ground on feral pears and their dangers! Has Sir David Attenborough contacted you for a filming session? It’s about time someone uncovered the dangers of the world – wild books, feral fruit… Whatever will we discover next? Who needs to go to Mars?!
Please keep up the good work! : )
Hey Squrille!
Funny you should mention David Attenborough, he’s one of the big influences for the blog. He’s such a great explainer…I think about him constantly.
But yeah, Life in the Fruit Aisle or something like that might take a great special!
Cheers and thanks for the comment!
– Joe
Holy smokes that looks great!
Another example of the perfect blend of info & humor. Poaching the pears in red wine might be pretty (and make the prickly pears a tad groggy)? Or would red be too strong?
Now, if one were especially neurotic and precise, could one make these without a lattice cutter? I love them but am always hesitant to buy one-use kitchen utensils.
It’s theoretically possible of course, but wow…what a headache! A lattice cutter is $7 and will cut lattices for lots of things!
I’m just sayin’…
– Joe
Very nice. I’d most definitely be sipping on the poaching liquid and munching on pastry scraps while these bake.
Were you spying or something?
– Joe
Hi Joe,
So that’s what that tool is for!!!!! I never knew that! This looks good, i’m wondering which tropical fruiit i can adapt for this recepie……hmmmmmmmm
Great Job, the pears look so good!!!!!!!!!!!!!!
Thanks
Melo
Thanks very much, Melo! Send me pictures of your improvisations please!
Cheers,
– Joe
Hi Joe, I will. My list of things to try & report on is getting bigger. lol.
Mel
Hehe…OK!
Thanks,
– Jim
Do you really think it is a good idea to poach feral pears in white wine? I don’t think any chef is safe around drunk feral pears! My heavens! Is there an alternate liquid to poach a pear in?
Thanks Joe!
Eva
Ooh…good point, Eva. I thought mine were getting a little extra surly the other day, and the alcohol may well have been the cause of it. Of course you don’t need to run that risk yourself. Pears can be poached in a light syrup: 10 ounces of sugar for every quart of water you use. You can add any aromatics you like to the liquid, just as you would do with wine. As with any poaching, make sure the pears are completely submerged to prevent any discoloration of the flesh. I like to put a plastic plate over them in the pan, both to keep them under and to prevent the little buggers from suddenly getting aggressive and lunging at me, which can also happen. Stay safe!
– Joe
you are awesom…. ^_^
Ha! Thanks, Ghazal!
– Joe