Making Vol-au-Vent
In the long list of reasons why you should consider making your own puff pastry, vol-au-vent may not be number one (that distinction goes to cheese straws), number two (tarte tatin) or even three (Gâteau St. Honoré), but it’s definitely in the top five. It makes a killer first course to a dinner: light, buttery, crunchy and lovely to look at. Made with your own pastry it’s almost as light as “a waft of wind”…which is what the name means in French.
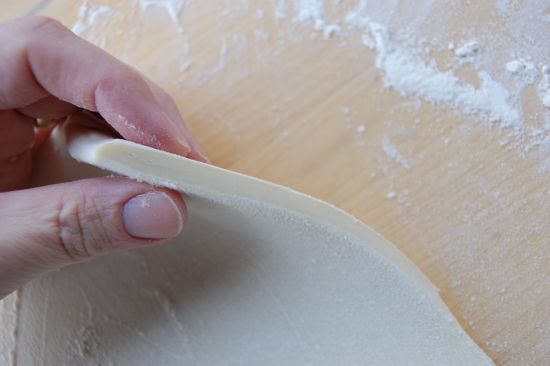
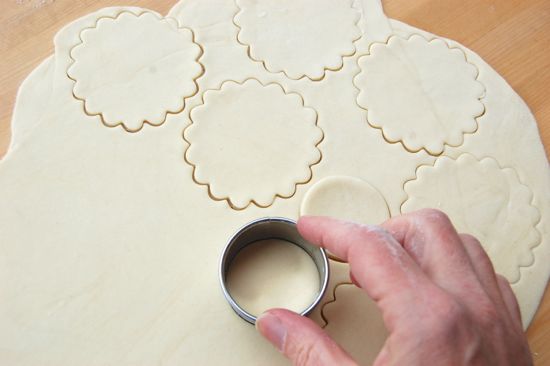
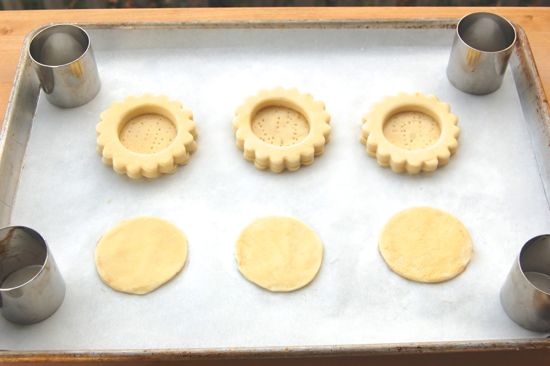
Start by securing some of that pastry stuff. A pound will make between six and eight vols-au-vent depending on the size. You can make one big one if you wish. I happen to think individual ones are both more fun and more impressive. You can even make teeny tiny ones if you want for appetizers (bouchées I believe they’re called) the process is more or less the same. Roll your pastry out to somewhere between a third and half an inch in thickness. About like so:
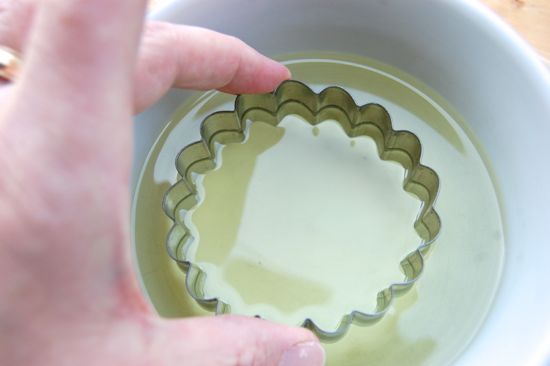
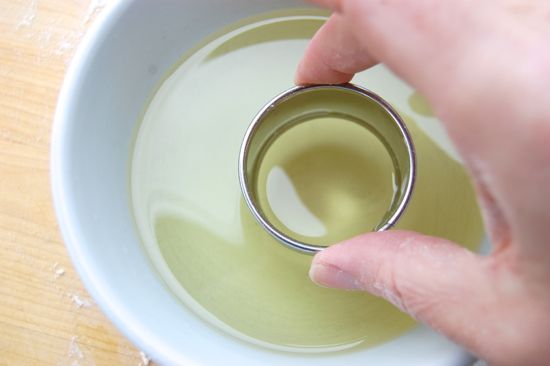
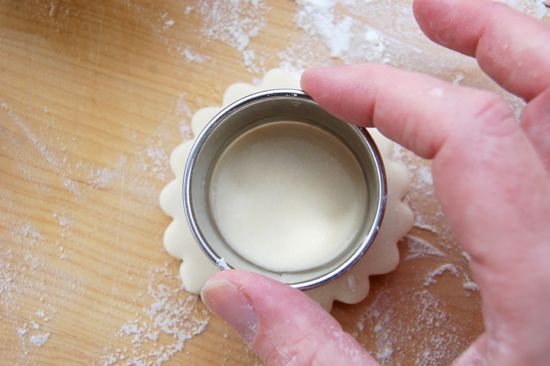
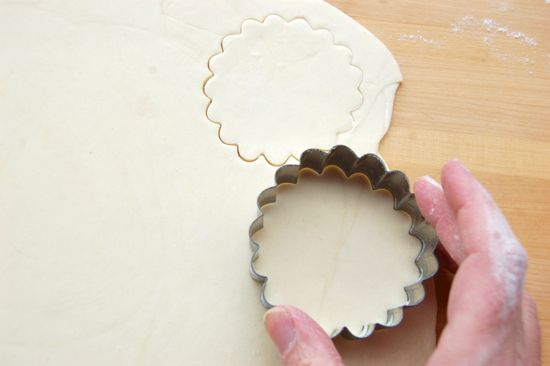
You can use fluted cutters or plain cutters if you wish. This one is at 3 1/2″ fluted model. Dip it in a little vegetable oil to lubricate it for the cuts. You don’t want to crush the layers of the pastry more than you must.
Press straight down, no twisting.

Once you’ve cut about six of those, cut out the centers. This is a 2″ circular cutter. Dip that.
Cut as close to the center as you can…
…and you’re done with that step.
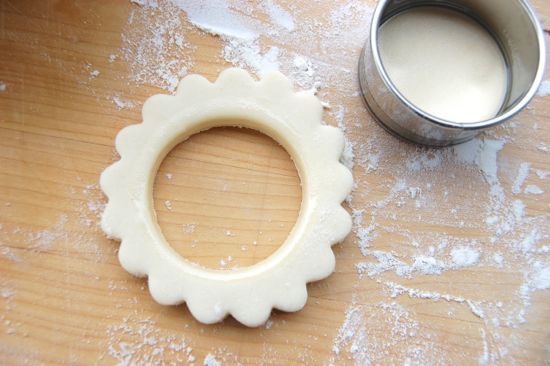
Put the rings in the refrigerator to rest while you work on the bases and tops.
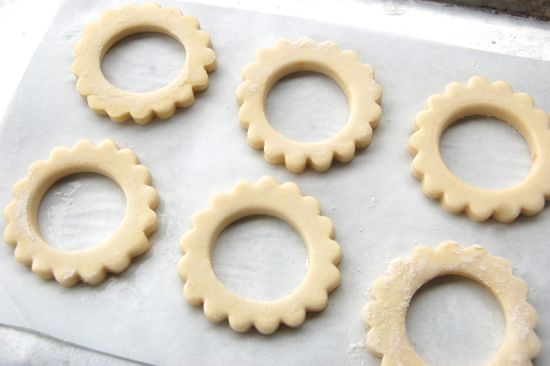
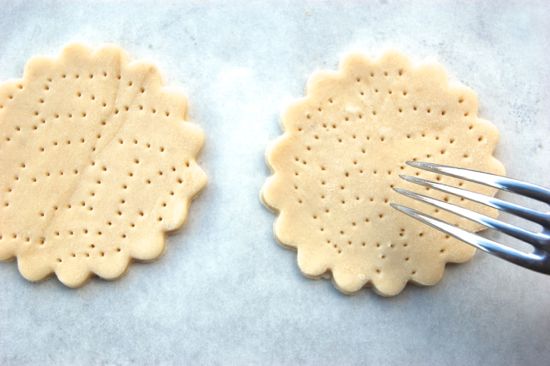
Assemble all your scraps, mash them together and roll them out into a very thin sheet. I’m sorry Joe, did you say mash them up? I did. The reason is because you don’t want the bases and tops to rise especially much. I realize it may pain you to destroy all those layers you worked so hard to create. All I can say is that sometimes one must suffer for one’s art. Man up and do it. Roll the pastry out very thin, about 1/8″. Using the same fluted cutter, cutter out six bases.
Cut out some tops as well, but make them bigger than these. My first batch was too small. You want the tops extremely thin and quite wide to allow for oven shrinkage. Use the 2 3/4″ cutter from your set.
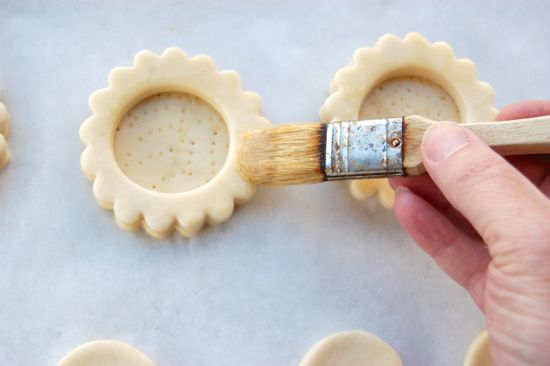
Now dock the bases with a fork to discourage puffing. Do it I tell you — do it! Then paint it with egg wash and drop and give me twenty!
Lay the rings down on the egg wash-painted bases, being careful to line up the flutes so they match. Here I should insert that if you don’t have a fluted cutter and don’t want to buy one, you can simply use a round cutter for both the tops and bottoms. Once the vols are put together you can make indentations in the edges with the back of a knife as you do with a galette des rois.
Now very daintily — because you don’t want to stick your precious layers together — brush the top lip with egg wash. Use very short strokes, going from the inner rim outward. It takes a very liquid wash to pull this off without dripping strings of egg white down the side, so spend a good 60 seconds scrambling that raw egg with a fork. It should flow like water. Paint the tops with egg wash as well, then rest everything in the refrigerator for an hour. Meanwhile, preheat your oven to 400 degrees Fahrenheit. Or, you can refrigerate them for up to several days (covered) or freeze them for up to several months (thaw in the fridge overnight before baking).
So OK, next you need some, er…items. These are pastry rings about two inches high. They are going to help me make my mold so that the vols don’t tip as they bake. I’ll show you what I mean. Oh, and see those tops down there below? That’s the size and thinness you want.
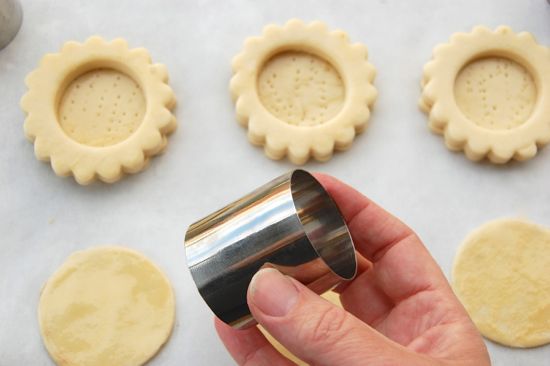
Place one…whatever….as long as it’s two inches high or so and can take the heat of an oven, in each corner.
Lay on an inverted cooling rack that’s been lightly oiled.

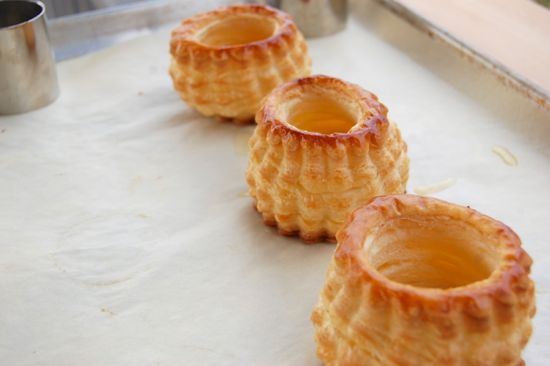
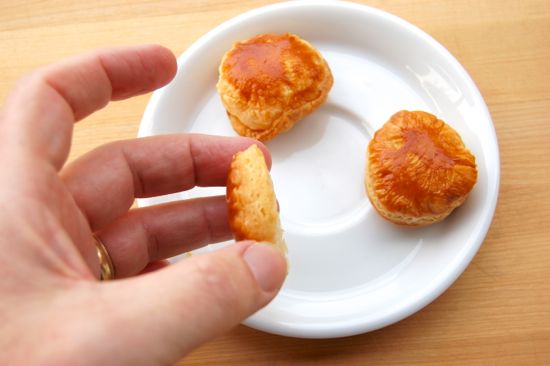
Place the whole contraption in the oven and bake for 15 minutes. At that point the vols will have risen to touch the rack and the tops will be done. Remove the tops to a plate, then turn the oven down to 375 degrees Fahrenheit and return the pan to the heat. When the tops are cool split them so you have a flat bottom, like so:
Fifteen or so minutes more baking and the vols themselves will be nicely browned (check the oven after ten…and take care not to burn the bottoms).
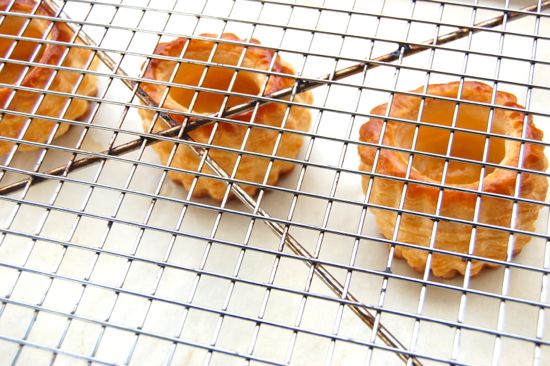
Remove the rack to inspect your handiwork. Your vols will be of slightly differing shapes. That’s how your guests will know they’re homemade (inconsistency is a stealth praise strategy). Every so often you’ll get one that will flop over completely before it ever reaches the rack, which is why I suggest you make a couple more of these than you actually need.
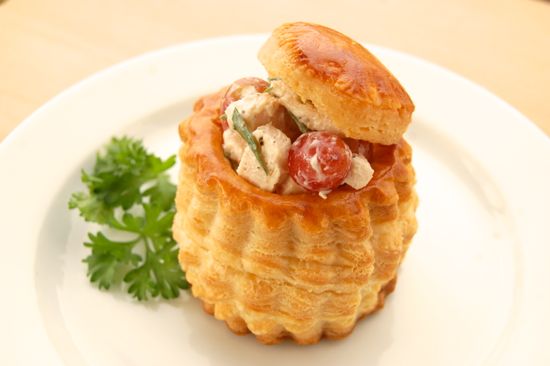
And that’s pretty much it! Cool them, fill them with whatever you want and eat! These are a knockout with savory foods but can also hold sweet fillings. Here I have a fairly conventional chicken salad (I didn’t have time to do anything too creative — I’m a working man!): diced leftover chicken with some red grape halves, slivered almonds, tarragon and salt and pepper. Still not a half-bad lunch, friends.
These can be baked many hours ahead of time. Truth be told they’ll keep for a couple of days in an airtight container, but I think they’re much better the day they’re made. Readers, please feel free to post your filling ideas once again here, so they’ll stand for posterity.
Despite the fact that vol-au-vent is wildly popular in Belgium, I’ve managed never to eat it in all the years I’ve lived here. You can buy it in one-liter glass jars at the supermarket around the corner from me, though — not sure whether it includes lumps of dough, but it doesn’t look too appetizing if you ask me. Anyway, I’ve a pound or so of homemade puff pastry in my freezer just begging for a use. I’m afraid it might be too old though, so I’m glad you linked to your cheese straw recipe — I’ll try those first and see how puffy my pastry still is….
My bet is that it’s up to the task, Jimma. Let me know how it goes!
– Joe
Dear Jimma,
What they sell in jars is the Belgian filling of Joe’s vol-au- vent pastry. Do make it your self: much better. It is a recipe for left over chicken (generally after preparing a ‘bouillon’ that you will need for the sauce). I searched a recipe on the web for you. Hope you understand french.
http://users.skynet.be/la_cuisine_belge/vol-au-vent.htm
There are more involved recipes though, ask your Belgian friends or their mothers.
Good appetite.
Herman
Thanks Herman, I understand enough French to read a recipe. Between this, Joe’s recipe, and my leftover puff (thanks for the encouragement, Joe!), I should have plenty of material to experiment with.
And trust me, I’ve never been tempted by the stuff the in jars — it looks truly nasty! But then I always think that about canned meat products….
This is beautiful! Something tells me though, I don’t have the patience. At least not right now.
Tomorrow then? 😉
– Joe
Great work Joe! Yours look very good.
These are really clever ideas for making more ordinary dishes seem very classy. I made smaller ones and filled them with roasted root vegetables (a mix of parsnip, onion, turnip and potato coated with a bit of oil,roasted at 400 degrees until tender then tossed in some chopped rosemary and truffle oil). That was a case of the side dish being the impressive bit to go with a more ordinary roast chicken.
I have threatened to do an entire meal around them with a small piece of beef and a foie gras type filling (a sort of a Wellington thing) for the main course and a mousse filled one for desert
Nice, Frankly! Thanks for that. I saved a few of these and froze them for later…I have a feeling I’ll be making your root vegetable version soon!
– Joe
That does look like a good way of doing them. I have always made the whole things as one- cutting the centres ALMOST to the bottom and pulling the lids/middles out after baking. Also appreciate the rack hint – I have made some doozy slumped-over ones in the past.
My very great pleasure! And yes, cutting them thick and punching the hole part of the way through is another very good method. Cheers,
– Joe
You have a doughy bit to get rid of though. Not so easy to get the whole thing crispy. I think your way is better.
As far as fillings go, I like them made with a roux sauce base, and either smoked fish (like a very thick chowder) or black mushrooms.
I would have done smoked fish for sure if I had the time. Warren (also from NZ) mentioned this and I was determined to find some smoked whitefish for the job, but alas, no luck. Perhaps by Christmas I’ll locate a little. I froze a few of these, so vols au vent with smoked fish may yet find their way onto a holiday menu!
– Joe
Found you via Google this morning searching for Vol-au-vent. Great tutorial, nice pics! I will be making Vol-au-vent for my winter holiday party for sure now! Just need to do some more Googling for ideas on fillings as I am also a working man and not the most creative person, at least not before 8AM on a Monday 🙂
Ha! Thanks very much for the note, Union Tom! Let me know if I can be of any help as you work on your project!
Cheers,
– Joe
I mix one can of cream of celery, one can of cream of broccoli and a can of veggies with some leftover chicken. It is sooo delicious as a filling for these.
Lovely, Giselle! Thanks so much for the recipe!
Cheers,
– Joe
hi 🙂
what accompanients could i use with this receipe?
Hey Debbie!
Just check the comment fields for this post and the recipe post below it. There are all sorts of fantastic ideas!
– Joe
I am Malaysian and I would love to have the Vols filled with curry chicken potatos!
Send me a picture! 😉
– Joe
My first, and certainly, the start of repeated visits to your site. Encountered vol-au-vent in a recipe book on finger foods. Will attempt to make them next weekend. Perhaps, raisins soaked in brandy for the filling, on a bed of appropriate sauce?
Send me pictures, Rofodol!
– Joe
Hi Joe
I’ve been trying to make these for years, and rarely have success. They usually collapse to one side, or one side won’t rise. Any idea on what the critical thing is to avoid these failures?
Hey Peter!
I can think of a couple of reasons for the unevenness. One could be a dough sheet that’s not evenly rolled, frankly that’s the most common reason. Another possibility is hot/cold spots in the oven which can cause uneven rising. A pizza stone will help that. Let me know how they go!
– Joe