Making Melon Pan

For a first attempt at melon pan, I was pretty pleased with these. Little 4-year-old Joan Pastry certainly was. Judging by her level of enthusiasm I’ll be making these quite a bit in future. But a very interesting item melon pan is. It’s not terribly sweet, nor does it have an especially pronounced flavor. However the textures are extremely interesting, and that jibes with what I know of Japan. Food lovers there are every bit as excited by texture as they are by flavor, perhaps even more so. Begin your melon by preparing the cookie dough. Put the butter and sugar in the bowl of a mixer fitted with a paddle (beater):

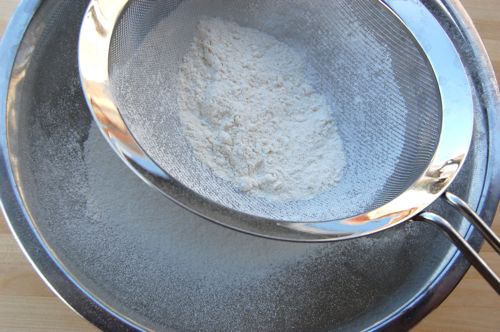
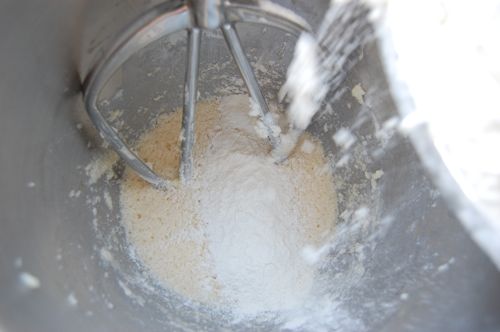
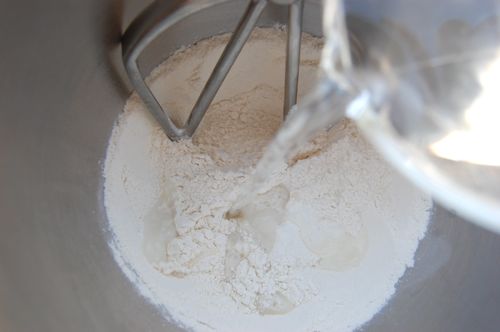
Meanwhile, sift the rest of the ingredients into a bowl.
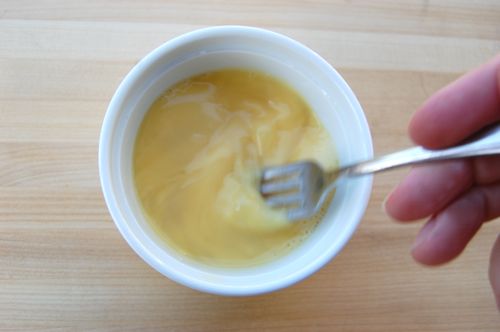
Lightly beat the eggs…
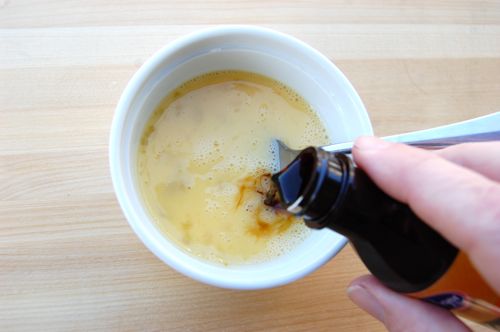
…and add the vanilla to them.
Add the eggs to the butter and sugar mixture in two additions, scraping the bowl as necessary.
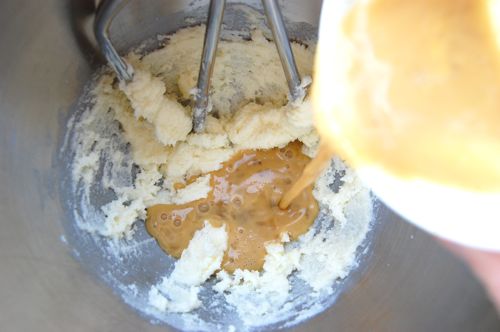
The mixture may look a little rough and lumpy, but proceed undeterred. Steadily sprinkle in the flour mixture and beat on medium-low to combine.
At first you’ll worry that something’s wrong, because you’ll get this shaggy-looking dough. Keep going.
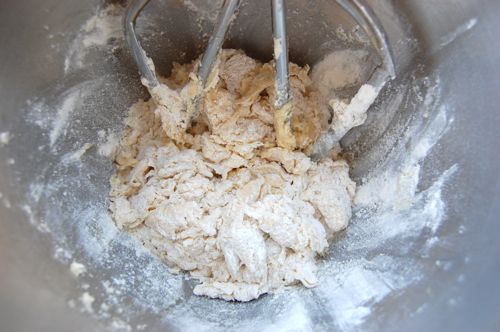
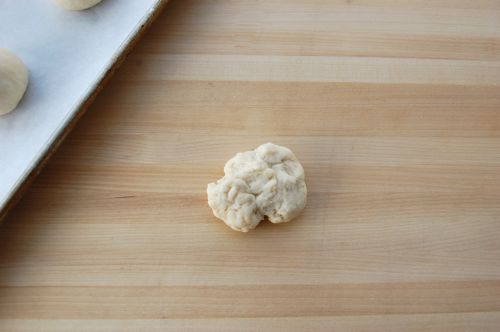
After a couple of minutes something resembling a cookie dough will form. Add the lemon zest to it and stir about 20 seconds more to incorporate it.

Turn the dough out on a board and roll it gently…
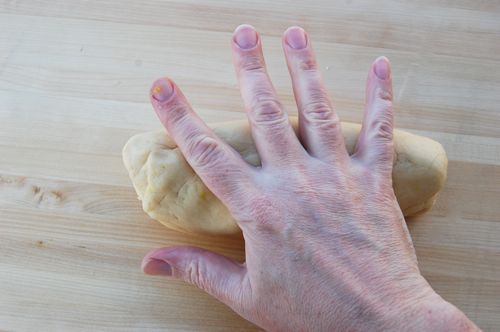
…into a log about 16 inches long. Wrap it in plastic and put it in the refrigerator.

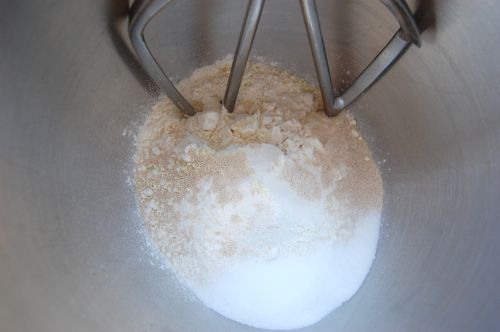
Next, prepare the buns. Clean the mixer bowl and combine all the dry ingredients in it, then affix the paddle (beater).
Stir the mixture to combine everything, then turn the speed up to medium and add the water.
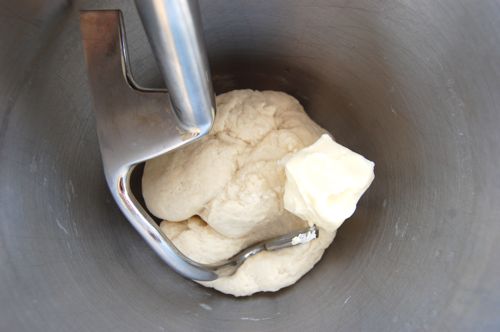
When the dough comes together into a mass, switch to the hook.

Knead for about five minutes on medium, you’ll notice the dough getting quite a bit smoother. Add the butter and knead to incorporate. It might take a bit longer than you hope, since the butter will cause the dough to slip around the inside of the bowl for a while. Continue until the sides of the bowl are once again clean. The dough will be very soft and slightly greasy.
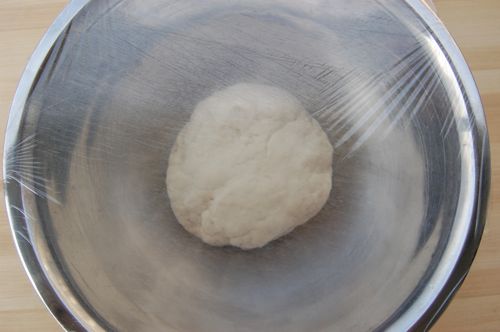
Put it in a lightly oiled bowl and cover it with plastic wrap.
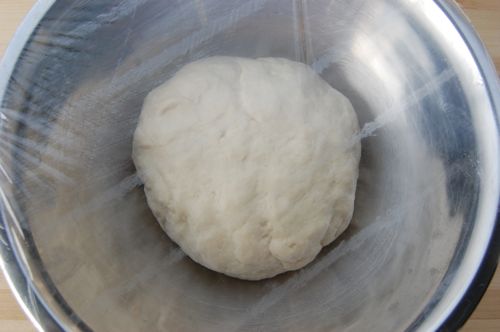
Let it rise about an hour until it’s about twice its original volume.
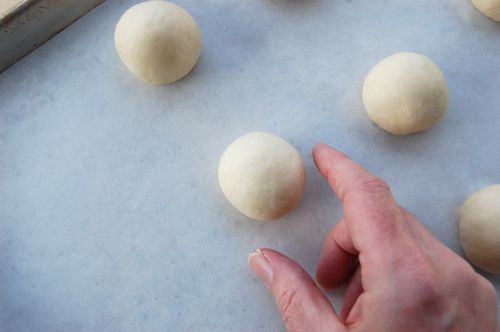
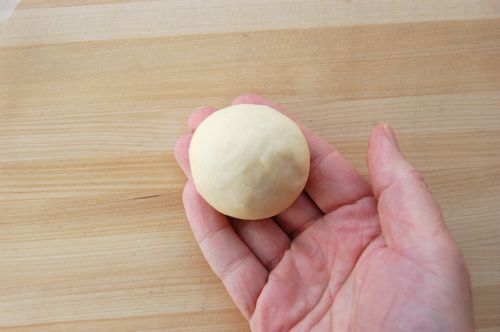
To shape, divide the dough up into ten or twelve pieces about 1.75 ounces each.
Roll them into balls on a wooden board or counter top, you may not need any flour at all. (I can very easily imagine inserting a few chocolate chips or some other small quantity of filling into the center of the dough at this point).

Set them aside and a parchment-lined sheet pan.
Now for the dough wrappers. Cut a piece of dough off the log (which you will have taken out of the refrigerator, obviously). I found that I prefer a slightly smaller amount of dough, about 1.25 ounces. But you can use up to two ounces per bun if you wish.

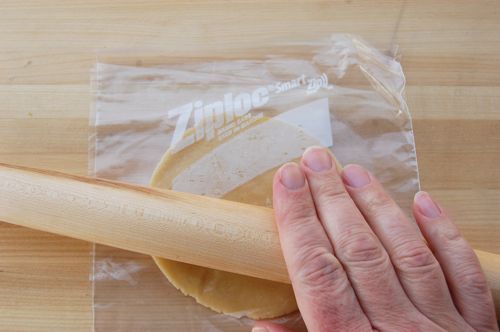
Roll it into a ball and put the ball between two sheets of plastic. Thicker plastic is easier to work with. Here I’ve opened up a Ziploc with scissors.
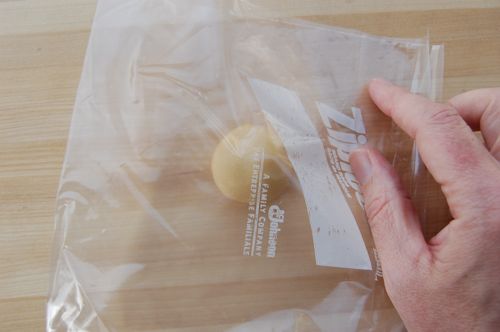
Now apply a sturdy object to the ball — a small saucepan was handy for me — and press it.

And here’s what you’ll have.
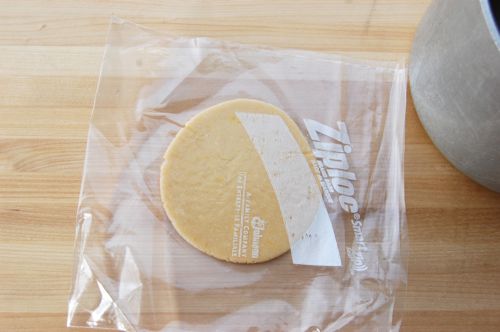
You may need to apply your pin to get the circle a little thinner.
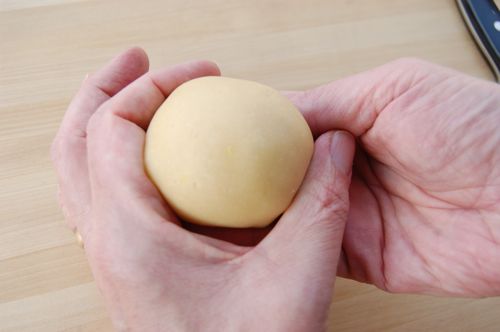
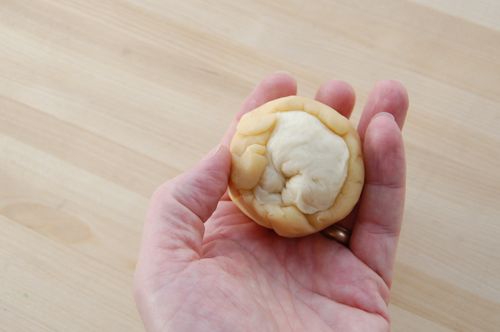
Now then, place a dough ball in your hand…
…and place the dough circle on top.
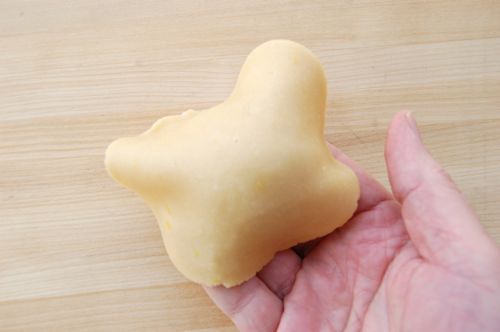
Bring your other hand over and gently stretch the dough down over the ball. Rotate the ball slowly from beneath as you continue to tuck the dough around the bottom of the ball. (Notice my other hand makes a special guest appearance here thanks to a contract waiver from Warner Brothers).
You want to leave the bottom open a little to allow for dough expansion. I didn’t do this one very neatly. Oh well.
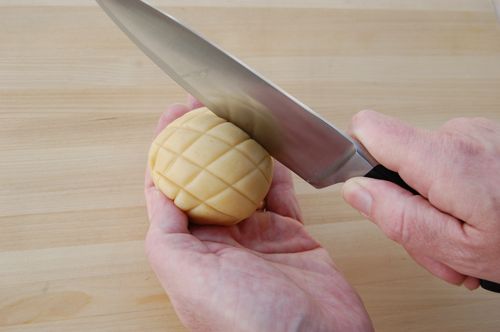
Now then, with a chef’s knife score the top using a gentle see-saw motion, rolling the knife over the bun. First in one direction…
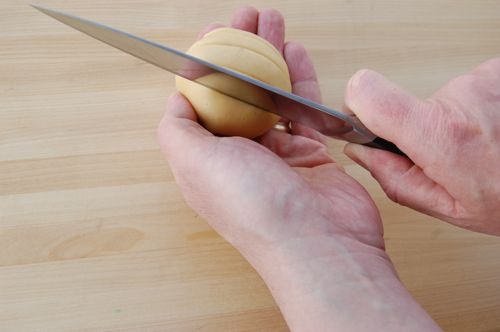
…then the other. Try not to open a vein. Actually, something duller like a bench scraper will work just fine too, come to think of it.
Holding the bun by the bottom (it’s OK to pinch the dough), roll the top from side to side in some granulated sugar…
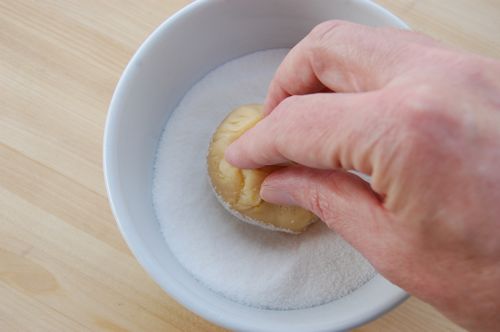
…and place it back on the lined pan.
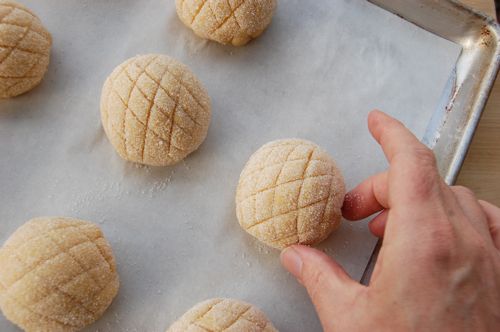
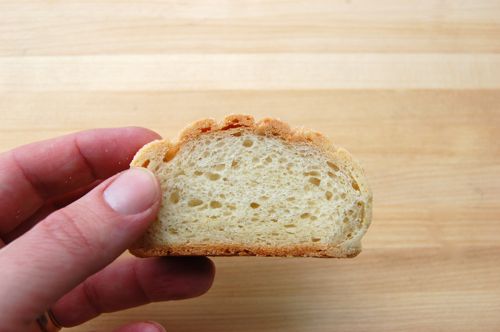
There, not too hard, was it? Let these proof for about 45 minutes to an hour. Meanwhile, preheat your oven to 375. Bake on the middle rack for about 20 minutes until lightly browned on the top. Eat warm, because they’re fantastic that way. Here’s what they look like on the inside, light and fluffy surrounded by a crispy cookie shell:
Delicious.
Oh these sound good.. do you post the ingredients?
Yes, just scroll down to find the recipe.
wow that is amazing . I would love to see what the inside looked like..
It’s pretty much a standard bun…but little Joan may have left one behind. I’ll find out and shoot it if I can.
Joe, could a tortilla press be used on the cookie dough or would it make the cookied dough too thin?
It certainly could be, that’s a good idea.
These look delicious! (I’m not seeing the recipe either.)
Just scroll down on the main page.
The lady in this video uses her bench scraper to press out the cookie circles and cut the crosshatch marks.
http://www.youtube.com/watch?v=5z0e-GKJA10
A bench scraper is an excellent idea. I’ll mention that in the post.
I’m totally stumped because I have scrolled up and down and everywhere else and still cannot find the recipe.. YIKES!
Hehe…OK. Just go to the hope page…www.joepastry.com…and scroll down almost to the bottom. You’ll see it. If not I’ll send you a link. Good luck! – J
FOUND IT! god, talk about a blond moment there!
Thanks… is going on the to do list. Pronto, because they look good and I’m sure they taste amazing as well. I mean bread engulfed in a cookie crust.. what is there NOT TO LIKE about that?
My goodness they look yummy. Question – for the recipe you posted earlier, how many buns did it yield? (And how big was each bun?)
P.S. You’re making me want dessert now, and it’s already 9:30 at night…
Hey April! Nice to hear from you. I got eleven total and each one was about 3 1/2 inches across.
Oh wow, they sure poof up quite a bit – the little balls of dough looked so tiny before being baked!
Thanks Joe 🙂
Yes, it’s pretty impressive how well they rise. But then they have quite a bit of yeast in them, plus bread flour. The extra gluten helps to capture and hold more gas and steam.
Fantastic!! Melon pan is the one reason that my family frequents the Asian bakery in the neighbourhood, but I can’t wait to try making my own! Thanks for such a well laid out and easy to follow post!
My pleasure, Ellie! Let me know how it goes!
Joe, I’d love to see one of these cut open… do you have such a picture of a baked one?
I’ve had several requests for that. I shall put one up today (as soon as I have a little more light).
I add chocolate chips when forming the ball of bread dough, then add the cookie dough as described. That is how the Japanese women I work with showed me. There is no melon flavoring added–the name comes from the resemblance to cantaloupe melon.
Joanne
PS The Japanese women who taught me to make melonpan use a small Zojirushi bread machine to make the bread dough part.
Joanne
Hey Joe,
I’m making these for the second time tonight, and both times I’ve had trouble with the cookie dough. It’s obnoxiously sticky (which I imagine is why you chill it), making the “roll into a log stage” basically impossible. I end up molding it and then haphazardly covering it with wrap and tossing it in the fridge.
When I went to drape the dough over my bread I had problems with the last few since it was warming up again, and I didn’t want to give it more fridge time.
Is that the right texture for the dough? Yours looks so much smoother and pliable than mine does at room temperature.
Hey, Sorry I have been searching but cannot find a list of the ingredients. Would really like to make this.
Hi Kayla! The project index to the left the has all the tutorials with the recipes at the bottom (I post those separately at the beginning of the project so I can talk about ingredients and such). Go here and scroll all the way down. Let me know how it goes!
– Joe
http://joepastry.com/category/bread/melon-pan/
I made these last night and I almost cried when I ate them. They’re so good!!! The crunchy on the outside, soft on the inside is what every person admires in food, and here it is on every single bun. I had a little trouble with the scoring for some reason, I guess I’m just not used to that? They turned out a tiny bit messy looking but that just gives me reasons to make it again to perfect it. Thank you thank you thank you thank you.
Hannah! Tears of joy no less! I cannot help but be deeply flattered. So glad these worked so well for you. And yes do try them again, it’s just a matter of getting used to the dough.
Thanks so much for the comment — I love a success story!
Cheers,
– Joe