How to Make Your Home Oven More Brick Oven-Like
It’s funny how many people seem to think their ovens are too cheap/old/junky to be improved by things like pizza stones and pans of water. The fact is, the junkier your oven is, the greater the difference these tricks will make.
The first thing you want to do to make your oven more hearth-like is to introduce some large, heat-absorbing masses to it. These will increase both the conductive and the radiant heat in your oven. The most common of these is of course a pizza stone. The best of these are the heaviest, since they can hold more heat. You want to place your stone directly on the floor of your oven for maximum effect.
What else can you add that might be even more help? How about another pizza stone? Why not? Only this one sits on a rack over whatever it is you’re baking, so that it radiates heat downward, much like an actual brick oven. Do I do this? Well, no, but I know bakers who employ this technique and swear by it. I’ve been meaning to borrow and extra stone from a foodie neighbor to try it. You might want to do the same thing!
Can you use actual bricks on the floor of the oven? Some people do that, yes. Just be sure they are unglazed “fire” bricks, the kind brick layers build fireplaces with. Why be so specific? Because you don’t want them to crack, nor do you want to disperse nasty chemicals around the inside of your oven and/or kitchen. The same goes for clay building tiles, which some bakers also use. These you can find at building supply places, usually for cheaper than you can acquire a stone (they also look cooler, for you oven interior aesthetes). Just be sure you’re buying plain clay. Nothing colored, nothing shiny. Got me?
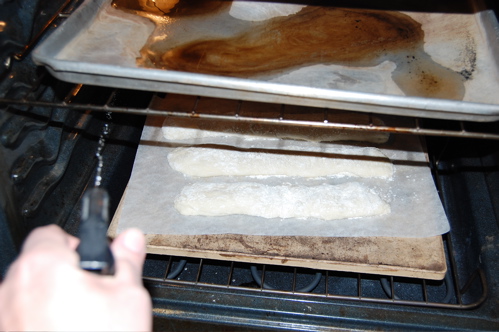
Here’s what the inside of my oven looks like:
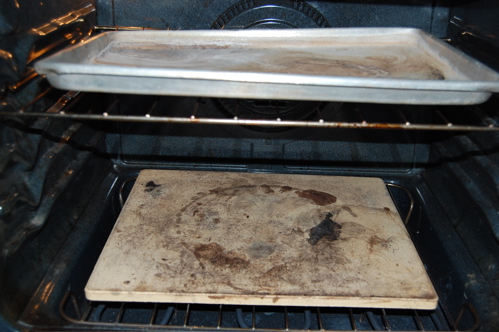
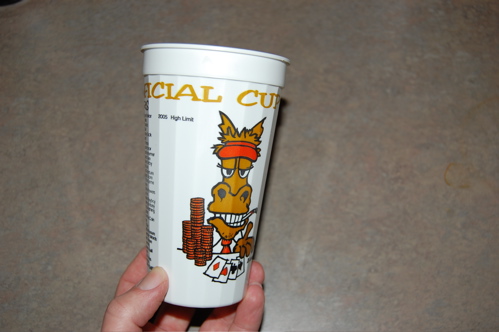
Kinda grubby, not very glamorous. I’ve got a large, heavy pizza stone down on the floor, and you can see that completely trashed sheet pan up top, scooted as far forward as it can go. What’s that for? I’m glad you asked: water. For moisture is another important feature of a hearth. Extra moisture translates to a better crust, for reasons you probably already know. Other important accountrement for moisture dispersal include this, a) silly cup:
and b) this spray bottle set on “stream”.
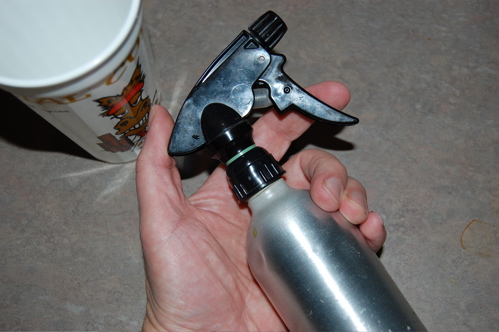
These help me introduce water into the oven environment. The lightness and length of that cup are actually important, since those features allow me to grasp it with my fingertips at its very bottom. What difference does that make? Allow me to demonstrate.
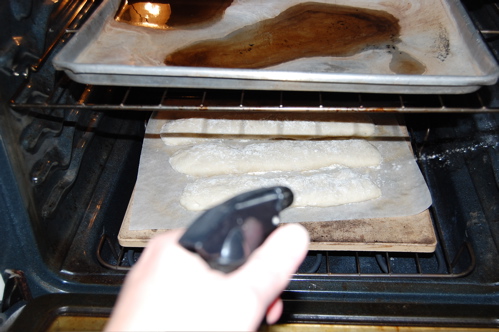
Once the oven is fully preheated to 500 degrees Fahrenheit, all the surfaces, including the pan and the stone, are darn hot. When my loaves are ready, I pour about 8 ounces of hot water into my plastic cup. I open the door, promptly lay my bread down on the pizza stone, and sneak the water into my stained and buckled pan (it got that way from being treated like this, as you’ve probably guessed). The length of the cup allows me to do that gingerly without getting scalded by steam. Which hurts.
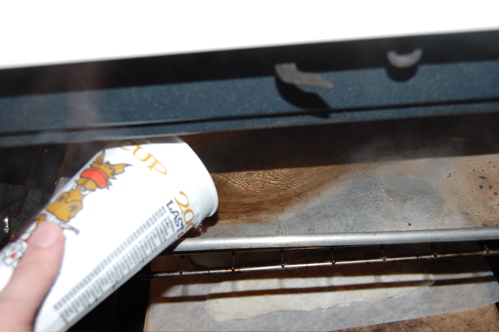
I pour in the water to a loud and violent hiss. I then give the sides and door of the oven several spritzes with water…
…then shut the thing up. Two minutes later, I repeat the spritzing:
…then close the door. Two minutes after that, I do it again:
Yes, it’s the same photo. Sue me. I’m trying to visually reinforce a point. Once all the spraying is done, I stop fiddling and simply let the oven do its work. This method would work just fine with an extra stone, in case you were wondering. Also, for those of you who might be wondering why I don’t just leave a pan or skillet full of water in the oven (as some books suggest), the reason is because moisture only helps your bread up to a certain point (which is to say, the first few minutes of baking). After that it will actually soften your crust. A simple sheet pan with lots of surface area, that can evaporate about a cup of water in 5-7 minutes, is exactly what you need (and yes, be prepared to sacrifice a decent pan for the cause).
That’s it as far as I’m concerned. Questions?
Hi Joe!:)
I have a question!does this oven improver technique only works on breads?:):)
Thanks!
Casey
The steam should just be used for breads, definitely not pastry as the moisture will soften crusts and crisp sheets of laminated doughs. However I keep the stone in my oven all the time and bake everything on it. Even heat is always a help, no matter what you happen to be making. Thanks for the comment! – Joe
How about cakes?:):):) Thanks for the quick response!:)
Casey
Cakes will benefit from the even heat, but not the moisture. – Joe
I have a neat trick for my pizza stone. I used to keep it on the bottom rack like a lot of people, but I hated having to move it if I needed the rack. I solved this minor inconvenience by buying an oven brick and fracturing it into four pieces. In my oven with the particular stone I have it leaves enough clearance over the heating element for the stone to sit above it and still have plenty of clearance for the lowest rack to move freely about. Gets wicked hot for making pizza.
Very interesting, Darren. Thanks for adding this to the post!
– Joe
Hi Joe
I think you wrote this for me, cause my oven needs help, my bread burns at the bottom all the time, even my choux pastry. So I need your help will this technique work for choux pastry..also when the 8 ounces of water dries up do I need to add more..not finish yet..how many times do I need to repeat spritzing the oven walls…….I really need your help.
Hey June!
Anything I can do! If your oven is running that wildly out of control, I suggest thicker bricks! Head down to a lawn and garden store and get some untreated/uncoated patio bricks and lay them on the floor of the oven. Don’t get the really thick kind, Lowe’s has some patio bricks that are less that 2″ thick, which will work perfectly. They’ll even out the heat very nicely…and you can just leave them in all the time.
Regarding extra water: you won’t need it. Past the first ten minutes or so you don’t want to add any more steam to the oven (it will actually diminish the crust). So one cup of water is just fine. Spritz the oven maybe three times during those initial minutes.
As for choux, it will benefit from the bricks but there’s no need to give it the full-on steam treatment. They’ll get nice and crispy on their own.
Have fun and let me know how it goes!
– Joe
Joe
Where were you all the time, I am glad I found you, thanks for the above advice, I am going to buy me some bricks …Ha
Great! No need to cover every inch of the oven floor, just the lion’s share of the center. Let me know how that works for you.
And come back any time!
– Joe
And make sure those things are unglazed…most all of the patio bricks will be, I’m pretty sure.
Thank you for the geat advice! I am. Getting ready to bake my first pullman loaf. Would I just place the pan on top of the stone?
Also, when I make my own loaves I use a Tagine of crete. The conical lid creates the steam to make the perfect loaf 🙂
Hello Chiara!
Yes, just put the pan directly on the stone and that will do it!
I’d love to own a tagine. Perhaps I will some day! Thank you for the comment,
– Joe
Warning to you all: do not spray anywhere near your lightbulb if your oven has one. mine exploded and i was lucky to have nothing but a ruined batard and a small burn on my arm.
anyway, steaming honestly didn’t seem to help that much. it was still a thick and dull crust on the baguettes that came out before i blew up the lightbulb. am i doing something wrong? i sprayed it more often than you did. if you can get to me by email or at least here to talk a bit that would be really helpful. ive been talking to our local baker but i think he’s getting a bit tired of me.
VERY good point, Melody. And in fact I had that happen to me once with an old oven. There’s a limit to how much you should spritz. A good topic for a post! Stand by.
– Joe
I was curious – I read somewhere about putting a cast iron pan in your oven & then preheating, then when ready to put bread in, throw 3-4 ice cubes in iron pan. Do you think this would work as well or better than your method? I’d try it, but not sure if the pan would break or anything. . .
Hey Tonia!
Some people love that method. You can definitely give it a try — it won’t hurt the pan.
– Joe