How to Make a Parchment Cone
Ever since I put up the post about assembling a plastic pastry bag, I’ve been besieged by requests for instructions on how to make a traditional paper pastry bag or “cone.” I confess I don’t use these much, though they’ve been the #1 tool of every professional or semi-professional cake and/or cookie decorator I’ve ever known. Why don’t I use them very often? Because a.) I’m not a particularly good decorator and b.) I’m lazy. Every time I set out to make a paper cone I have to think hard to remember the process. I don’t like doing that. I much prefer to avoid thinking and just whip out the plastic bags and tips I’m accustomed to. However it must be admitted that a paper cone vastly increases the amount of control the decorator has over where icing goes. So if you can get in the habit of using paper cones, your decorating — and especially your writing — will improve noticeably. Make a few and the process will soon be second nature.
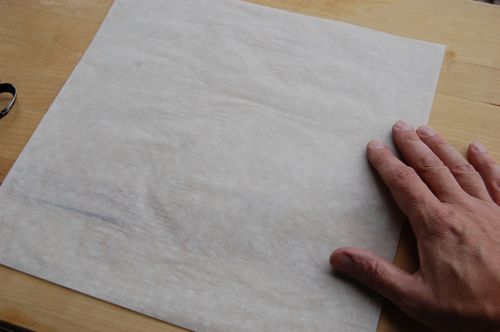
So then. You’ll want to begin with a square of parchment paper. Here I’ve trimmed a rectangular sheet into a square.
Using scissors, cut the square from corner to corner into two triangles. (Alternately, you can be slick about it and simply fold it, then use a sharp knife to slit the piece in two along the crease).

Set one piece aside. You might think the point of triangle up at the top is what’s going to end up as the point of our cone. It would be very natural to think that. Intuitive, even. You’d be wrong, is all. The point is actually going to be the exact center of the long side of the triangle, at the bottom. I’ll show you how we’ll make that happen. Begin by taking up one of the far corners of the triangle…
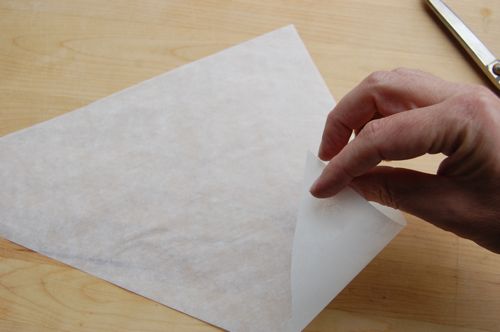
…and curling it around until the points meet. Ah yes, ze cone, she is already beginning to take her shape, yes?
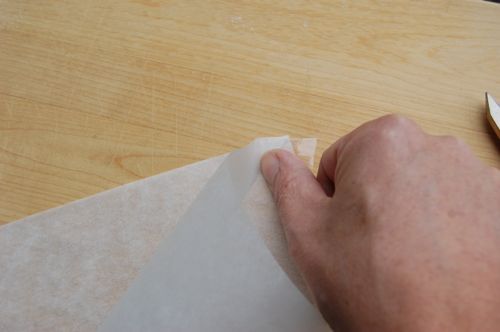
At this point you might want to apply a piece of tape to secure it. This works great for parchment that isn’t silicone-coated, not so well for parchment that is. In the latter scenario, the tape will hold only very briefly, if at all.
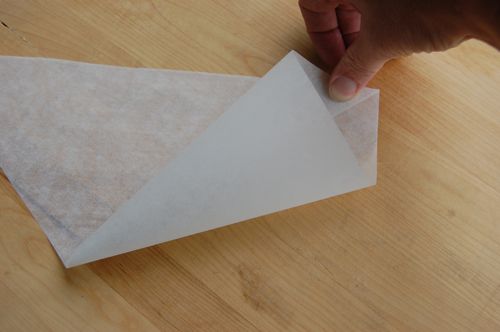
So alright, we still have another corner to deal with. What you’ll want to do is grasp it and curl it around the back of the cone, thus creating a double layer of parchment.
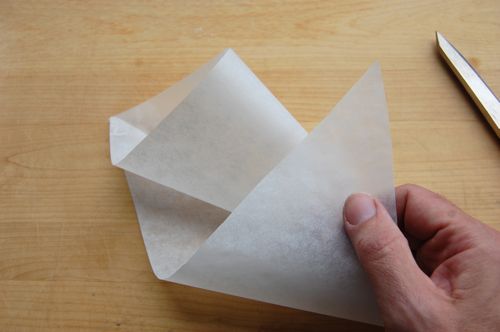
Pull it tight, so the points all touch (or almost touch).
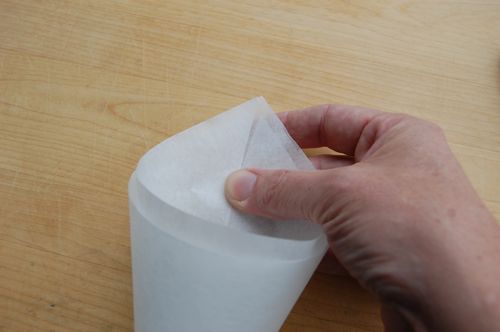
Fold the pointy part down and inward…
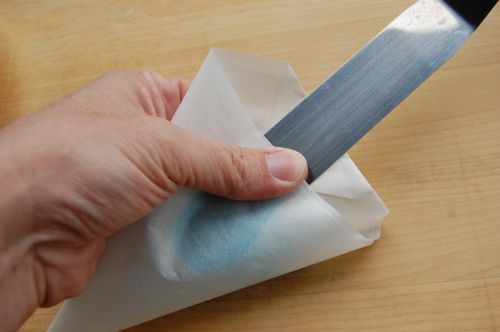
…and voilà there’s your pastry cone. See how sharp that tip is. You can use a scissors to cut whatever size hole you wish (but wait until it’s filled with icing, since the cone will want to unravel at this point if you let go).

To load the cone with icing, take a generous scoop with a spatula, and insert it into the cone.
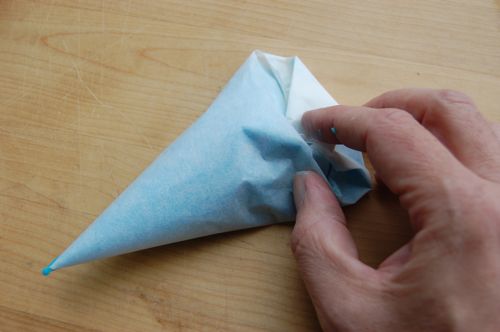
Pinch the cone and remove the spatula, thus leaving the icing inside. Do that a few times and your cone will be fully loaded.
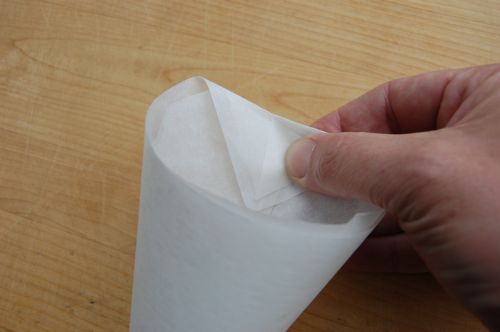
Now then all you need to do is fold the excess from the far end down to enclose the payload. There are formal methods for doing this, but frankly, I don’t care what they are. Any old folding or crinkling will do the job.
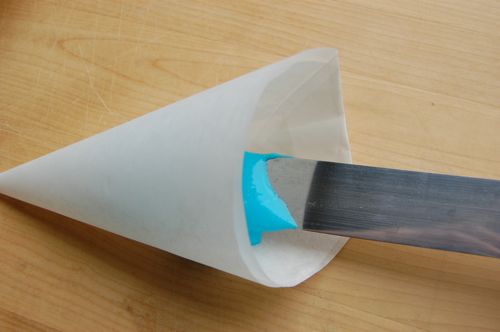
All you need to do now is cut an opening and apply a little pressure. Like so:
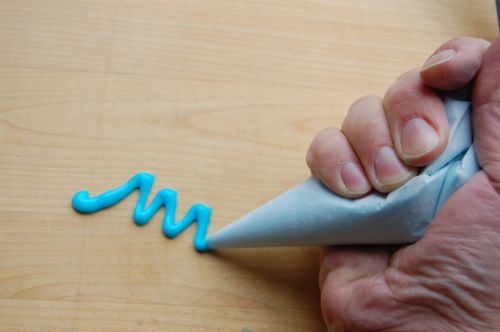
Kinda cool, yes? Yes.
I love this site. I’m making a cake for my mother we don’t own a pastry cone. But I don’t have any Parchment Papar, any other Ideas?
Tin foil or wax paper! 😉
– Joe
this post was great! i have never decorated a cake with anything than plain single-color frosting before. i used wax paper to make a cone and had a blast writing and drawing :).
thank you so much!
It really is easy once you have the right tool, isn’t it?
Glad these worked so well…and thanks for the note!
– Joe
i’ve seen a lot of demos with confusing pics like this, but this cleared up all my questions. i thought i’d write an appreciation. thank you!
^ ok i meant to say others’ are confusing me and this one seems to clear them all up
Haha…I totally got it the first time. But thanks for the clarification — and especially the comment. It’s very much appreciated!
Your friend,
– Joe
btw could you share any no-bake dessert ideas? for impoverished (lol) people like me who doesnt have ovens
Hey there OK!
Just check the “Desserts & Cookies” section in the menus on the left. There are all sorts of things there from chocolate mousse to floating islands, ice cream and tiramisu!
Let me know what you decide to make! Cheers,
– Joe
ive just read that floating island and it seems wicked! def must try lol fer the meantime i’ll just stalk around your blog
Stalk all you like, OK. I’ll be around should you have any questions!
– Joe