The Front-to-Back Burn
So then, having tried and tried and tried again to master this brick oven firing thing, I’ve gotten to a place where I’m mostly satisfied. There’s still plenty to learn, I’m certain of that, but at least now I’m in a zone where I can generate enough heat to get my Alan Scott-designed wood burning (“black”) oven hot enough to bake both bread and Neapolitan-style pizza. Here’s a window on how the firing process works.
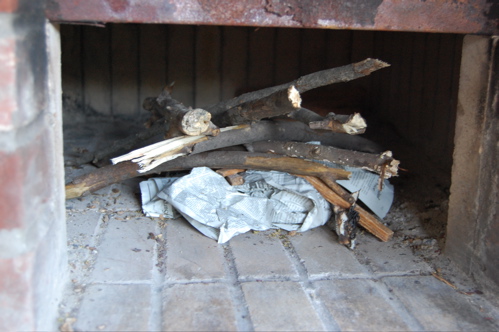
I start small, with a “warm-up” fire in the very front of the oven. For this I generally use pieces of fallen tree limbs that I find around the neighborhood. The stuff is old, dead, dry and will blaze up if you even look at it cross-eyed. I encourage it along with some crumpled newspaper and a few of those natural pine “fatwood” starters, which you can see tucked in there.
Here’s the fire at 15 seconds…
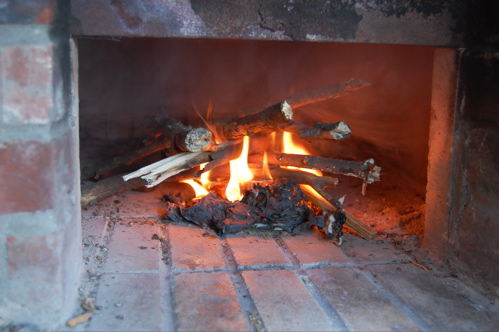
Then at five minutes with a little more dead wood added:
After about half an hour of this I’ve got a nice bed of charcoal built up and the front of the oven is fairly hot. Here you can see the fire is all in front. Look behind it and you can see there’s nothing but brick oven floor back there.
Now’s the time to “load” the oven as it were. Which is to say fill the center of the oven with small-diameter logs no wider than 3-4 inches. Why so narrow? Because you want as bright and hot a fire as you can manage, one that will pump heat into the masonry as fast as possible and not burn down to large, smoldering embers which allow that upper masonry heat to escape.
So then, being careful not to burn thyself, you want to begin inserting wood into the oven behind the warm-up fire, criss-crossing your logs on top of one another so the fire will be able to draw. Carefully stack about a dozen small logs up nearly to to the roof of the oven, but don’t stuff the chamber full.
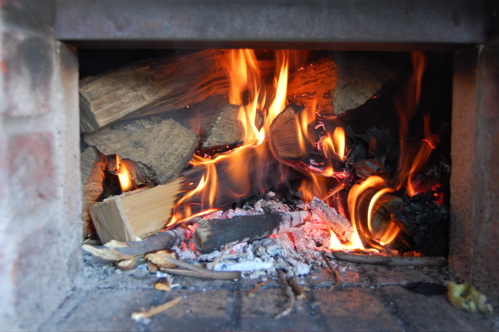
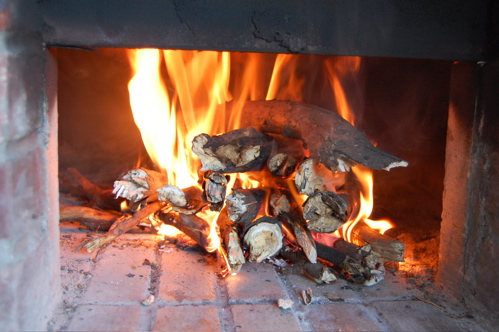
Before you know it a wall of flame will rise in the front of the oven and begin to steadily work its way back. Here’s my fire about half an hour after loading…
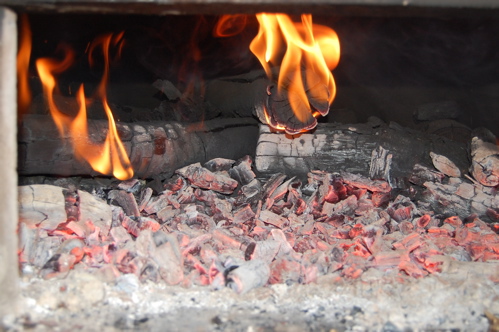
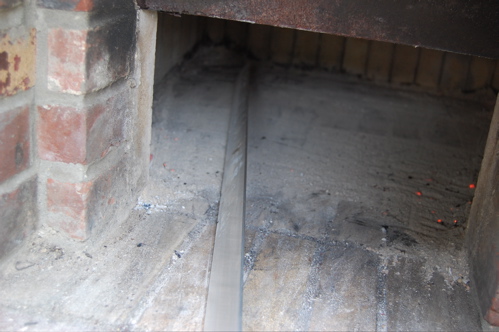
About an hour and a half into the firing and you can see the progress. The line on the ceiling between black soot and fully-heated white fire brick tells the story.

What’s happening here is that the fire is steadily consuming fuel, moving back and heating the masonry as it goes. The nice thing about the process is that the fire pretty much tends itself. A few pokes and prods might be needed early to make sure the logs catch all the way across, but after that you shouldn’t have to touch it until the burn is over.
And in fact you should make a point to refrain from adding any extra wood to the oven at this point. More wood in the front will use up all the oxygen coming into the oven, thus “choking” the fire in the back and ruining the burn.
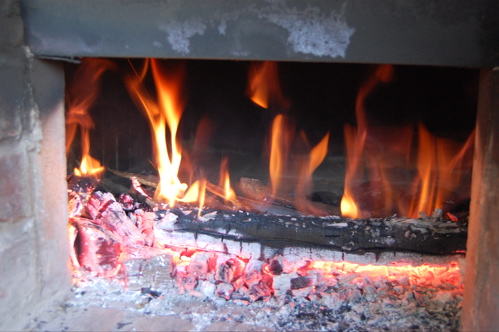
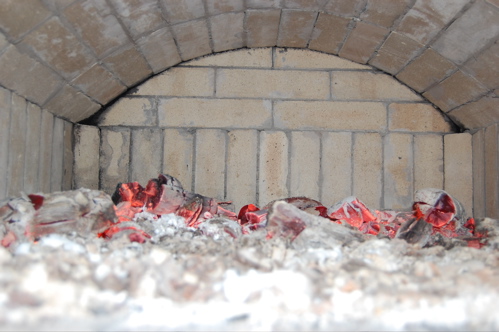
So then, about two hours later and you can see the fire is pretty much burned out and the brick is white, the soot from the “warm-up” fire having been completely burned away. One interesting thing you’ll notice is that as your fire gets hotter in your oven, the amount of smoke the fire creates will diminish, in the end to virtually nothing, as the massive and increasingly efficient burn consumes every last vestige of the wood.
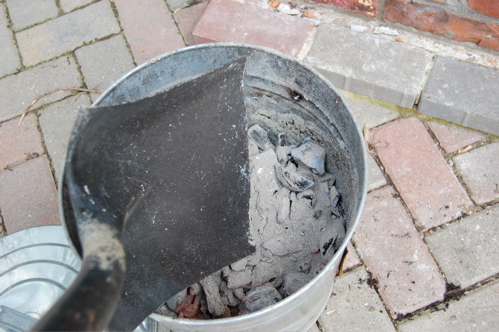
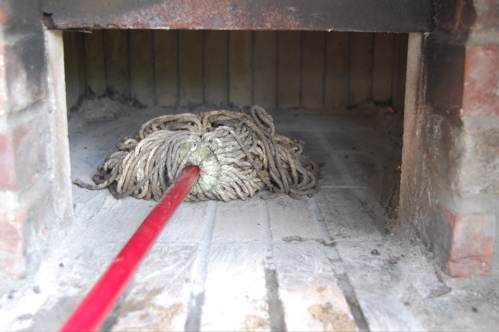
Now then, time to rake any remaining coals out over the floor of the oven and let them burn down as much as possible…about half an hour. At that point it’s time for “rake out”, which is to say, it’s time to scoop the embers and ash out of the oven with the sturdiest flat-ended shovel you’ve got. The trick to this — and I can’t emphasize it enough — is not to try it wearing open-toed shoes. I scoop whatever ash and embers are left into a metal pail.
Since there’s always something left behind that the shovel won’t pick up easily, I use a long aluminum bar ($18.99 at Home Depot) to scrape residual embers and ash to the sides…
…then use the shovel again to scoop up the piles. Once that’s done it’s time to mop. I use a simple plastic-handled rag mop, well moistened and wrung out. I’d prefer it had a wooden or metal handle, but this is all I could find at the hardware store. Once the floor is well swabbed I pour my blackened water over the coals in the bucket. It makes a soupy black mess, but better that than a flaming-hot metal bucket around if you ask me.
At this point it’s time to take temperature readings. I use one of those gun-like infrared thermometers, which are one of the miracles of the industrial age. If your burn went well, you should have a minimum wall temperature of 600 degrees Fahrenheit, which means your air temperature is 500, perfect for baguettes. Ideally it will be even hotter, more like 650 or 700, which will allow you to put the door on and let it sit for another half hour or so.
What will the extra wait time accomplish? Essentially, it will allow the heat in the masonry to even out over the entire baking enclosure, eliminating the “hot” and “cold” spots that even the best burn leaves behind. This extra step is of course a luxury. If you don’t have access to very hot-burning fuel, you may be lucky to reach even 600 after rake-out. That’s perfectly serviceable, but you’ll want to get your bread in and the door on promptly.
I should insert here that if my goal were Neapolitan pizza baking, I would not have scooped the oven out, but instead pushed my embers to the back of the oven and simply mopped the front half of the floor to make room for 10″-11″-inch pizzas. Neapolitan pizzas need an oven temperature of around 900 degrees Fahrenheit, and a ceiling temperature of around 1200 to bake properly (as you might expect it takes under a minute to bake a pizza this way). For that you need the embers right there in the oven, and more than that a small fire going. A small dry log placed on top of the ember heap will do the trick — but be careful…not only is the air temperature insanely hot, a dry log will burst into flames with a whoosh in maybe five seconds. Get yourself a long metal poker.
So that in a nutshell is it, and it’s really not very complicated. The trick, if there is one, is to be consistent about the fuel you use. Use the same wood (or mix of woods) and the same size of wood. This will allow you to judge, more or less, how much time your firing will take (and the temperature you’ll end up with) so you can match a bread rising schedule to it. That for me will be the next challenge, but I feel much better having this much of the process now figured out.
Thanks so much for this thorough, clear and concise description of firing an oven. I just took a wood-fired oven baking class and this sort of rounds out what I learned there. Good photos, too!
Thanks Judi! Very kind of you to say! I’ve been a pretty lax bread baker this year, you’ve inspired me to get back with the program!
Cheers and send pictures of your creations when you can!
– Joe