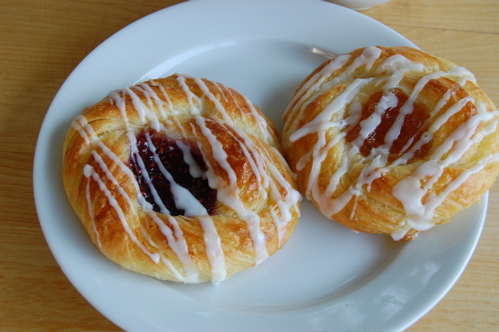
The Classic Sweet Roll
As ubiquitous as this style of Danish is, it’s one of the more complex to make. I learned to make them putting in an extra fold and layer of buttercream. That makes the end product both richer (of course) and flakier. If you’d rather not do that part (though it’s a nice way to use up any leftover buttercream you might have in the freezer) you don’t have to. The end result will still be amazing.
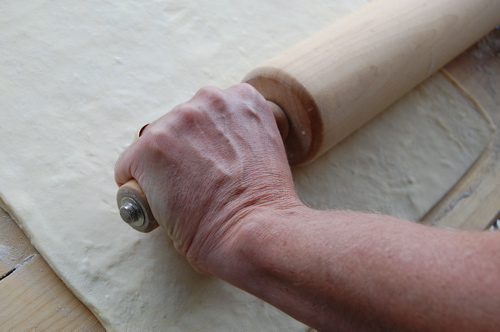
Begin by rolling about a pound and a half of Danish dough (find the recipe here) out into a square about 1/4-inch thick (the actual dimensions don’t really matter).
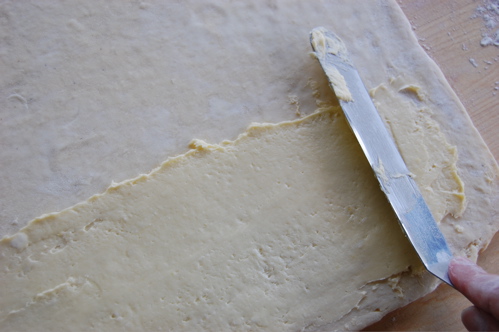
Trim up the sides a little to square it off, the spread a thin layer of vanilla buttercream frosting (I always make a point to stash leftover buttercream from other projects in the freezer) on the half of the pastry sheet closest to you.
Fold the top half down to enclosed the buttercream…
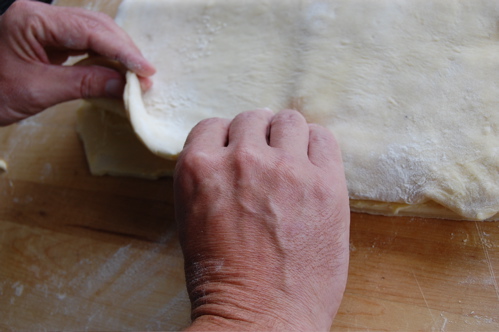
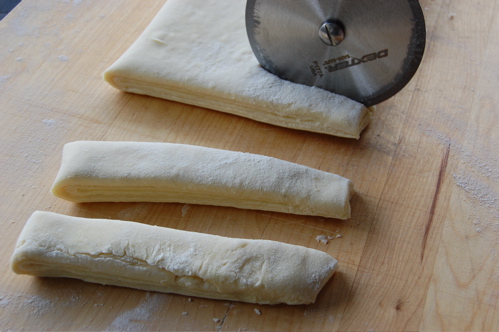
Then cut the dough into roughly 1/2-inch thick strips. (Actually, I should have rolled the dough out a little more first to make the strips longer, but I forgot. Oh, what my former pastry task master Fanuel would say!)
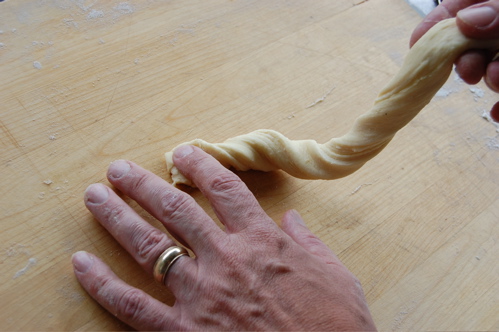
Now then, grasping the strip on each end, stretch the dough strip out, flipping it back and forth like you’re trying to dry the ink on a check.
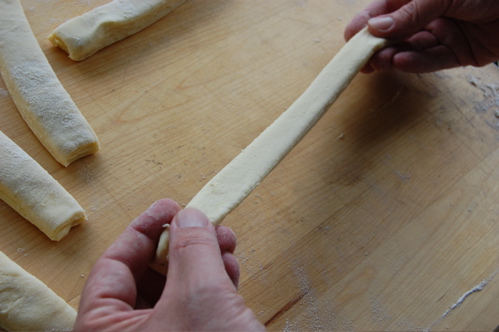
When it’s long enough (and ideally, this strip should be about half again as long…) press one end down onto the board with you index finger…
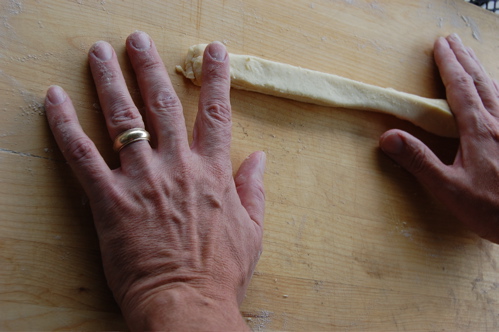
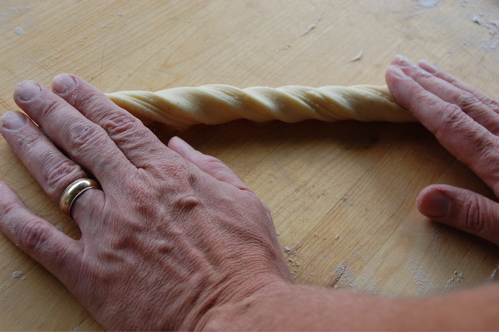
…then use the palm of the other hand to roll the strip toward you. What you get, as you see, is an attractive twist.
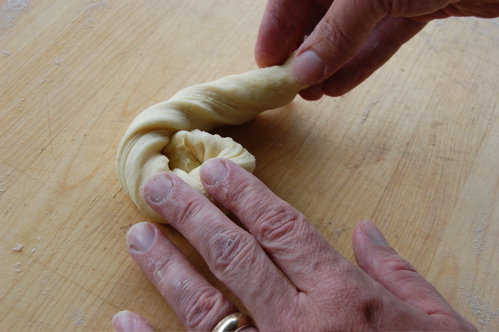
Now, still holding one end of the dough strip down, drape the strip down and around the center point in a curlicue.
Bring it around and around…
…tuck the last half inch underneath so the pastry doesn’t unravel in the oven…
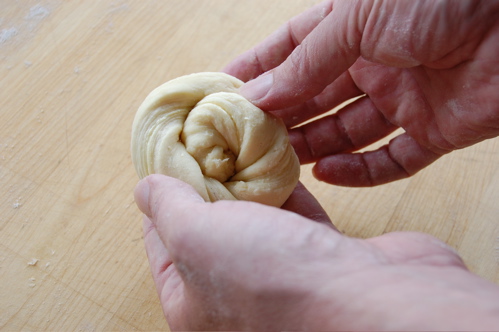
…and — ta da! You’re done. A nice little heap of clothes, as my former boss used to say. Again, a longer strip gives you more of a swirl…but heck, it’s close enough for blogging, am I right?

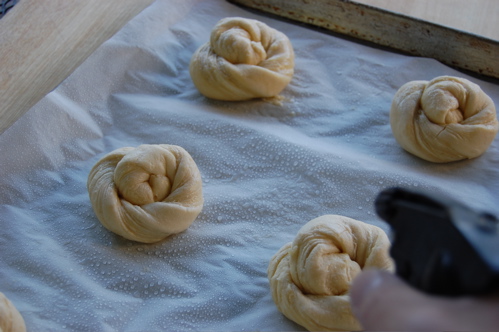
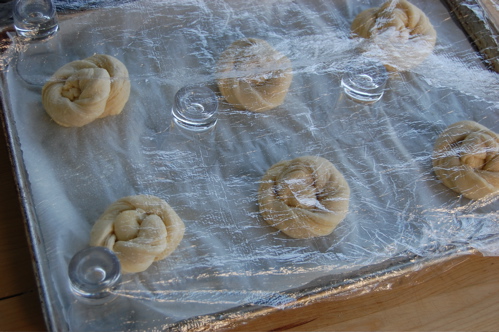
Put them on a parchment-lined sheet pan, six per sheet. At this point you can start proofing the pastries in anticipation of baking right away, or put them in the fridge overnight (you can even freeze them if you wish, for up to three months). If you don’t have a proof box, don’t worry about it. Just give them a spritz of water to keep the outer skin moist…
…then cover them with lightly oiled plastic wrap (or you can drape the plastic over upturned shot glasses to keep it from touching…which is what I like to do). You’ll want to give them a light spritz with water every 45 minutes or so to keep them supple.
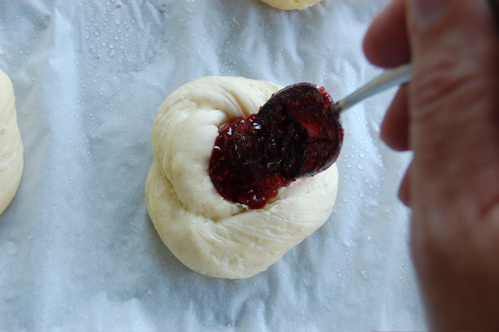
Once the Danishes have proofed and are soft and airy to the touch, about two hours at room temperature (closer to three hours if the pastries have been refrigerated) make a deep depression in the middle of the Danish with the back of a spoon and lay in about a tablespoon of any jam you like.
Brush with egg wash and bake in a preheated 375-degree oven for about fifteen minutes or until golden. After the Danishes have cooled on a wire rack, drizzle them with a simple powdered sugar and water “five finger” icing.

i have said many times that the perfect danish was found at the denmark section of epcot (disneyworld) and it was the perfect danish. done just right.
and now this, what you have created might be my next venture. what a perfect tutorial.
Thanks so much! Try it, you’ll like it!
What a FANTASTIC site you have!!!! I came across it by accident today. I cannot thank you enough for providing this for us to view. I have taken several professional baking classes and frequently am searching the web for new ideas and to review what I have simply forgotten. Words cannot express how much I appreciated the time and effort you have put into this for others to see. Thank you, thank you, thank you. You are indeed a talented, generous and giving person to share all that you have learned. Thanks again. Luba
I don’t think I deceiver all that credit, Luba, but I’m sure happy that the site will be so useful to you! Get in touch should you have any questions. I’m usually around! Cheers. – Joe
Thank you for having such a wonderful baking web site. I love to bake, and always have. I am a senior (grandma) that has been baking for 50 years, and never stop trying to learn something new. I like having a challenge. I have made Danish once before, but I was more concerned with getting it perfectly retangular with square corners, according to one of Peter Rhinehart’s books. I was exhausted by the time I was done, but the finished rolls were delicious. I found your site, and I wanted to try the smaller volume of dough that your recipe makes. I didn’t wear myself out on this recipe. I just finished up baking enough for DH and I to have with afternoon coffee. I had to sneak one for testing (QC) purposes, and they are wonderful. I brushed a very light glaze on them right after baking (made by boiling sugar, water and lemon slices) I put the rest of the shaped rolls in the freezer for later. (cooking for 2 here)
I do have one question:
Should I proof them overnight in the refrigerator when I get ready to bake them, or just take them out early and let them proof at room temperature?
Barb
Hi Barb! So glad the recipe is working well for you (and the DH). I love your glaze idea — I’ll use that if you don’t mind! 😉
As for the proofing, I generally shape Danishes, let them site in the refrigerator overnight for convenience sake, then take them out to proof for about an hour and a half before baking. I find that the reverse: proofing, then refrigerating, then baking immediately can lead to over-risen pastries. I find I get a higher rise and better texture if I just get up early.
Thanks for the great question, Barb!
– Joe
Joe, the glaze idea was shown in Peter Rhinehart’s “Artisan Breads Every Day”. He went to a lot more work than I do and actually had a recipe! I have learned that the older I get, the more shortcuts are necessary. Standing for long hours is no longer that much fun! LOL!
Mine tastes just as good and helps to seal the pastries and keep them fresher. The brush on glaze dries and gives the pastries a sheen. I think you will like it.
Great stuff, Barb. Thanks!
– Joe
I decided to support one of our boats Chief Petty Officers fundraiser by making Danishes and realized quickly that there are not many blogs or recipes out there that teach you both how to bake and that it’s okay to ‘crack a cold one’ while waiting on your pastries.
Your recipes are just the kind of pastries I love to bake. Thank you.
BTW I added about 1/2 teaspoon on vanilla extract to the danish dough. I think I like the taste a bit more.
Thanks Kimberly! What would baking be without beer, I ask you? Awfully darned dull is what.
Thanks for the kind words and the tip!
– Joe
While in Norway for a couple weeks several years ago I became quite enamored of a pastry called “wienerbrod” or Vienna-bread, the Norwegian name for Danish pastry apparently. The most common, and my favorite flavor had almond paste in it, and was topped with a pastry cream. I think your method of spreading filling in between the dough layers will be an excellent way to get the almond paste in, then I’ll put the pastry cream on top.
thanks!
And thanks to Deb at Smitten Kitchen for sending me over your way.
Let me know how it goes, Patryce! And thanks so much for visiting!
– Joe
Hi Joe
Ok I have tried the brioche pastry, made cinnamon rolls and that came out great, so now I am gonna try the Danish Pastry.
I wanna try the buttercream thingy just like you do, however I am not in the habbit of making, so unlike you I do not have any stash.
Question which one of your buttercream recipes would you suggest I use: American/French/Italian or Swiss..
Hm. Thought I replied to that. Sorry! Any buttercream will be just fine since it will disappear during baking, leaving only richness and sweetness behind. Whatever you like!
Hi Joe
Tried your recipe and lamination went great. Looked and smelled wonderful out of the oven.Lots of butter leaked during baking and it was flaky outside and uncooked inside. 375 for 25 min. What did I do wrong?
Once again thank you for your tutorial.
Finally got around to making Danish dough. Made a triple batch, froze two pieces then went to work on the third piece. Didn’t have nay buttercream sitting around and was prepared to make some then I spied the leftover cream cheese frosting in the fridge. Feeling a bit adventurous and well sort of lazy figure what the heck give it a try.
The end result was tasty but what a mess to get there! I guess I should has thought better about using that frosting because it was made for cinnamon rolls so it was a bit gooeyier than regular frosting. This fact made the roll/twist act a bit of a mess to do. ha!
Looking forward to trying other shapes and maybe even buttercream added in the other pieces soon.
🙂
H
Sounds good to me, Holly, I bet they were delicious!
Send me picture of the next batch!
– Joe
I love your site….and I LOVE this recipe. I swear, I’ve been dreaming of Danishes for about a month and can’t wait to try this! Thank you. 😀
Let me know how they go, Jody!
And thanks very much!
– Joe
Just wanted to update. They turned out awesome and didn’t take nearly as long as I thought they would. This was my first attempt at laminated dough of any kind. Great instructions and the pictures were really helpful too. This goes in my permanent collection. <3
Great news, Jody! Fabulous. I love hearing laminated dough success stories!
Cheers,
– Joe
I just have to make this.