Making Ze Rolled Fondant
This is ever-so-much quicker and easier than poured fondant. My only suggestion before you start is that you not wear any kind of dark-colored shirt or sweater, since lint has a way of finding its way into a pristine batch of fondant (there’s a reason pastry makers wear white, you know).
Starting with this recipe:
1 1/4-ounce package unflavored gelatin
1/4 cup cold water
1/2 cup glucose syrup
1 tablespoon glycerin
2 tablespoons shortening
1 teaspoon vanilla extract (or other flavoring)
8 cups sifted confectioners’ sugar
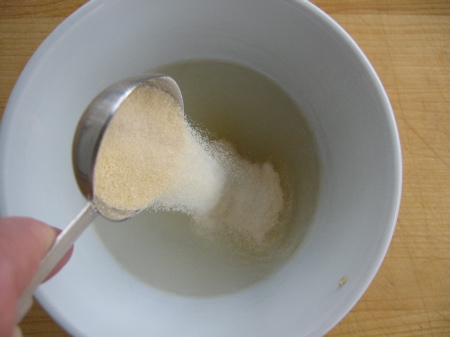
Begin by sprinkling your powdered gelatin onto your water…
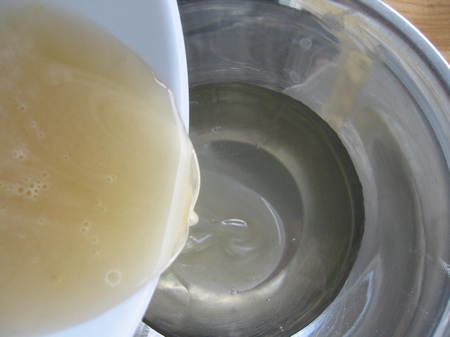
…let it sit for five minutes then heat it to melting over a double boiler (I just use a microwave…two shots of 15 or so seconds on high). Pour that into your glucose/glycerine mixture…
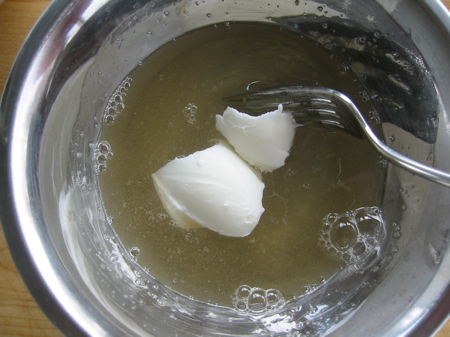
…add the shortening and stir until it’s melted. Give it an extra shot in the microwave if needed (only, you know, not in a metal bowl).
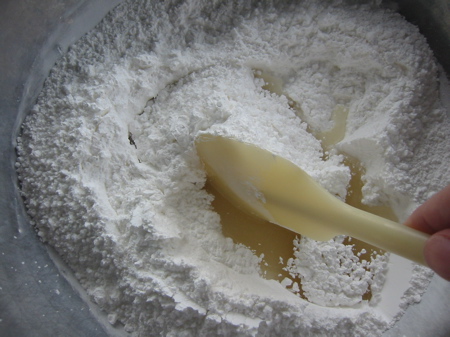
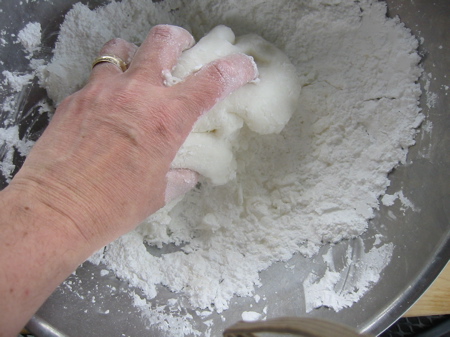
Pour that into a bowl that contains the powdered sugar and fold to combine. This will only take you so far of course.
To make your sugar “dough” you’ll need to get in there and knead it (you may oil your hands lightly if you wish). Keep kneading until all the sugar in the bowl has been incorporated. If the fondant isn’t taking it up add a little water drop by drop until it’s gone (conversely if the fondant is too loose add more sugar).
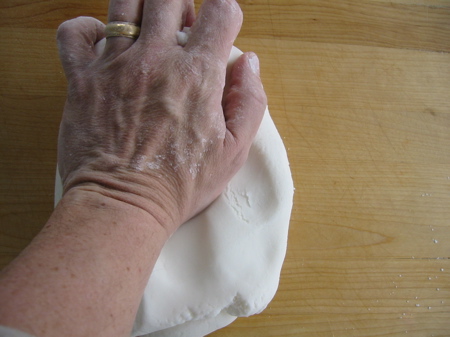
Then turn it out onto a board dusted with powdered sugar and knead it until it’s smooth and uniform.
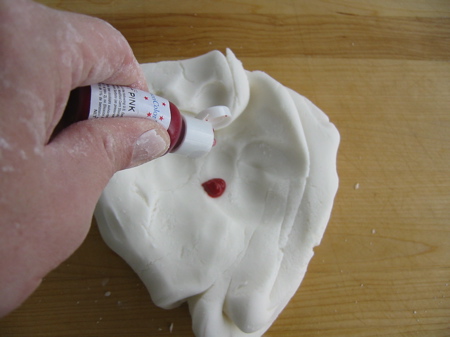
This is the point that you can add coloring to it if you’d like (some people do this in the mixing stage, me I like to knead it in since it gives you more control). Here I’m adding a little pink…
Then all you do is knead the fondant until the color starts to spread (you’ll get a little on your hands).
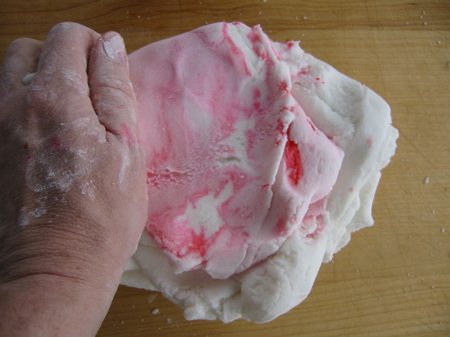
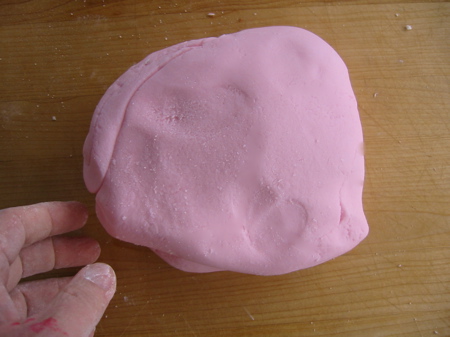
And in a few minutes it’s done. A batch of pink rolled fondant (my preferred shade, not my daughter’s) the perfect size for a 9-inch two-layer Easter cake.
Easy, wasn’t it? I suggest using it right away, though it technically can be stored for a few hours, wrapped very tightly in plastic. I recommend against it since even a little drying can create “scales” that are impossible to knead out.
Applying Ze Rolled Fondant
So we’ve got some rolled fondant and we’ve got a cake. Now all we need to do is put the two together. First thing is to roll the fondant out to the proper size. To determine that, add the width of the cake to the height of both sides put together. In this case that’s about seventeen inches, which will be what my circle of fondant will need to measure side-to-side.
Dust your rolling surface liberally with powdered sugar (a formica or corian countertop is probably ideal) and apply your rolling pin like so:
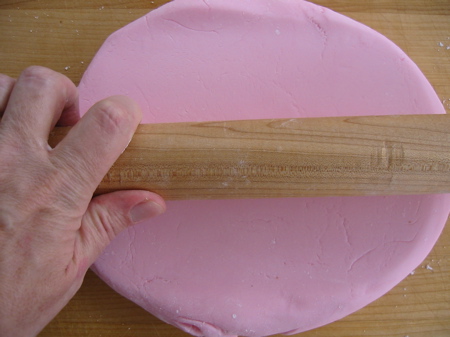
It’s important that you roll slowly and steadily, and that you constantly check to make sure your fondant circle isn’t sticking. You do that by jostling the fondant a bit to make sure it’s still capable of sliding back and forth. It gets harder the bigger the sheets gets, but it’s still important. Nothing is more frustrating that rolling out a perfectly smooth sheet of fondant, only to have it tear in half when you go to lift it. Of course if that happens it’s not the end of the world. You just sprinkle on a few drops of water (to compensate for any that may have evaporated), knead it back into a ball and try again.
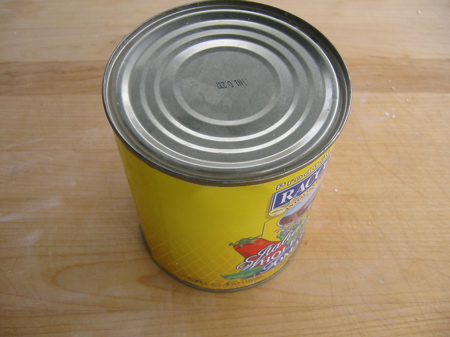
So then, once your sheet is the size you need, it’s time to employ the rolled fondant cake maker’s secret weapon: a can of tomatoes. Put it down on your work surface like so:
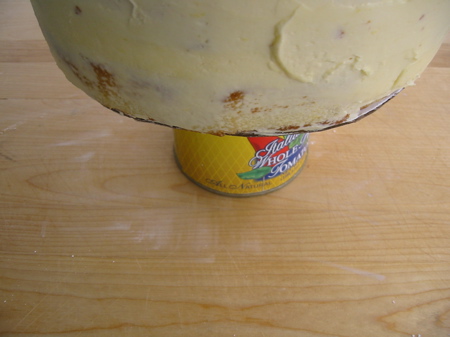
…then apply your cake, fresh from the refrigerator, right on top. Boom.
Then — gently — drape your sheet of fondant over everything.
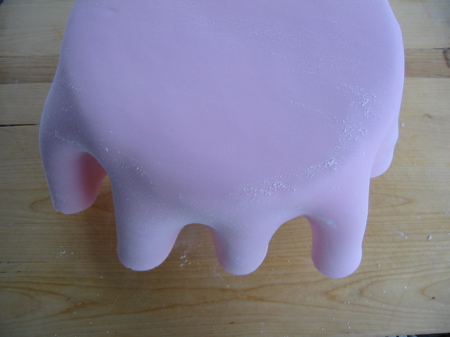
How this sheet of pink fondant came to look purple in this picture I don’t know. That’s natural light for you! Anyway, once the fondant is on start to smooth it down around the contours of the cake with your palms. Tug a little here, stretch a little there but be very careful not to tear it (since you’re past the point of no return now). Below you can see I’ve got the fondant mostly smooth on this side, but for a small crease where I had to fold the fondant over onto itself:
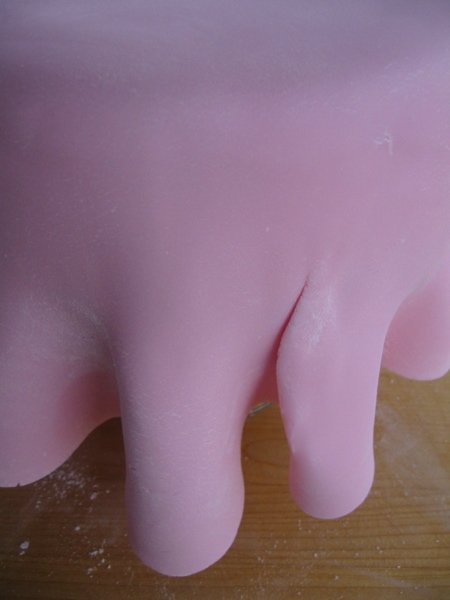
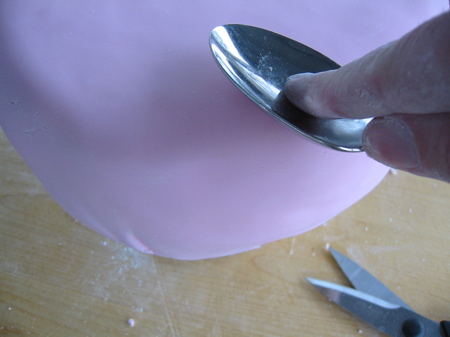
These are unavoidable and part of every rolled fondant cake. All you can really do about them is to do your best to limit their size and length (again a little tugging and stretching) and then decorate over whatever is left (you’d be surprised at how easy that is). Once the fondant is on as smoothly as you can reasonably get it, get out the kitchen shears and trim off the excess, keeping the cardboard cake circle covered.

If it’s a little rough that’s OK, the bottom edge is going to get covered by royal icing anyway. The last step is to go over the cake to smooth out any last bumps and any creases. You can buy specially-made plastic smoothers to do this job. Me, I find the back of a spoon works just dandy.
So then, now you decorate, only I didn’t have any time! My Easter Sunday was such that by the time my fondant was on, I had literally ten minutes to put on any final touches before company arrived. The below result is what you’d expect from that scenario…my royal icing “dots” became spikes and were uneven to boot. Jackie Kennedy meets the Dead Kennedys (plus this photo came out dark….grrr!). Oh well, that’s a holiday.
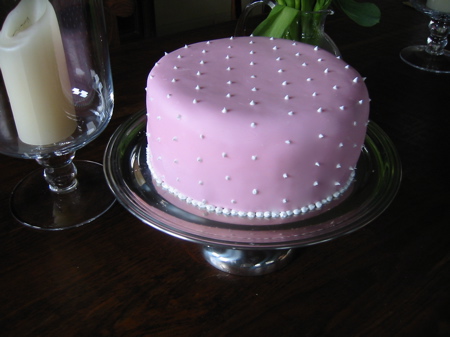
However I must say the rolled fondant I made tasted much, much better than I remembered. I still didn’t eat very much of it, but what I did eat was very pleasant indeed.
I absolutely love the look of fondant, but really dislike the taste (maybe a bit of a texture issue too.) Are there any alternatives that can give me the smooth look of fondant, but with a better taste and lighter texture? Perhaps some kind of thick glaze?
Most people who don’t like rolled fondant tend to like the homemade version, so I’d encourage you to try it and see. Otherwise a thick coating of warm poured fondant that’s not diluted with syrup may get you where you want to go, provided you’re quick about spreading it (it sets up pretty fast).
I tried your version, and you were right. Much better than store-bought. Since I needed to use solid shortening anyway (which kinda grosses me out), I used butter-flavore crisco.
Thanks!
VERY glad it worked so well, Laura. Neat idea on the Cisco! Thanks for sending me the note. – Joe
I love you so much for posting this! I kind of hobby-wandered into cake decorating and since then I have made more cakes for family events than I can easily recall (sitting next to one of them right now) and this recipe is so easy to understand, I use it all the time. Thank you so much!
Hahaha, I’m a different Laura than the previous commenter. That’s pretty weird, a growing army of cake Laura’s.
Hey, I’ll take all the Laura’s I can get! Welcome!
– Joe
My pleasure, Laura! Send me some pictures sometime!
– Joe
Can we use same amount of butter instead of the shortening?
Yes, though there’s always a risk of rancidity with butter if the fondant sits too long. So long as you use it within a couple of days all should be well!
Cheers,
– Joe
Can this be made without gelatin? Or is there a different version for vegan fondant? What do commercial fondants use as they are vegan? Sorry to be bombarding with so many questions!
Hello Rekha!
That is indeed a lot of questions! 😉 I’m not sure I can answer them all. You can indeed make vegan fondant. Most versions use shortening and glucose (or corn syrup) as a replacement for the gelatin. Here’s one that looks pretty good: http://www.yummly.com/recipe/Rolled-Buttercream-Fondant-Allrecipes?columns=3&position=1%2F40
As far as commercial fondant is concerned I honestly don’t know the answer. You’d have to check the ingredient labels or ask the baker!
Cheers and best of luck!
– Joe