How to Make Pugliese Bread
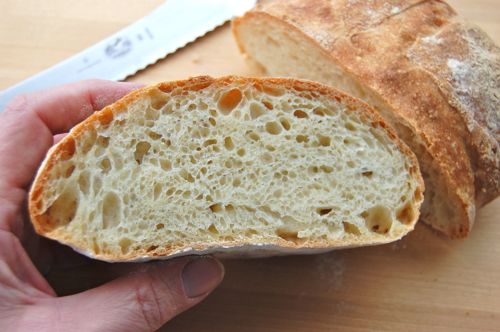
I love this bread. Such a nice, glossy, slightly golden interior and spongy texture. Great for dipping in olive oil, and let’s not get started about sandwiches.
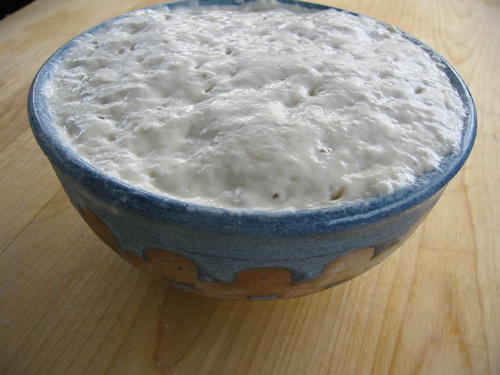
Did I say get started? Then let’s. Your refrigerated starter should be bubbly, about like so (fancy crockery bowl not required):
Put it into the bowl of your mixer (it’ll deflate totally):
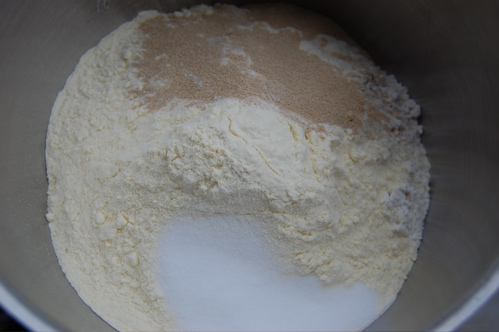
Then add your dry ingredients on top (note I’m making eight loaves’ worth here, so your quantities will be different, though the overall look and feel of the dough will be the same).
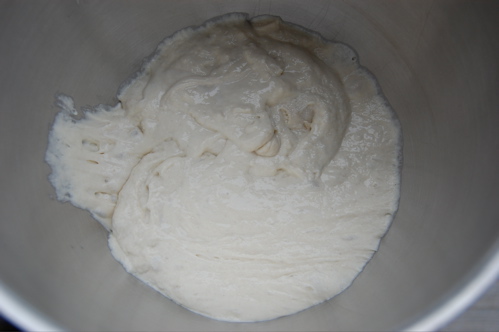
Mix with the paddle for two minutes to moisten, then apply the dough hook for five minutes. The finished product should look like this:
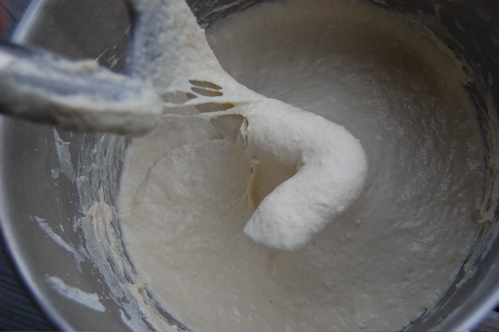
Wet and stretchy, no? That’s a good thing. Transfer to a bowl and let sit for half an hour. Then give it a stretch or two to spread the yeast around.
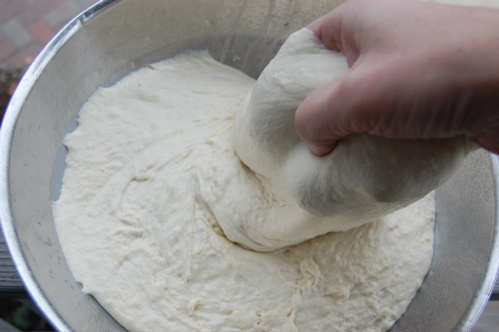
Wait another half hour and give it another stretch.

Then another half hour and one more stretch.
Is it sticky, messy work?
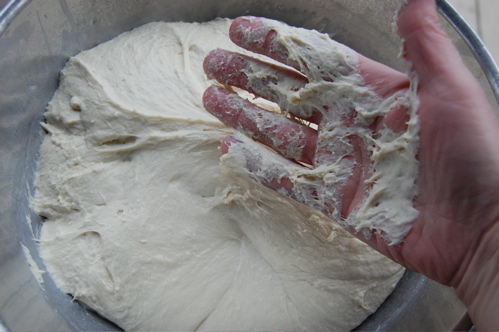
It is.
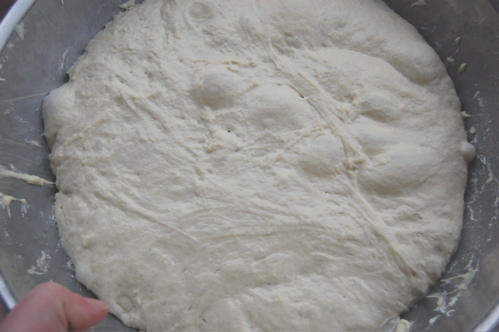
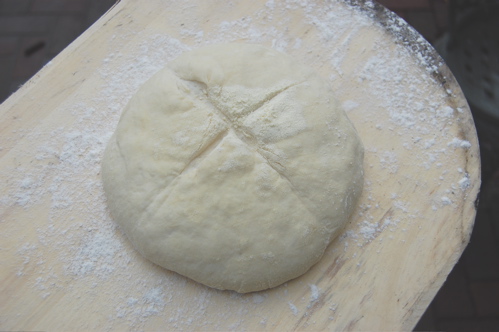
So then, once the stretching is all done, let the dough rise for almost two hours, until it triples in volume and looks like this (this is half my dough, the rest is in another bowl that looks just like this…it didn’t seem to warrant another photo):
Turn the dough out onto a VERY well-floured board (durum, if you’re using it). Then cut it into 13-ounces pieces with a bench scraper or knife.

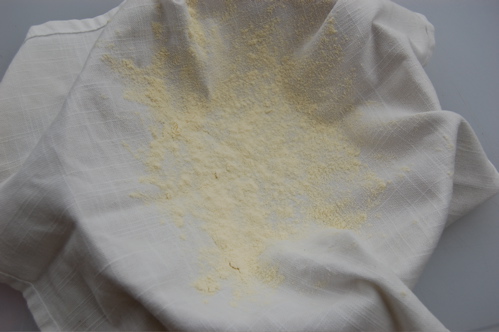
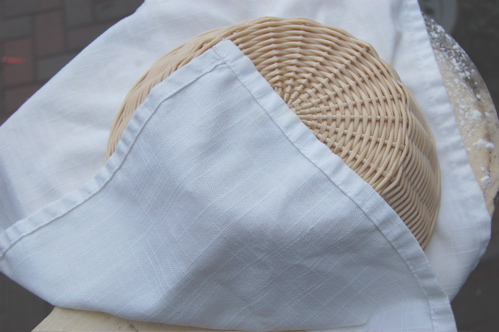
Now then, fetching the closest available small basket, bowl or colander, line it with a towel or napkin and sprinkle with more flour (durum, preferably)
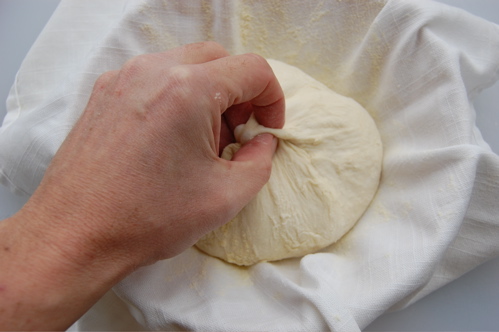
Place your lump of dough in it, bringing the cut sides up to the top of the ball and pinching them closed. This is all the shaping you’ll need to do for this very slack dough.
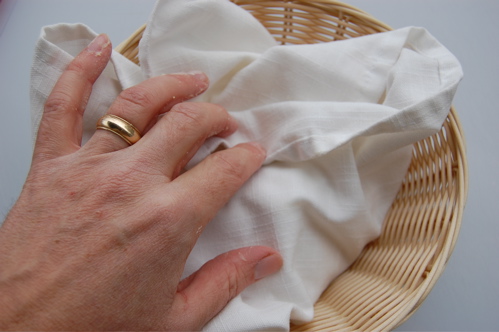
Sprinkle with more flour, fold the corners of the cloth over to cover and let sit for 1 1/4 hours or so until the loaves are very poofy.
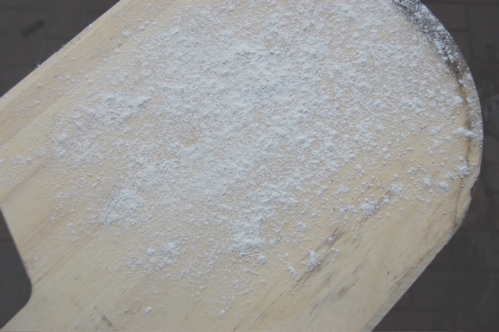
With your oven up to blazing temperature, dust your peel with flour.
Turn your dough out onto it…
…and slash the tops as best you can with a razor blade or sharp knife. Dough this wet doesn’t slash too well, but if you can manage it, the loaves will come out prettier.
Insert into your oven and bake for 20-25 minutes.
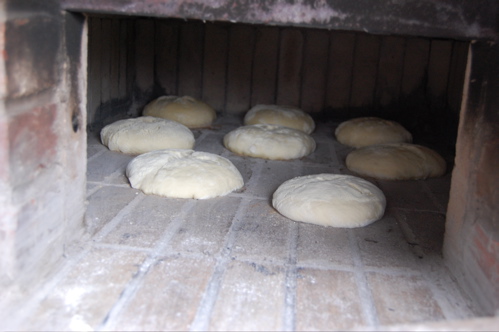
I know, you probably don’t have one of these. However when I get back next week I’ll show you how to prepare your own oven to be more like a big, brick hearth. Until then, have a Merry Christmas all you baking fanatics!
looks great- thanks for the detailed instructions- I am about to start preparng it now;)
Have fun and let me know how it goes!
– Joe
Thanks for the redirect and heading me back to one of my favorite breads too. As I was scrolling thru the photos, I was wondering how you went from putting the dough on the peel ( with the napkin under it) to having no napkin and a well floured peel in the next pic. Baker’s slight of hand?
Thanks
Ha! Great question. It really looks that way, doesn’t it? Actually the ball of dough is touching the board underneath there, the edges of the napkin that were wrapped around it are what are sticking out. Does that make sense?
– Joe
got it, I was hoping it was a magic trick I could use.
Yeah I need some of those myself. I pulled a quarter out of my younger daughter’s ear last week on a lark and suddenly I’m David Copperfield. I’m gonna need to step it up!
– Joe
Thanks Joe~ I loved the pictures and detailed instructions. I will try this. Thanks for sharing your expertise!
My pleasure, Patti! Please give me a full report!
– Joe
This recipe and photo illustrations are the absolute best. We always loved pugliese bread, and longed to make it for ourselves.
When I found your recipe I could not wait to try it. I have made it thousands of times over the past few years, usually 7-8 loaves at a time.
It really is a sticky mess, but such a wonderful process. I found that I’ve had to add a bit more flour at times to get the dough just right, but the loaves are a huge hit with family and friends! In fact…I have a big batch rising as I type.
Thanks again for sharing your Pugliese Wisdom!
My pleasure, Ran!
It’s one of my go-to breads as well. So glad you’re getting so much use out of it!
Cheers,
– Joe
Hi Joe,
I have “the bread bible” and have made the pugliese. Love it. I found your site because I was looking for a quicker way to make it. In your pictures (lovely) it looks like you stretch the dough 3 times in the bowl. Do you? This could save time.
Also, after my biga sat for two days in my pantry (50 – 60F), it smelled really good like a mild sourdough. Is it possible to start a sourdough with a biga by feeding it?
Thanks for your site, I like it.
Robin
Hi Robin!
Yes, I do leave the dough in the bowl when I stretch it. I wouldn’t have the patience for it otherwise. It works great.
As for growing a starter from a biga, yes you can do that. It’s an unconventional way to begin a starter, but perfectly legitimate. Like any starter it will develop more individual character the longer you keep it going.
Cheers and thanks for the questions!
– Joe
Try dusting the loaves lightly with flour right before you score them it make for a smoother cut.
Thanks, Christopher!
– Joe
Making my first Pug bread. Also using Bread Bible for recipe. It is a long one. Came across your site (bookmarked) and you tube vids for visuals. This has helped build my confidence. The oven is on. Using a baking stone.
So, my Pug was tastes and smells sublime. The crust has a slight crunch, which I didn’t expect , but I liked it. It looks just like a pug bread only it is a fraction of the size it’s supposed to be. Any idea where I went wrong? Thank you, again.
Hey Laura!
You mean it collapsed in the oven? Or the loaf is simply smaller than you expected? Shed a little more light if you please!
Cheers,
– Joe
Hi Joe,
I mean the boule was small just before bake. The dough was not tripled in size by 3rd stretching. Finished product should have been 6.5 x 3in high loaf. Mine was a 1.5 x 2.5 in loaf.
Huh. That weird. Was the crumb nice and open when it was done baking?
– Joe
It may not have had enough holes in it.
Hm. How did it rise before you shaped it? Well enough?
– Joe
Today, I am using a well fed biga. I will use your recipe and see how it goes. Thank you so very much for your help. BTW your web site is a pleasure to navigate. 🙂
Joe,
Hmmmm. Same thing this bake; small loaf. My dough is failing to rise enough for a standard size loaf. I have worked all day on this bread and I’m a little deflated.
It failed to rise much after I shaped it. I will keep trying, though. Used Bread Bible recipe. Do not have Banneton. Used Durham Semolina to dust during each folding. The Biga looked and smelled perfect…whatever ‘perfect’ means to a baker.
Hey Laura,
Sorry to hear about he continuing problems. You’re using a fine grind of durum flour, yes? If it’s the grainy sort of semolina that could be what’s undermining your rise. Could that be the problem do you think?
– Joe
Hey Joe
Yes.
The durham flour is labeled Semolina. It is the only Durham flour I can find outside of online ordering. Also, our water filtration system desperately needs a filter change. Maybe the chlorine in the water? I will switch to bottled Spring water and look for Durham flour online.
I am far from giving up.
Hey Laura!
Is it grainy or powdery? That’s the real question. And that’s a good point about the water, though if the preferment was nice and bubbly I don’t think chlorine is the problem. It wouldn’t have allowed the yeast to thrive in the starter, then kill them off in the proofing step. What brand of durum did you use? Maybe I can look it up since that seems like the most likely source of the problem to me…at least at this point.
– Joe
…my Whole Foods @ Union Square does not carry your bread any longer where can i buy it i live on 19th &2nd ave
Hello Hal!
I wish I could tell you I had an answer, but I’m just a blogger, not a retail baker. You’re making me miss New York however. Have a black and white for me!
– Joe
Happy Holidays Joe!
I’ve got a nice batch of Meyer lemons that need to juiced. I was looking around for a recipe for lemon pugliese bread, and I came across your site and your demonstration for making pugliese. I then looked at your lemon tea bread demonstration and recipe. Both or your demonstrations you use a stand mixer, for the bread with a hook and paddle for the tea bread. Not due to lack of desire, but due to limited space, I don’t have a stand mixer. I have a funky little hand mixer that I use for cakes (creaming butter, batters, …). Over Christmas, I made a fennel, orange-scented challah recipe that I found in the NY Times. It too called for making the bread with a hook and then turning it out onto a board for kneading. I just stirred in all the ingredients as best I could, and then turned it out for kneading and it came out fine (I think). My question: If I’m not using a hook to initially build the bread, especially with a bread like the pugliese, is there something I should be attentive to or do differently? Just curious. Thanks for your time–and this is a great site!