Peach Pie

The same basic rules for peach pie apply to all double-crust fruit pies. For double-crust pies are made by a slightly different method than open-faced pies. Unlike open-faced pies, double-crust pie crusts are not “blind”-baked (i.e. partially baked without the filling inside). Thus extra measures have to be taken to prevent the bottom crust from becoming soggy. The filling is treated a bit differently vis-à-vis an open-faced pie, and it’s baked lower in the oven at a higher temperature.
The thing that prevents so many talented bakers and cooks from attempting homemade pie is fear of crust. Rolling crust, moving crust, shaping crust…it terrifies people. This comes, I believe, from too many bad experiences working with ultra-dry dough that crumbles at the merest touch. What aspiring pie makers need to know is that a dough need not be that dry. Recipe writers, though they try, have no way of knowing if, say, the flour you’re working with is especially dry (oh yes my friends, sacks of flour can have different moisture contents). Thus you should use your own judgment when making your dough. If it seems just horribly crumbly after you knead it, add another teaspoon or two of water. The idea is to give it just enough to keep it together. Then, after a nice long rest in the fridge, the flour granules should be hydrated enough that it rolls out smoothly.
Another misconception most pie bakers have is that a dough must be rock-hard, right out of the fridge when you start to roll it. Nonsense. A few minutes at room temperature or a little patting between the palms to loosen it up is fine. You just don’t want it warm and greasy.
I realize of course that these reassurances still won’t be enough for a lot of folks, especially when it comes to picking the dough up and shaping the crust (they fear they need one of those silly giant pie spatulas). Which is why I decided to demonstrate crust rolling using a fool-proof method: plastic wrap. Seeing how easy this is, you’ll probably decide you don’t need to the reassurance of wrap the next time, but we all need a little security blanket every so often, yes?
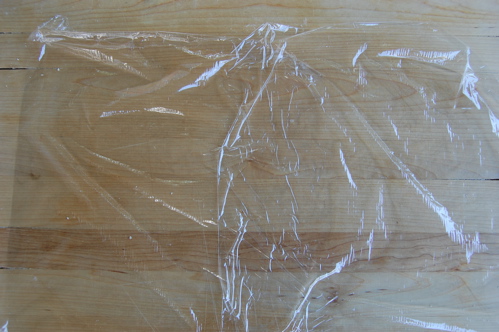
So then, start by laying down two sheets of overlapped plastic wrap on your cutting board like so:
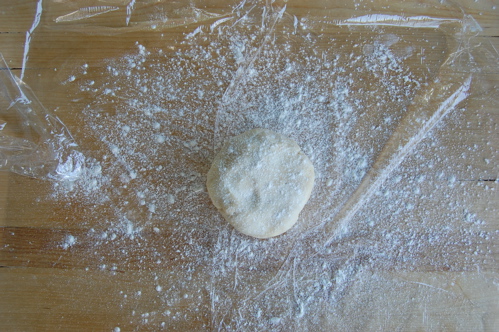
Flour it well, then put down your ball of dough (half the original ball…remember this is a two-crust pie), then dust again with flour. You’ll want to use a bit more than I’m showing here to prevent sticking…but I wanted you to be able to see what I was doing.
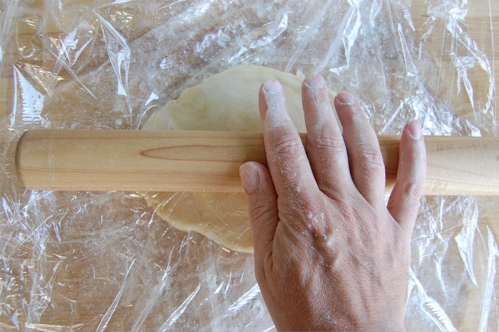
Now, apply another double-wide, overlapped sheet of wrap on top, and roll it a little to get warmed up:
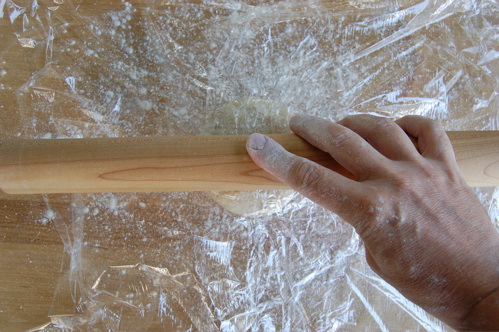
Here’s another point of anxiety that’s common: how can I be sure to roll a perfectly round crust? Simple. Roll it a little in one direction…
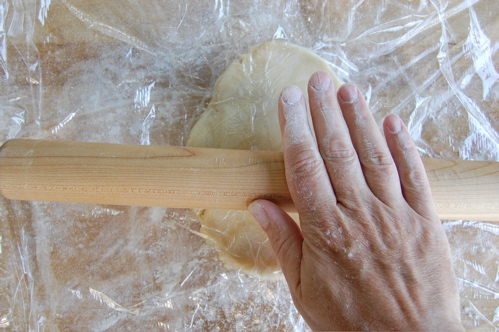
Then turn the crust (or the board), and roll it in the other direction.
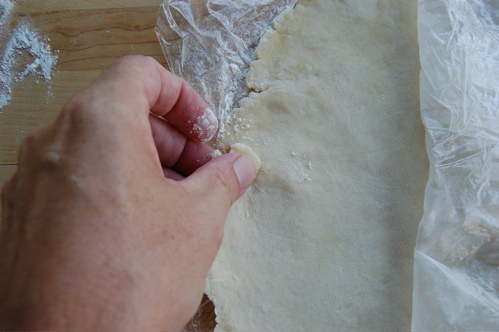
Getting some tears? No problem. Just moisten your thumb a little bit…
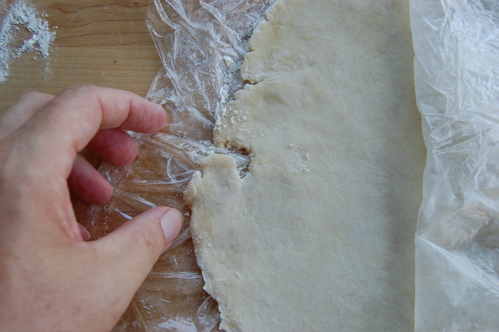
…and stick’em back together.
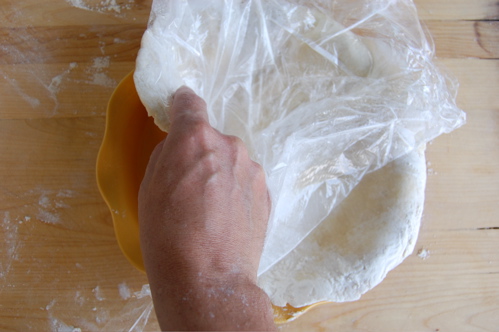
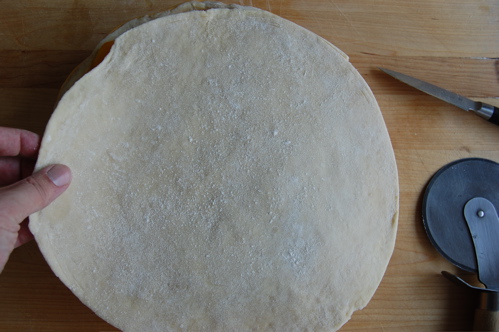
Is the crust sticking to the wrap? Then just peel back the plastic and add more flour. Four or five minutes later you should have a nice round piece of dough. Now just peel off the top layer of plastic…
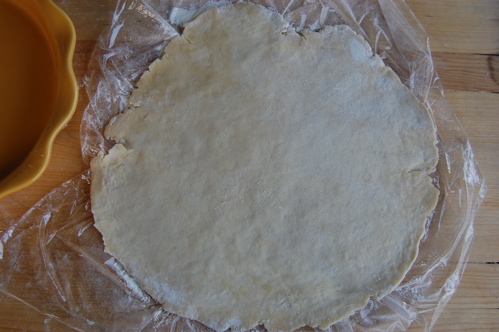
…and flip the sucker onto the pie plate.
Trim off the excess dough and you should have something like this:
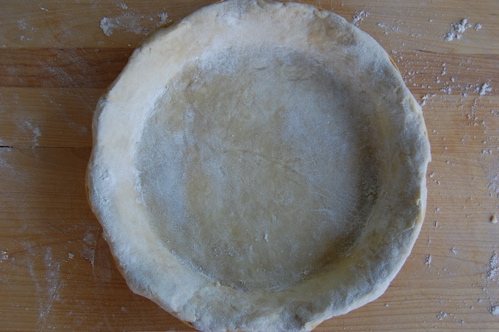
Put a sheet of plastic wrap over it and put it in the fridge while you roll out the other piece for the top crust. Once that’s done put the top crust, plastic and all, into the fridge as well. Let both pieces rest in the fridge for a few minutes while you prepare your filling.
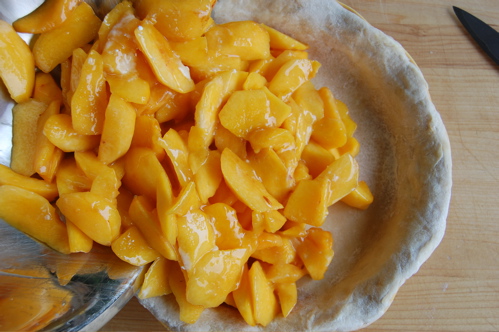
In this case my filling is peach. I combined six cups of sliced peaches with four ounces of sugar and a pinch of salt in a bowl. I sprinkled on four teaspoons of corn starch and a half teaspoon of almond extract (trust me, it’s a great addition), and stirred until I couldn’t seen the corn starch anymore. Then, I poured it into the shell.
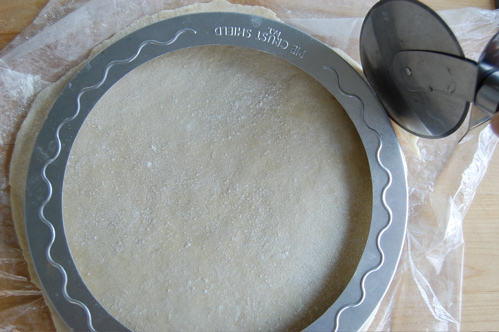
That done, it’s time to cut out the top crust. I use a pie crust shield as a template. Like so:
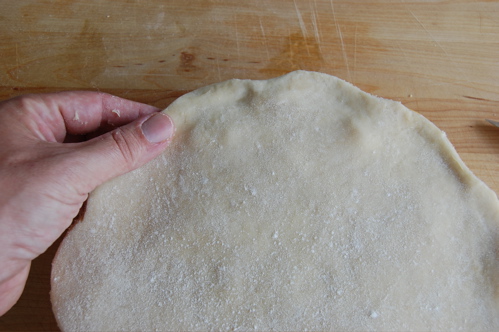
Moisten your index finger and wet the edge of the bottom crust (this will act like an adhesive, sealing the two crusts together). The just flop on the top crust:
Here you have two options. You can jump straight in to crimping, or you can tuck the excess top crust down under the edge of the bottom crust first. The first method is easier (maybe better for a first-timer), the second yields a more attractive border. Either way, give the crust a good, firm squeeze to seal it:
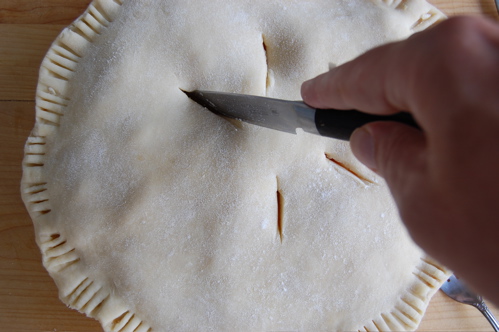
I like a good ol’ rustic fork crimping, but do whatever you wish.

Cut a few steam vents in the top and you’re done.
Let the pie rest for a minimum of half an hour more. Yes, I said more resting — superior pie takes time! This will further relax any gluten and keep the pie from shrinking up in the oven. Set your hot box to 425 and put a pizza stone directly on the floor of the oven.
Once the oven is heated and the pie relaxed, put on your pie crust shield (if you like) and set the pie down right on the stone. The idea here is to quickly cook the bottom crust so it won’t absorb any excess moisture. Bake it for 30 minutes, then move the pie to a lower rack for a further 10-20 minutes to finish the bake. The pie is done when the crust is golden and you can see thick bubbles of filling bubbling up through the steam vents.
You just blew my mind. I guess I always thought the drier the dough, the flakier the outcome? Which I now realize I had no solid evidence to support… But it seemed to make sense in my amateur baker brain and led to many a botched and torn pie. I recall one specific pie I deemed “the quilt pie” because I had “patched” it so many times…The horror.
But Thank you immensely for the tips and thorough instruction! I will no longer fear the pie dough.
Great new, Virginia! I can’t wait to hear how your next pie goes. Send pictures if you can!
– Joe
Joe! Just a question do you have any recommendations on baking this type of pie in a convention oven without a pizza stone??
Thanks!
Hey Kinda!
You definitely don’t need a pizza stone. And a conventional oven is fine.
What do you do with the boiled-down peach syrup? And are your peaches peeled?
Oh crikey! Did I forget to put that in? So sorry, you pour it over the fruit after you put the fruit into the pie shell. Sorry Allison!
– Joe
…People are scared of rolling pastry? Rolling pastry is FUN!
Though, My own suggestion would be: don’t roll out on a board. Coat your worksurface in clingfilm and flour it, that way you can make the pastry as large as you like, transforming the entire worksurface into your board – then you can just roll it up and throw it away once you’re done, taking away all the mess.
Nice trick with the colander, though. It hadn’t occured to me. 😉
Thanks Douglas! I appreciate both the complement and the tips!
– Joe
Hi Joe!
Thanks so much for all the help with this! Pie is a lot less scary now. However, my top crust always seems too rigid when I put it on top of the pie and it breaks apart. Should I just leave it out for a bit before putting it on top, or is there a problem with my technique?
Hi Ruth! So I gather it’s very cold – just out of the fridge – when it breaks? Then yes, just let it warm up until it’s flexible. Put it on, crimp it, the rest the whole thing again.
Thanks for the question!
– Joe
Doing myself a nice apple pie, thanks for the tips – especially the boiling down of the juice to a syrup. That’s a good one!
I can’t believe you didn’t have a money shot for us of the finished product, bubbling goodness 😉
cheers
Chris from DU
Yeah, this dates back to before I was doing a lot of photo tutorials…back then I relied solely on my sparkling wit to attract readers, so of course I got about five of them a week. Later I learned how many words a single picture was good for…gave me the boost I needed!
Thanks for the update and I’m glad the pie worked so well for you!
– J
Here are my tips for sucessful pie crust: Place your shortening and flour, salt, in the freezer before you cut in the shortening. An hour or so, even overnight, the crisco will not freeze. Then, be sure to use the amount of full amount of water when you toss the water with the flour/shortening mix. Gather all together, into a disc. Then leave the disc out of the fridge, to come to room temp. Use a pastry cloth with a cloth on the roller. My pie crust always comes out thin and flaky with this method. I always use the recipe from an old Fanny Farmer cookbook.
Many thanks, Barbara! It makes perfect sense. I greatly appreciate you sharing your secrets with us!
– Joe
Hi Joe,
Best baking website ever. Thank you very much.
I was wondering if you changed the link to the shortcrust pastry in this post? I baked a cherry pie last week to it, this week it is gone (you forced me to try the perfect pie crust recipe instead).
At least it was perfect! 😉
Sorry about that, Clayton. I fixed the problem just now. Just so you know, you can find all my components, including the various pie crusts, under the “pastry components” menu on the left. Cheers and way to go on the pies!
– Joe