Bun Rolling 101
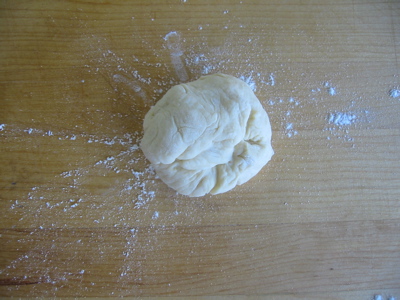
It’s my opinion that if only a few people understood how easy it really was to roll a 2-ounce piece of dough, we’d have far fewer inferior buns in this country. Yet bun rolling and shaping continues to intimidate people. Well brothers and sisters, let me tell you I’m here to put an end to all that. Follow me and you’ll never hesitate to make your own rolls and buns again. First, lightly — and I mean lightly — flour your board and put down your dough piece.
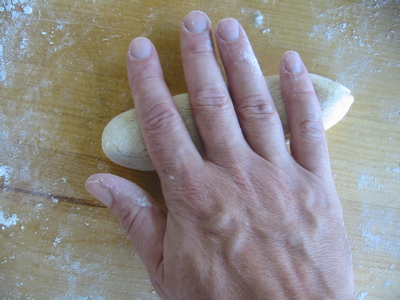
The important thing to remember is that dough rolling is not like forming a ball of, say, play dough. You’ll be using a lot less pressure, and much less of the surface of your hand. In fact it’s your work board that will be doing most of the work. So, bring your hand down over the dough like so:
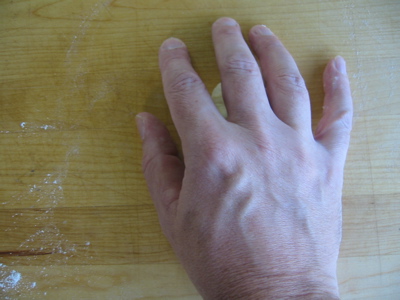
Notice that my hand is essentially working like a cage. My fingers are curved, with my fingertips on the board. My palm is barely touching the dough:
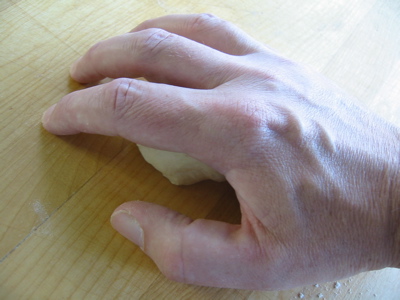
I shape the roll by simply moving my hand in a fairly quick, circular motion. Notice I’m not really pressing on the dough, as much as I am guiding its path with my thumb, pinky, and the base of my fingers.
Above you can see the slightly tacky consistency of the dough as it adheres a little to the board. It’s this tackiness that’s responsible for stretching the surface of the dough ball downward, creating a smooth and even skin.

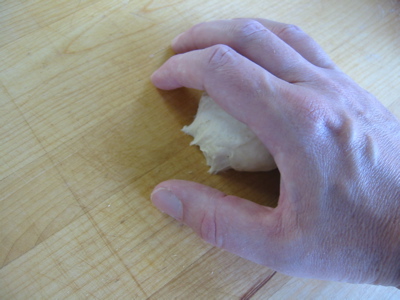
Round and round. As I mentioned, getting the right amount of flour down on the board is crucial to the whole rolling process. Too much and the ball will just skate along under your hand. Too little and it’ll stick. From these pictures you can’t even tell that there’s any flour there. Trust me though, there is. A few rotations and I’m done:

A little uneven and dimply still, but then it’s a very wet dough with big gas bubbles.
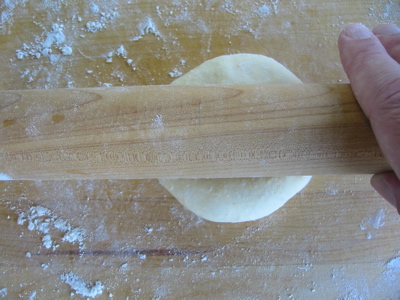
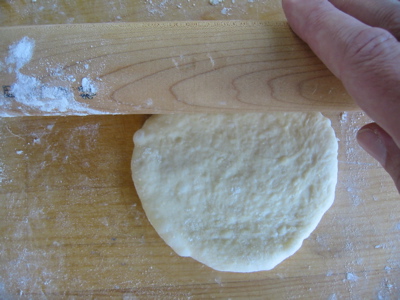
For hamburger buns you just bring down your pin and roll it once into an oval.
Now give it a quarter turn and roll once more until it’s a round. If you’ve rested your dough (and don’t worry I’ll put this whole recipe up later today or tomorrow) it shouldn’t snap back much. If it does, just repeat the rolling until you get the size and thickness you’re after.
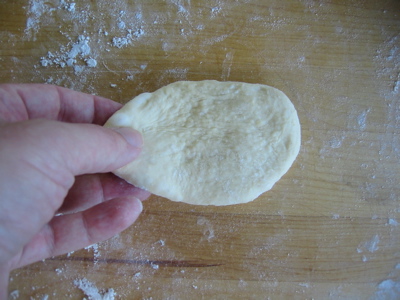
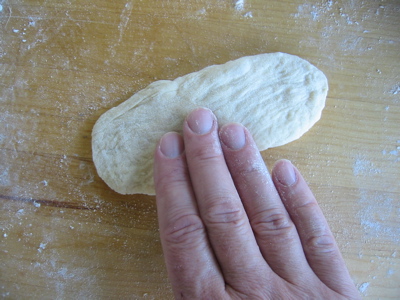
For hot dog buns, just roll the ball into a sausage shape…
Then pat the bun down a little.
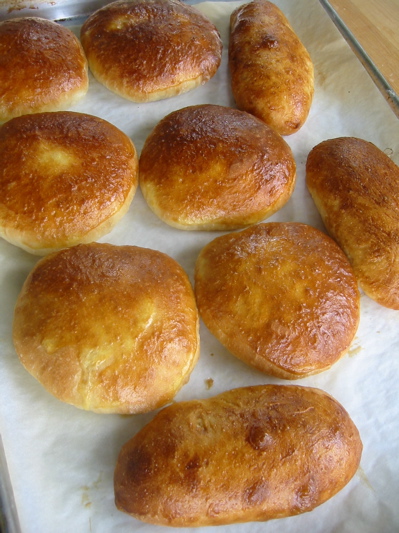
After an hour proof and twelve or so minutes in the oven you should have some nicely risen and crusted (though not crust-y) hamburger and hot dog buns that can be frozen for a month or more.
Hey that was fun…I haven’t done a photo tutorial in a while!
I made these over the weekend and while they tasted good, they did not get as puffy as a commercial bun. They didn’t seem to rise very much in the second proof. Any advice?
Hey Lori!
These definitely aren’t as fluffy as commercial buns, no matter how well they’re proofed (I kinda like ’em that way). However I wonder if your rising time might be a bit too long. Try cutting that down, shape, then see how the proofing goes. I’ll be you get a better end product. Thanks for the note!
– Joe
Thanks Joe, I will try it out!