Making Pan de Muerto
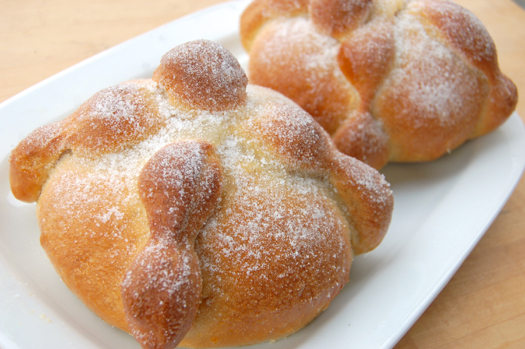
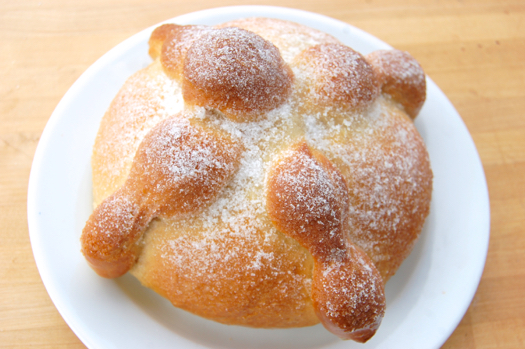
This is the traditional bread of the Mexican Day of the Dead — Día de Muertos — a celebration that actually encompasses three days: October 31st, November 1st and November 2nd. Together they make up Allhallowtide, a trio of Christian holy days that includes All Hallows’ Eve (Halloween), All Saints’ Day and All Souls’ Day. Of course in Mexico they take on a unique character, blended as they are with pre-Christian traditions and motifs. These sweet and aromatic breads, which resemble little piles of bones, are frequently placed on Day of the Dead altars. Just as often they’re simply consumed with wild abandon.
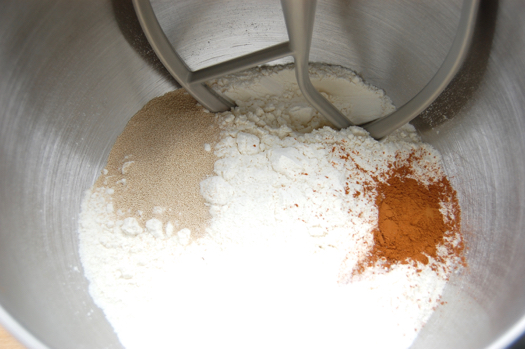
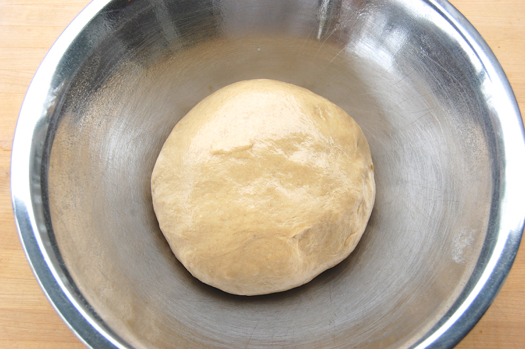
The nice thing about pan de muerto is that you can make it start to finish in only about 3 1/2 hours. Start by assembling your ingredients. Place your dry ingredients a medium bowl or the bowl of a stand mixer fitted with the paddle. Stir them to combfine. If you’re using a liquid orange flavoring, add that with the eggs.
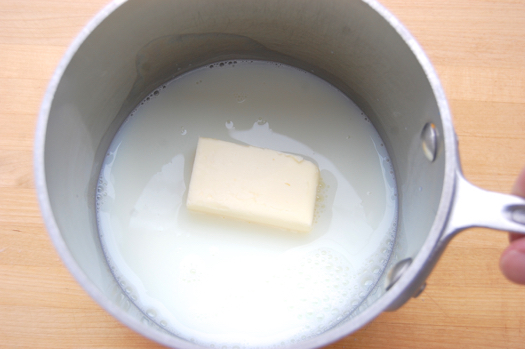
Meantime, combine the milk and butter in a small saucepan and heat it just enough to melt the butter. You want it only warm, not hot. Why? Because you’re going to add eggs shortly and you don’t want those to cook. Actually, you could just as easily perform this step in a microwave in a ceramic or plastic bowl.
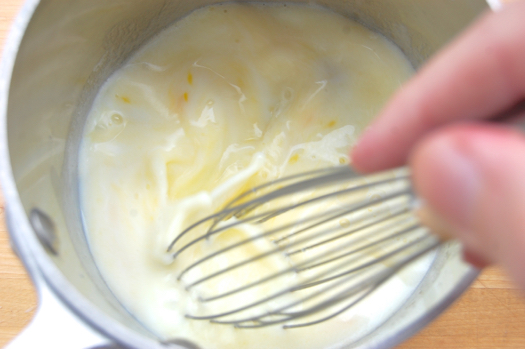
When the butter is melted, add the eggs. Plop!
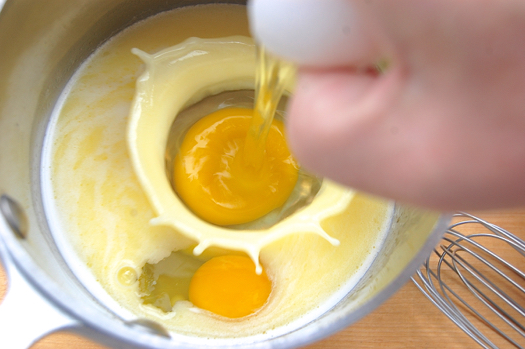
Ooh that was a nice shot. I can’t believe I got it, but sometimes you just get lucky, eh? Anyway, give those a little whisk to combine them.
Add that mixture to the dry ingredients…
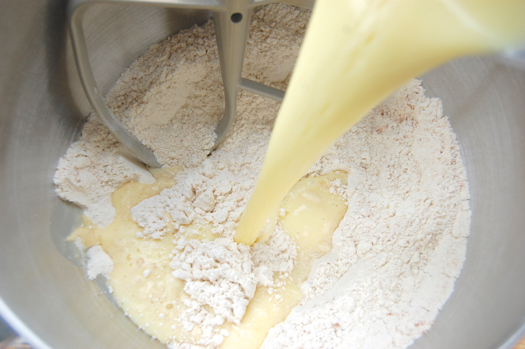
…and stir them until everything is wet.
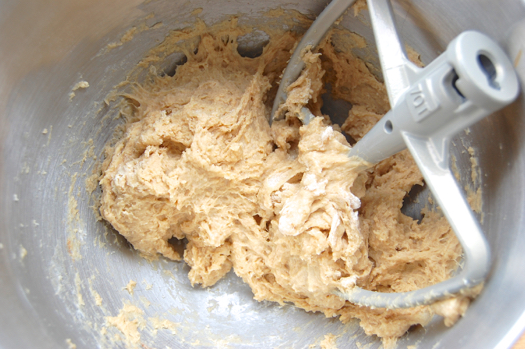
Switch to the dough hook and knead about 5 minutes until the dough is smooth and just a little bit sticky. All this can be done by hand of course. Note that if the dough seems too wet, add a little more flour. If it seems too dry and stiff, dribble in a little more milk.
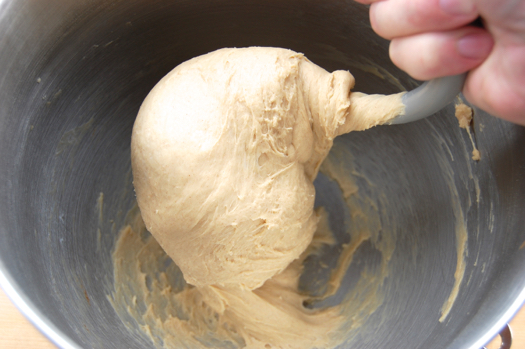
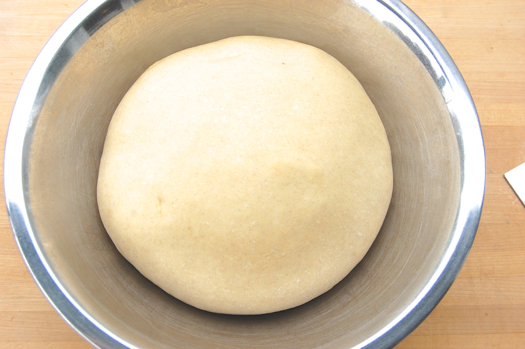
Remove the dough to a greased bowl and allow it to rise for 1 1/2 hours or so…
…until it’s about double in size.
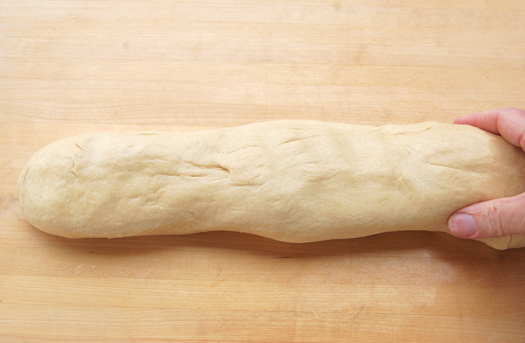
To shape, roll the ball out into a thick log.
Cut the log into four pieces, saving the smallest for your decorations.
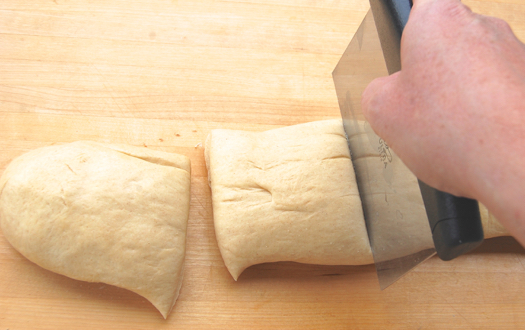
Roll the pieces — they’ll be about 9-10 ounces each — into balls.
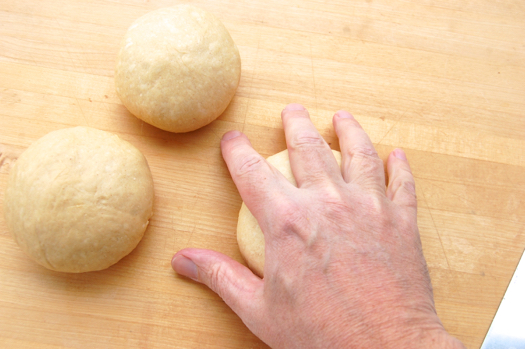
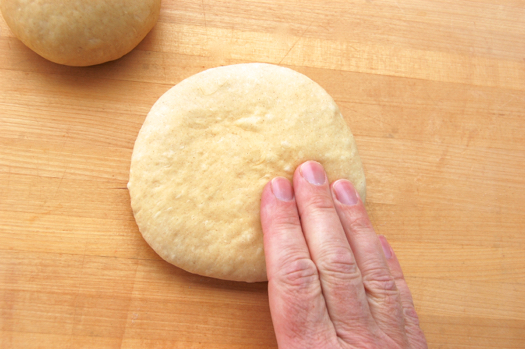
Pat the balls down into thick disks, then turn out attention to the decorations.
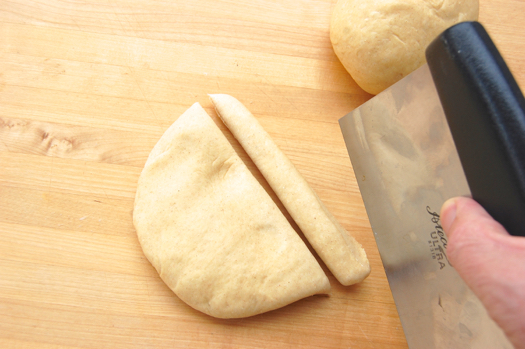
Using your bench scraper, cut the last disk into slices.
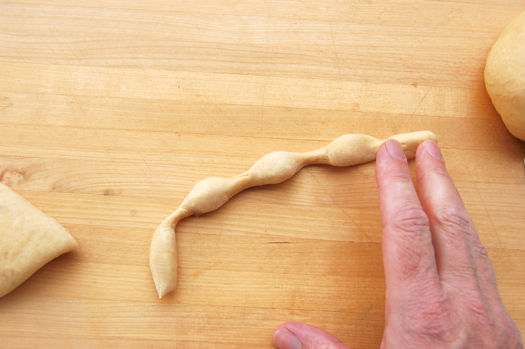
Roll the slices one at a time with your fingers apart.
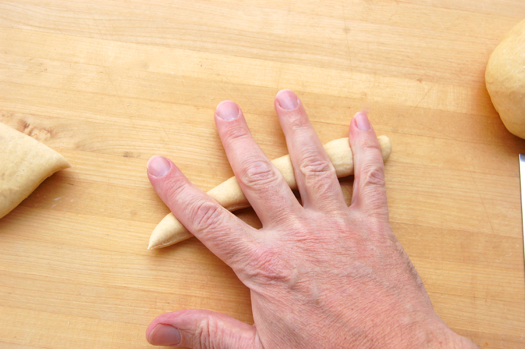
Apply some decent pressure until beads form between your fingers. These will be your “bones”.
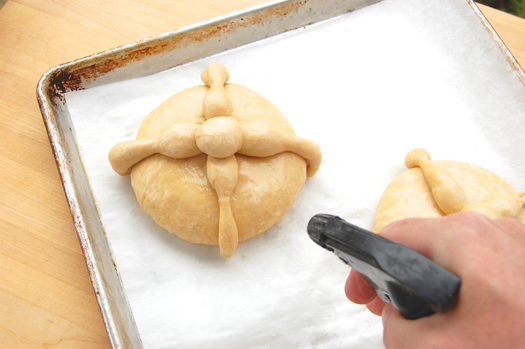
Lay the bones across the loaves in a cross shape. Note you don’t want one of the fatter sections on the very top.
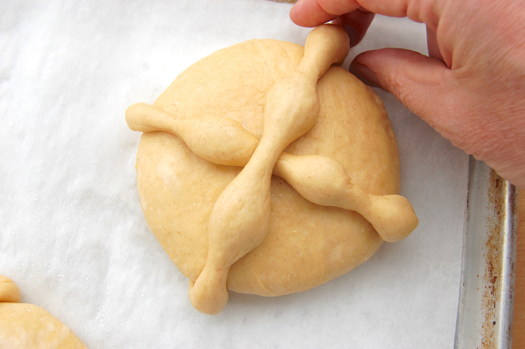
For the crown you’re going to make a little depression in the top…
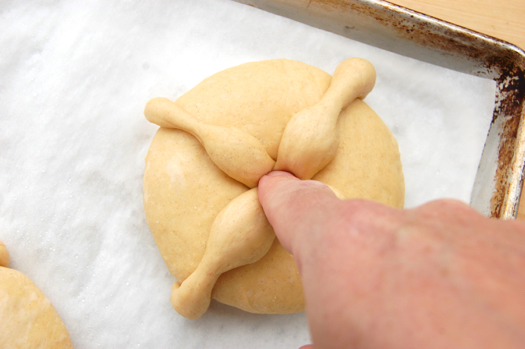
…then stuff a little ball of dough into it.
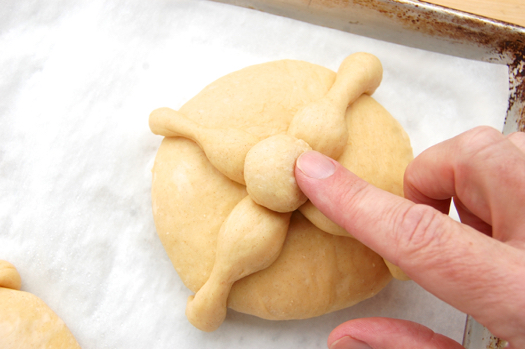
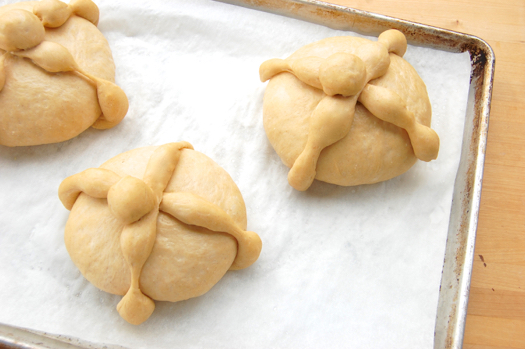
And you’re done shaping! Spritz the loaves with water and allow them to proof about an hour. Meanwhile, preheat your oven to 375 degrees Fahrenheit.
When they look about like this put them in the oven and bake them for about 25 minutes.
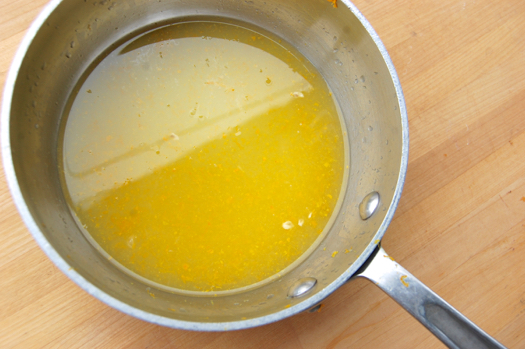
While the breads are baking, combine your glaze ingredients and bring them briefly to a boil to melt the sugar. Take the finished glaze off the heat and let it cool a bit.
When the breads look about like this, remove them from the oven. Contents may have shifted slightly during the trip. Hey, that’s how you know they’re homemade! Had I been a little more diligent about stuffing the topknots into the holes I’d made it probably wouldn’t have happened. Oh well, live and learn. If you want to go darker for a more rustic appearance, knock yourself out!
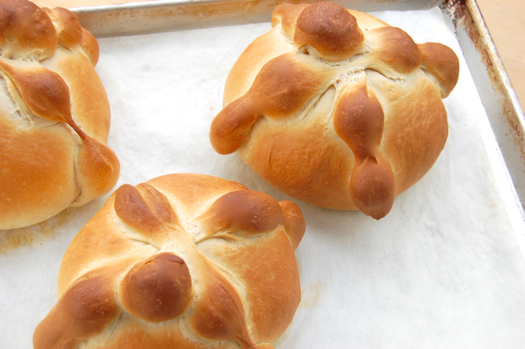
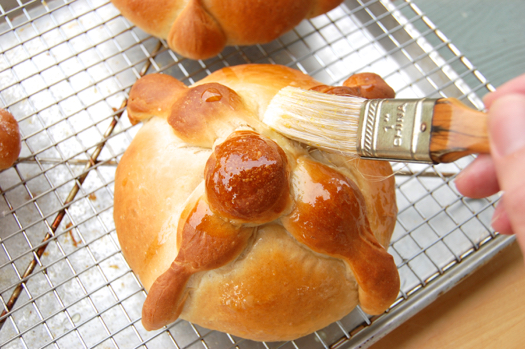
Transfer them to a rack and let them cool about 10 minutes, then paint them with the glaze.
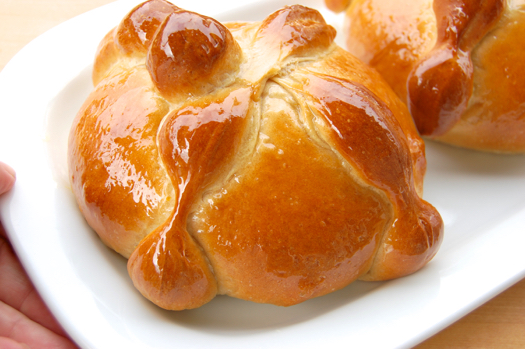
If you like you can leave them that way. It’s a good look.
Or…sprinkle granulated sugar all over them…
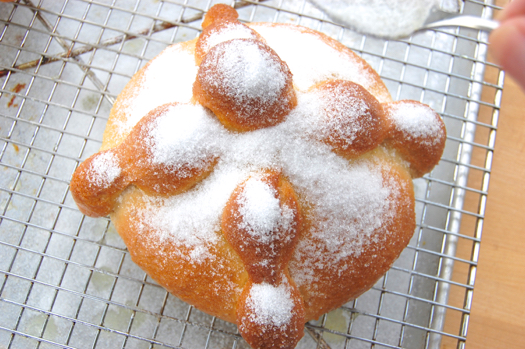
…tip off the excess…
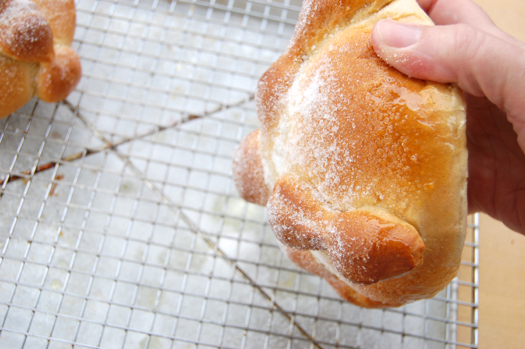
…and that looks good too. Sesame seeds are also traditional if you’re looking for a less-sweet alternative.
Let the breads cool completely and place on the Day of the Dead altar of your choice. If they taste bland and stale a week later, that means the spirits of the dead came and ate everything that was good inside. Of course the alternative is to whip up some hot chocolate and go get crazy on your own.
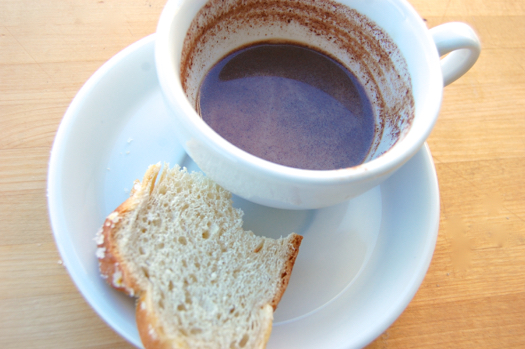
Mrs. Pastry came back from Oaxaca yesterday toting a bag of custom-blended drinking chocolate spiked with cinnamon, chile, almonds and brown sugar. What could I do? I’m counting on my ancestors to understand.
I love seeing Mexican traditions on your blog, specially because most of the time the take on Mexican recipes in most blogs, web sites, and tv shows, are far from what they should be.
Congrats!! *Writing this while enjoying a fresh made pan de muerto and a cup of hot “Chocolate Abuelita”*
P.S. More modern takes on this tradition make these breads with dulce de leche, cajeta, condensed milk, or chocolate filling. (Talk about sugar rush).
Thanks for that, Jorge, I appreciate it! Mrs. Pastry just brought back some drinking chocolate from Oaxaca, and it tastes, well…just like Mexico. I love the place, honestly. Partly because I’ve never had a bad time there, but also because my first baking job was in Chicago — where Mexicans taught me how to bake French pastry!
I hope to do much more in the future, because there’s quite a lot to do!
Cheers,
– Joe
I know how proud you are of that egg splash photo, anyone would be, the masses don’t know the effort and expense involved!
AND, the tutorial was excellent! Ima make these next year!
Hey Dave!
Thanks for that! I’m definitely no technician when it comes to cameras, though experience has taught me that cloudy-but-not-rainy days are the best for capturing good shots of falling liquids. All that bright, diffuse light works wonders and Saturday was one of those perfect days. I was hopeful when I started snapping and I got really lucky on that shot. It sorta steals the show on this post…but I wasn’t going to hide it! 😉
Cheers,
– Joe
I never hated you until you posted that egg splash down! Dang, I can barely get a decent still photo & you are pulling *stuff* like this?!? Oh well, I guess I’ll stick to trying to bake half as well as you & forget the snapshots. I hope you are happy!
🙂
Don’t hate me because I’m talented, Frankly. Because I’m not. It was just me, my auto-focus camera and the right light. Be warned I’ll probably use this for every single egg-cracking shot in all my future posts, because it’ll never happen again!
– Joe
Th paraphrase the old commercial “Don’t hate me because my photos are beautiful”?
Hehe…yeah that’s sorta where I was going. We old-timers need to stick together!
– Joe
Great recipe! I am going to give this a go. Im sure it will taste as good as it looks!
Let me know what you think, Nicole!
– Joe
I made these yesterday for our day of the dead offerenda. Joe, the instructions, pics, recipe – everything was top notch. The bread was absolutely lovely in taste, texture, and form. Really, just superb! Two loaves to us and one placed on the alter my son helped create honoring our beloved dog of 12 years who passed a few months ago. My husband is of Mexican decent, so it was nice that our son could explore his heritage through this celebration while remembering his friend.
With all due respect to the ancestors–let ’em make their own! We may have no appetite for dinner, but I’m so glad the presence of an orange and the ancient remains of ground anise could combine in this spectacular recipe. Fresh anise on order real soon now. That glaze is super!
Haha…well said, Sally! Let me know how the fresh anise version goes over!
Cheers,
– Joe
So that’s how they make the pretty little designs on top! You make things look and sound so simple. I’ll give this a try and hopefully get it tasting and looking right. Thanks!
Get back to me, Claire! I’ll be interested to hear!
– Joe