Making Croquembouche
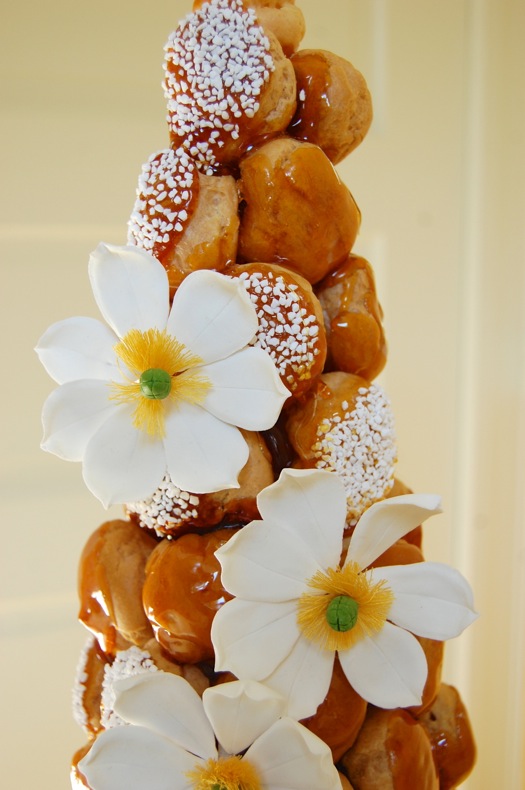
What’s the hardest part of a croquembouche? The photography. I don’t do “across” on this website, I only do “down”. Why is that? It’s not because my photo studio consists entirely of a cutting board that’s twenty inches across, that’s a vicious rumor. It’s because “across” is the direction of evil. Everybody knows that. Still, “across” shots are one of those necessary evils when your finished product is two feet tall sitting on a cake stand.
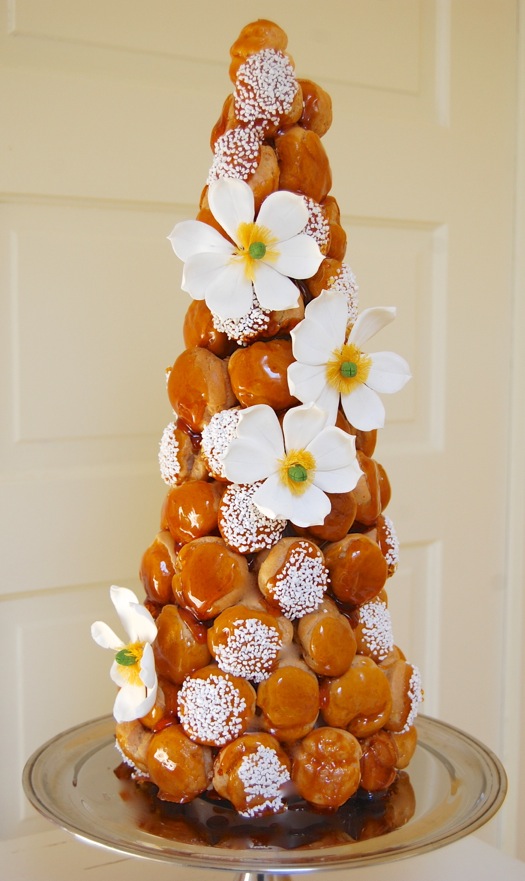
Ah well. I’ll go to confession later. Right now we’re talking croquembouche. “Crunch in the mouth” as it’s known in lands where people employ French vocabulary. Why is it called that? You’re about to find out.
Begin by assembling a whole lot of cream puff shells. The croquembouche I made consists of about 80 of them (you’d need another 25 or so more to completely fill it up). These are a touch smaller than a standard cream puff, made from 2-teaspoon (or so) dollops of choux batter.
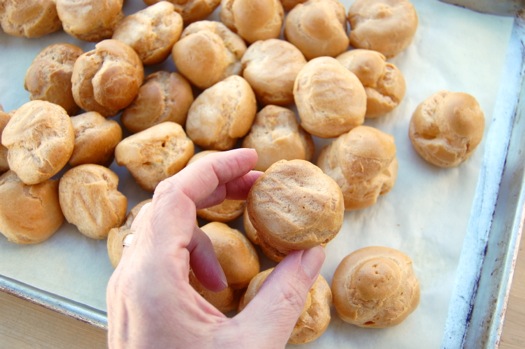
Sort of like these. Two recipes of batter should give you about 85 of them. You don’t want to pipe high and tall blobs, but rather low, almost puddle-like ones so the choux doesn’t bake up into balls. Slightly flatter, more egg-shaped puffs are easier to stack. Pipe those by touching the piping bag collar to the sheet pan and squeezing: one…two…three…and lift.
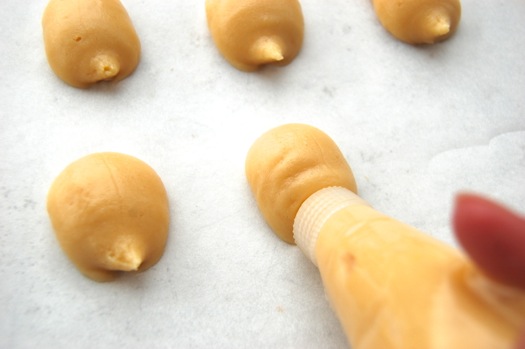
Tap down any points or peaks with a moistened finger.
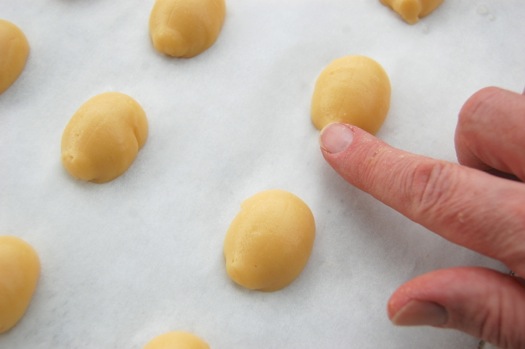
Bake 10 minutes at 425 degrees Fahrenheit, then about another 20 at 375 or until they’re nice and brown. Rotate the pans half way through for even browning.
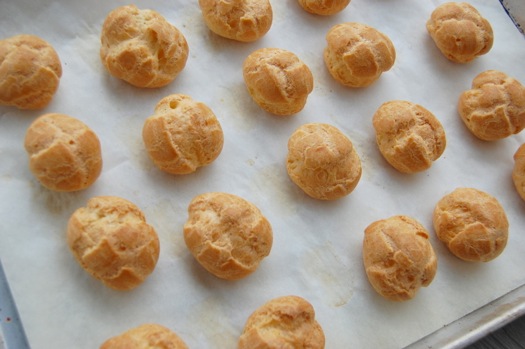
Once done, turn off the oven, prop the door open a touch by sticking a wooden spoon handle into it, and leave the puffs there for a couple of hours or over night. These can be made and frozen well ahead of time, up to a couple of months.
Now we need a mold. I was going to use nothing but parchment, but found some backing was necessary. So I rolled up a little poster board and secured it with cello (Scotch) tape. I prefer a tall, tapering shape as opposed to a wide one. It just looks cooler.
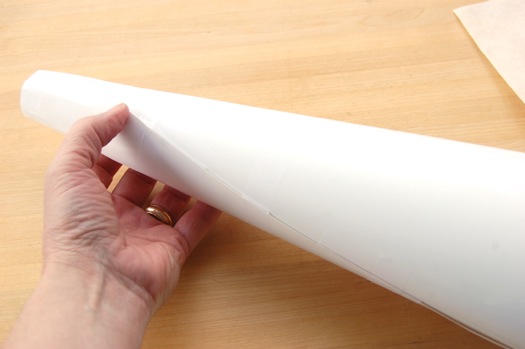
This cone is 4 inches wide at the bottom and tapers to a little less than an inch at the top. It’s about 15 inches high.
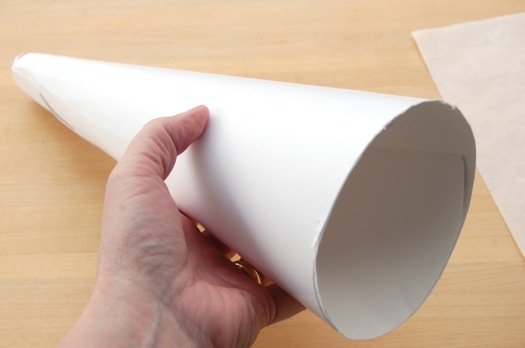
I trimmed it so it would stand perfectly straight, then wrapped it in parchment paper (to eliminate sticking).
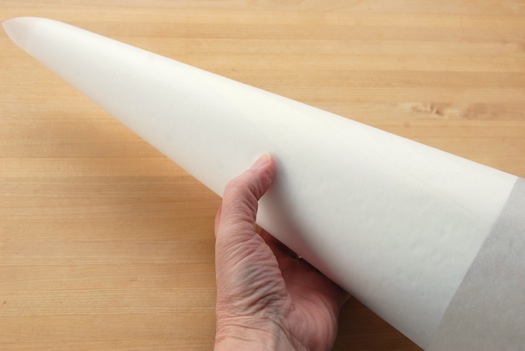
Then I stood it up on a parchment-lined sheet pan. Ready to roll.

On the day you want to assemble and serve this, fill your cream puffs. Why the same day? Because a croquembouche doesn’t keep well, in part because pastry cream shouldn’t be left at room temperature for more than a day, but also because pastry cream filling softens cream puffs over time and they lose their structural integrity. My suggestion is to make it and serve it a few hours later. Just give the puffs a short shot of pastry cream each using a Bismarck tip.
You can use any sort of plain or flavored pastry cream you like. Stabilized whipped cream also works for something lighter, as does a combination of the two. But go easy regardless. You don’t want them bursting with the stuff.
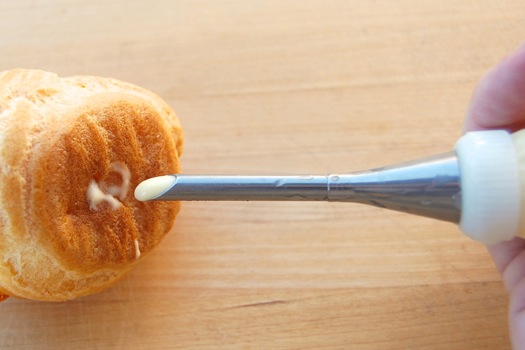
Actually I should have filled these from the side, not the bottoms. The bottoms, it turned out, made better outward-facing sides when I was building the croquembouche. Ah well. Live and learn.
Now all we need is glue to hold our tower together. That’s the caramel. Though some pastry makers suggest a single large batch of caramel, I prefer a couple of smaller ones made as needed. Why? Because even a small batch needs to be placed on the heat every so often to loosen it. As you do that the caramel cooks a little and gets steadily darker. That’s not a problem per se, however very dark caramel looks a little weird, plus it starts to take on a burnt taste which doesn’t work for me in this context. But do what you prefer. I started with about two cups of sugar in a sauce pan. I poured in about a cup of water (the amount doesn’t matter as long as all the sugar gets wet).
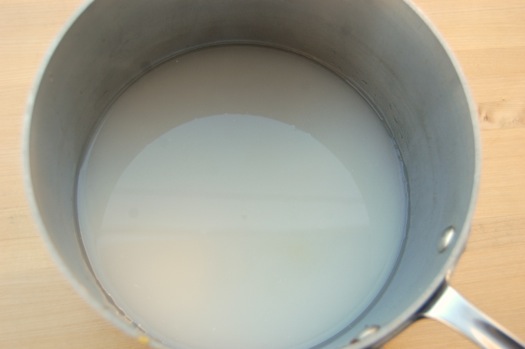
I cooked that over high heat for about 7 minutes until it turned a light amber. You want to take the pan off the heat at this point since it’s going to continue to cook for another minute or two.
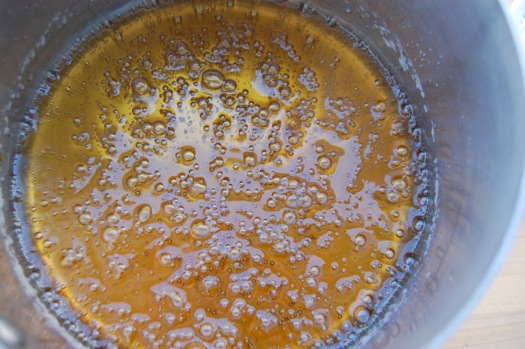
So alright. Being extremely careful — because they don’t call caramel “bakery napalm” for nothing — dip the smooth bottom side in.
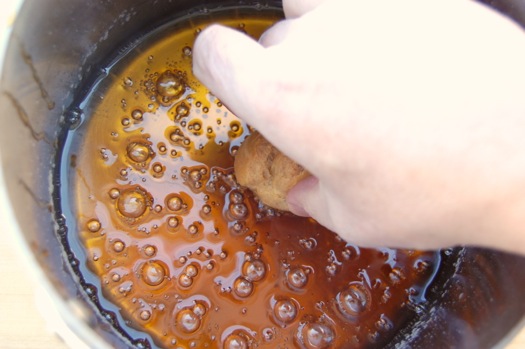
Bring it up and let it cool a second or two. See how much that caramel down there darkened in about 45 seconds? The stuff cooks fast at this stage! I should point out that you don’t have to coat the outward-facing sides of the puffs if you’d rather not. I think the shiny surfaces look nice, but they do add more caramel and hence more sweetness. Up to you!
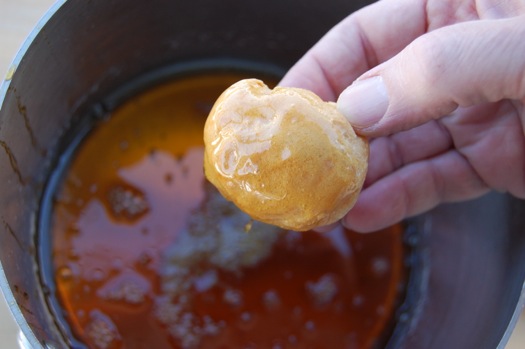
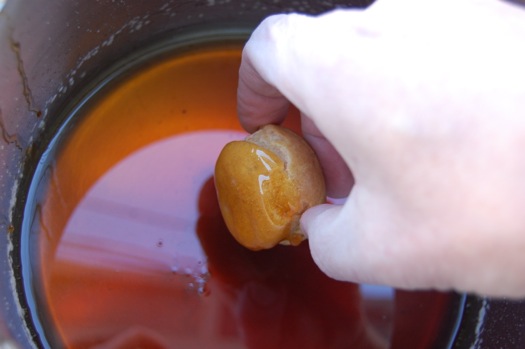
Now dip the puff on the edge rocking it back and forth a little to get caramel on the sides as well as the bottom. You can use tongs for all of this if you prefer. I only got one small burn on my knuckle working on this project. Felt kinda good I have to say. I used to wear bakery burns as badges of honor — know true working bakers by their stripey forearms, from many accidental contacts with oven racks and doors. A cool look AND a great conversation starter.
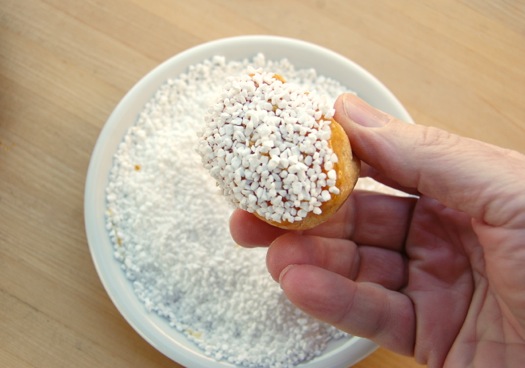
I should say here that if you want to decorate the fronts of the puffs, place them caramel-side down in dishes of pearl sugar and let them sit for a minute or so.
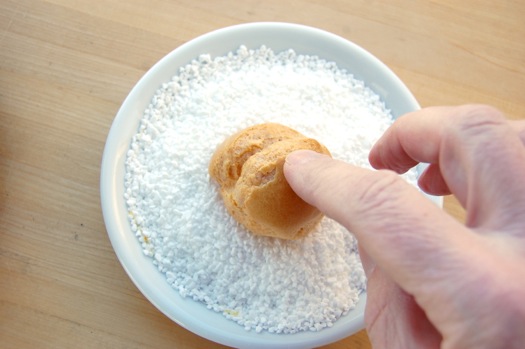
Nice! You can also use chopped nuts. I’ve seen single slices of almond as well. Classy!
Now start your construction. The caramel will harden to brittle candy as it cools (that’s the “crunch” if you were wondering). You’ll find the bottom “course” takes a fair amount of time as you’ll have to hold them in place as they firm. Once you move on to the second course this won’t be as much of a problem as the puffs sort of cradle each other. You want the puffs glued below as well as to the side — both sides if you can manage it as that will give the tower more strength.
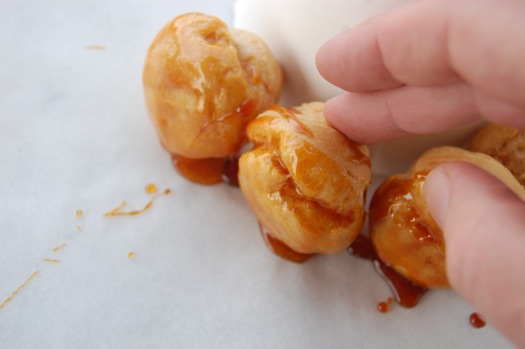
After the second course you’ll be a pro. Don’t get too comfortable around that caramel though. It burns confident people too.
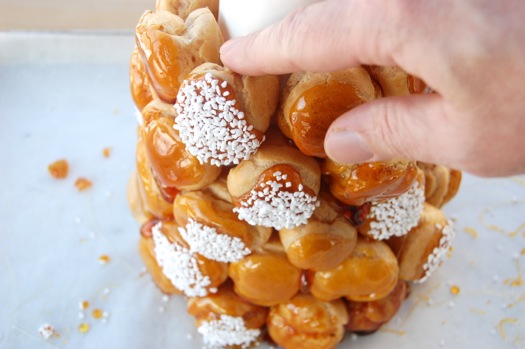
Up…up…up, putting decorated puffs where the Muses tell you. Drizzle on some caramel in spots where you’re not making proper contact. As you go you’ll find that gaps are inevitable. You can fill those with candy flowers or candied almonds later if you like.
Once you’re about 80% of the way up the mold, stop and take a break. Let the caramel harden for about ten minutes while you…I dunno, have a quick beer or something. Why the pause in the action? Because this is when you want to remove the mold. Why now? Because even parchment sticks a little and this way you can easily loosen the mold and push it out.
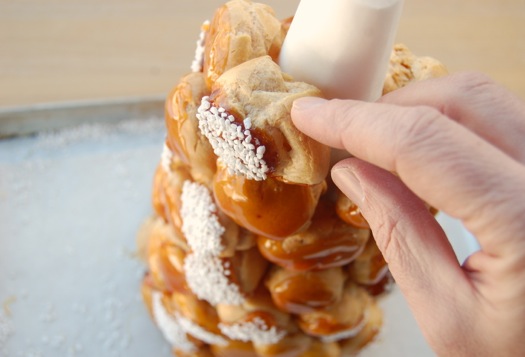
Just tip the whole thing back (you’ll find the croquembouche to be surprisingly light and rigid) and push from the top with the fingers of one hand while you pull gently with the other. Get a friend to help you if you like. This step is really very easy.
If you find that it’s not coming loose, you can gently slide an icing spatula or skewer along the sides (from either end) and…tap-tap-tap…gently knock the stuck spots loose. Should a puff or two come loose for some reason just glue them back with more caramel. No sweat.
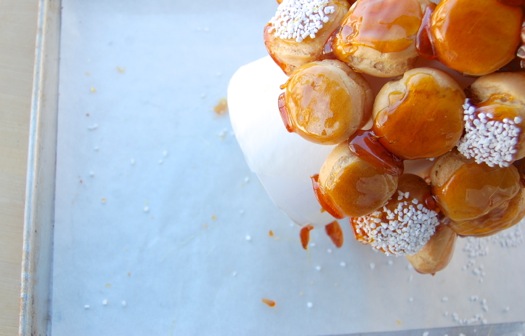
Return the croque to the upright locked position and continue the building. I’ll add that if you want to fill the whole thing up with cream puffs so it’s a solid mass, you can do so at this point by just dropping them in the top. I estimate it would take about another 20-25 of them. Of course you’ll need to transfer the croquembouche to a serving platter before you begin that step. If you’re content with just the outer shell, press on to the summit. You’ll have no trouble finishing it off without that sissy mold now, right?
The tip-top will be as time consuming as the very bottom. There’s a fair amount of balancing that needs to happen there, but soon it’s over and your tower of deliciousness is done! Let it cool and harden about twenty minutes or so, then just pick it up from the bottom and put it on a serving device of some sort.
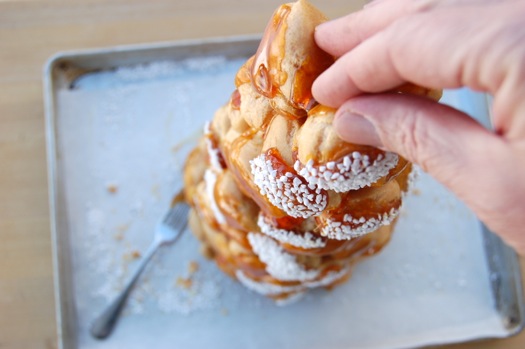
Now’s the time to add any additional decorations. I bought some candy flowers at a cake decorating shop. Someday I’ll learn to make my own.
Not.
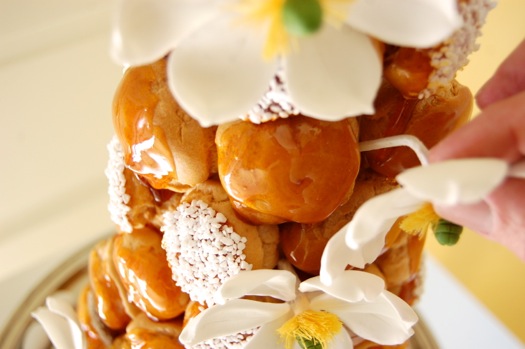
I sprinkled some candied almonds on the platter at the last minute just for fun.
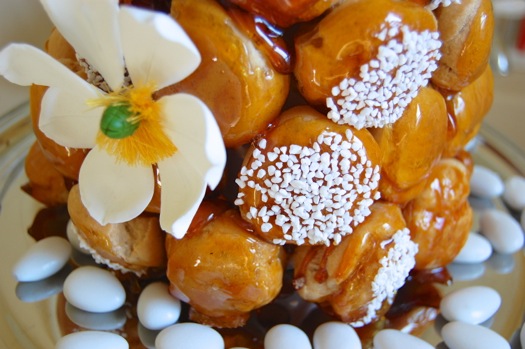
I thought of that well after I took this photo of course:

A croquembouche of this size will serve about 20-25 people unfilled, 25-30 when filled, assuming three to four puffs each. That’s plenty for a dessert course methinks. All in all I’d suggest budgeting 2-3 hours for the filling and assembly. A good loud radio and a can of your favorite libation helps you from taking it too seriously. Note that there’s little you can do to a croquembouche — short of outright dropping it — that you can’t repair with caramel and puffs or disguise with decorations. Plan in advance, make it fun and you cannot go wrong. Cheerio. – J
Beautiful! How do you take this masterpiece apart to serve it?
Great question, Judy! Something I forgot to address in the post. Apparently in France they’re frequently just shattered, then the pieces picked up and eaten. Me, I’d be inclined to just break pieces off starting at the top. Being quite brittle, it comes apart pretty easily.
Cheers,
– Joe
Hi Judy!
Last year I made four croquembouches, and only after the second one my dad thought of using scissors to cut as you eat them top down. Saves your fingers from possible caramel and pastry cream messes.
Scissors! That’s genius!
Thanks, Vicki!
– Joe
Seriously impressive and actually doable for us enthusiasts/non-pros. Beautiful (if shamefully side-on) photography too. I made pate choux this weekend for the first time (after many years of baking projects) and found the whole process incredibly fun and rewarding. My first batch was an utter failure (why I thought a Paris-Brest would be an appropriate first pate choux project is anybody’s guess) but the second, which were just simple cream puffs, was a huge success, thanks in large part to your simple and clear step-by-step directions. I’d love to get one of those pastry cream injection nozzles. What are they called/how can I find one?
Hey Jeff!
Great to hear that the choux project is progressing so well. Keep up the great work!
As for the injector, it’s called a “Bismark tip”. You can get them at most cake decorating/candy making stores. And they’re very easily had online. Keep me informed of your future successes (or failures, in which case we can trouble shoot them)!
Thanks for the comment,
– Joe
Yours looks so festive! What was the occasion?
A baby shower! 😉
A baby shower was the occasion for my cream puffs too! Great minds… thanks Joe!
Hehe…they do indeed! Have fun!
– Joe
OMG! You’ve done it again! A beautiful marriage of understated restraint with drop dead gorgeous.
Hope all the Pastries are warm and well again.
That’s the kind of review you want on a dust jacket, Rainey. Thanks!
And yes, we’ve got the house all heated back up again. Thanks goodness…it’s gonna be 3 degrees tonight. Pretty cold for here.
Here’s to electricity!
– Joe
Wow.
Duly impressed, Joe. I may not get to making my own for a month or two (Easter Croquembouche? That sounds nifty – i might even hide a few eggs in the middle!)… thankyouthankyouthankyou!
Hey, I needed to be goaded into it! 😉 Thanks for all the persistence, Roger! I want photos of yours!
– Joe
YOU CHEATED!! I worked on the inside of the cone so that mine was cream puffs all the way through. The nice part (besides serving a lot more people) is tht the thing becomes self supporting.
Yours looks really good, I particularly like the caramel glaze on the outside. I don’t know if I have the courage to deal with molten sugar – that stuff hurts!
Cheat indeed! I actually didn’t know they were commonly served as a “full” stack. I’ve only seen them as a cone. But you can certainly fill one up with more puffs when the interior mold is removed if you wanted to do that. No problem!
Cheated.
Sheesh!
– Joe
The problem when you fill the mold is that you can’t get that nice shiny coat of caramel on it. I had to frost mine ergo you cheated 🙂 I like the looks of yours much more & will probably do it that way if I make one again, although it won’t serve as many people it sure looks good!
BTW – my niece made one of these using a tub of pre-made cream puffs from Costco – Now THATS cheating!
But if you are really afraid of the choux its not a terrible idea. In a pinch I bet you could whip one of these out in under an hour that way
I suppose so, Frankly. The building step is more fun than the puff making and filling, that’s for sure!
Thanks again!
– Joe
You can fill it up if you want Frankly…or make a bigger one! 😉
With the mold you have, how do you get the cream puff to stick together? Enough so the pile doesn’t just roll apart I mean. I’m curious.
– Joe
You have to coat the top of each puff (other than the first one) and snuggle it in against the one that will be above it when unmolded. I used a royal icing which allowed me to add almond flavor but does not look as good I don’t think. It did sort of sag after it was out for a while, better to keep it cool I guess.
Interesting. Thanks, Frankly!
– Joe
That’s beautiful! I’ve never seen one of these before and now need to make one (as soon as I have an occasion that calls for pastry for 20, where leftovers are no good– there’s a baby shower coming up, but I already promised a cake.)
Hey Hillary! Leftovers are fine. The thing just can’t stand in one piece for all that long. You can also make versions that are a whole lot smaller. A mini one, made of 20 or so puffs, makes a terrific centerpiece to a dinner for friends!
I’m just sayin’.
– Joe
And this is proof why I tell all my friends about your site – that’s the best ‘bouche I’ve seen for a very long time 🙂
Just beautiful!
CfDU
Chris, that’s high praise coming from a fellow like you. I greatly appreciate it!
Cheers,
– Joe
That is lovely! I’d never really understood the visual appeal of a croquembouche. Your version has convinced me that they can be beautiful as well as delicious when done well.
Thanks Mari! I appreciate that. I too have seen a lot of them that look like piles of rocks. This was fun to do and turned out surprisingly well. Now that I have one under my belt I’ll be making it again for some special occasions!
Cheers,
– Joe
Oh my! I am looking at 2 or 3 baby-showers coming up in the next few months and at least one of them MUST have a croquembouche! Thank you for this project 🙂
Send pictures, G!
And be careful with the caramel! 😉
– Joe
Ooh la la, Joe! That is beautiful! And soooo much better for a baby shower than serving slices of baby butt cake! I hope it was a hit with the guest of honor!
It went over very well, thanks. Baby butt cake…I’d never heard of that and did some google searches after I read your comment. Who knew there was practically an industry devoted to that!
Cheers and thanks!
– Joe
That’s gorgeous! I remember seeing some in the store front of a bakery in Reims (I think it was Reims), and thought it was stunning. Of course it was only a representation and not made with actual choux and caramel, but still lovely. It had spun, crystalized surge strands draped down it. Yours looks just as good!
I just finished a “fluffy” book by British author Trisha Ashley, and one of the main characters was a baker who specialized in croquembouche wedding cakes. I guess that’s a thing in France and Briton?
I think it is, MIHH. Or so I understand. Those sugar threads are traditional to some extent. I decided not to do them, but they can look very cool.
Thank you for the wonderful compliment! Cheers,
– Joe
She’s a real looker Joe! A real head-turner!!! Even my tummy’s purring just looking at her!!! And those flowers, a nice touch – I’ll bet she’s infinitely more delectable than any exotic island dancer I’ll ever bump into!!! Nice work! As for shooting across – if this is the kind of sinful eye-candy that it shall result in then the more the merrier, I say!
Thanks very much, OB! I like the island girl comparison…the tan and the flowers all fit!
Don’t tempt me on the sideways photographs, you devil in my ear! Hear no evil, speak no evil, see no evil…
– Joe
This looks wonderful, and it is on my list of things to do whenever an opportunity comes up. Bravo!
Just a suggestion about keeping the caramel fluid but stable taste-wise: I find that putting the pan over some simmering water / a steamer for a few minutes works quite well.
Thanks for the great posts!
GREAT tip, Juie B! Thank you. I shall employ it as I have a request for another one next week!
Cheers,
– Joe
That’s amazing. Simply amazing.
(And those flowers are magic. I looked at them and thought “You know, they look kinda like Cosmos, but just slightly wrong, somehow….”)
Ha! Thanks Ted! I had fun doing it. And the horizontal photography was actually a pretty fund change of pace.
I might spend more time on the dark side.
– Joe
Stunning ! 🙂
Thanks, Heather!
– Joe
You are my hero, Joe. Croquembouche has long been on my baking to-do list. Looking forward to working with your recipe.
looks great! but what happened to the original choux au craquelin idea, which is not so commonplace?
here’s one made with du craquelin that incorporates a lot of nougatine, which is also fun to work with.
http://lafeechantilly.canalblog.com/archives/2013/08/25/27854629.html
Hey Ascanius!
In the end I decided against it. Firstly because the extra rigidity of the craquelin choux puffs makes for more difficult stacking and cementing (being more sphere-like there’s less surface area). Also the crunchy texture seemed redundant to the caramel. But I’m with you on updates to éclairs and profiteroles. I’ll get to those sometime soon.
Thanks for checking in!
– Joe
though i haven’t done it myself yet, i like the craquelin idea for croquembouche–mainly in order to replace/minimize the hard caramel element, which usually looks better than it tastes (too hard, too cloying and one dimensional). i’d decorate the public side of the puffs with drizzles/designs of white fondant, dark chocolate and maybe a little caramel, using the hard caramel just for gluing the structure together.
for several years now even in the st. honore i use the hard caramel only to attach the puffs to the couronne, glazing the puffs themselves with a chewy, buttery caramel icing which has a much better mouth feel and depth of flavor when it combines with the pastry cream.
Those are all excellent improvisations, and they make a lot of sense. One of these days I’ll try some of them I think!
Thanks as always, Ascanius!
– Joe
Tried making the tree today and it came out fine. My only question is how do you take one cream puff at a time starting at the top of the tree without taking off more than one? Because of the caramel glue, they did not come apart easily and ripped the other cream puffs.
Shears are a great solution for that, Sheryl! I had the same problem, but shears let you cut the croque into reasonable portions without the mess!
Cheers,
– Joe
Hello! It has been forever! This is just gorgeous. Lovely!
I’m putting a post round up together of “edible centerpieces” such as buche de noel and croquembouche. I’d love to feature yours and would like your permission to snag a photo for the round up. Let me know!
Hey Jenni!
By all means. And if you’d like a larger high-res photo just send me an email.
Cheers,
– Joe