Assembling ze S’more

It’s all well and good to prepare an assortment of premium homemade s’more components, but putting them together, that’s the critical last step. It can be a bit tricky. Certainly, given the freshness of the ingredients, there are more than a few folks out there who’d be just as happy to whip together a plain, unheated chocolate and marshmallow sandwich and eat it as-is. Others might be inclined toward the oven. Both methods are valid, yet they leave out what I think is the final, critical flavor and textural element: the charred, crackling skin of the roasted marshmallow.
And that, my friends, can only be had by the application of flame. But in absence of a camp fire, where to find one? There’s the gas flame of the stove top, though in my experience a gas burner doesn’t have the heat output to quickly char the outside of a homemade mallow before it totally melts. My preference?

The blowtorch. What, a blowtorch isn’t standard equipment in your kitchen? Oh, for shame. Julia Child would be so disappointed. But if you have one, or are inclined toward getting one (they’re not the least bit expensive), here’s what I recommend:
Lit torch in hand, put your first graham cracker down:

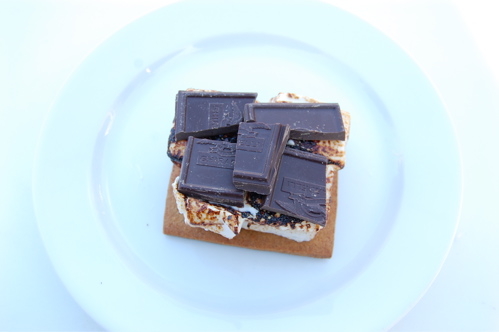
Put down marshmallows to cover and apply the torch lightly. You want to gently brown the outside, so as to get the interior a little bit melty. The blackening can come after…you can even set the marshmallows afire if that’s your thing.

Put on your chocolate pieces promptly.

Here I’m using Ghiradelli, which is a bit fancy for this application. However I find Hershey’s (as much as I like it) rather too sweet and a little bit chalky for a really good s’more. A decent 60% chocolate like this is just about ideal.
As a last step, you’ll want to wave the torch over the chocolate a few times to soften it. Don’t turn the flame on it directly, since you don’t want to burn the cocoa solids (which unlike marshmallow, tasty nasty when blackened…even a little). It shouldn’t take too much since the heat from the marshmallows should be doing its job from below.
Apply your top cracker and consume immediately!
Warnings about a microwave: just a few seconds in a microwave is all it takes to turn a homemade marshmallow back into flowing fluff. Use one if you must, but only to soften the chocolate.